1. Welcome to Tacoma World!

    You are currently viewing as a guest! To get full-access, you need to register for a FREE account.

    As a registered member, you’ll be able to:
    • Participate in all Tacoma discussion topics
    • Communicate privately with other Tacoma owners from around the world
    • Post your own photos in our Members Gallery
    • Access all special features of the site

LCA bushing install - How?

Discussion in '2nd Gen. Tacomas (2005-2015)' started by Slamuel, Jul 29, 2018.

  1. Jul 29, 2018 at 12:45 AM
    #1
    Slamuel

    Slamuel [OP] Well-Known Member

    Joined:
    Jun 23, 2018
    Member:
    #257264
    Messages:
    466
    Gender:
    Male
    First Name:
    Sam
    Vehicle:
    Tacoma
    currently mid project doing my LCA bushings. I opted for the OEM’s.

    Has anyone replaced theirs with OEM bushings? Do I just man up and press them in? Do I need a ball joint kit? (I’ll be getting one anyways).

    I am afraid of damaging them by just driving them in there. I’m assuming I need to catch the lip of the sleeve and push that in.

    Also, why are they loose until almost all the way in? I see that they’re tapered but still. Looking for some clarity lol.

    I need some pointers from guys with experience.
     
  2. Jul 29, 2018 at 12:47 AM
    #2
    Slamuel

    Slamuel [OP] Well-Known Member

    Joined:
    Jun 23, 2018
    Member:
    #257264
    Messages:
    466
    Gender:
    Male
    First Name:
    Sam
    Vehicle:
    Tacoma
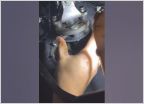
    Pushing them in from here makes the inner sleeve move inside the outer sleeve and I am worried it will damage the rubber.

    66EF4D55-8E5F-49EB-B27E-15EB6244344A.jpg
     
  3. Jul 29, 2018 at 7:37 AM
    #3
    Slamuel

    Slamuel [OP] Well-Known Member

    Joined:
    Jun 23, 2018
    Member:
    #257264
    Messages:
    466
    Gender:
    Male
    First Name:
    Sam
    Vehicle:
    Tacoma
    Let’s get some incentive going...

    First correct answer wins used lollipop!
     
  4. Jul 29, 2018 at 7:42 AM
    #4
    Texoma

    Texoma IG: Triple C Chop Shop

    Joined:
    Feb 1, 2011
    Member:
    #50374
    Messages:
    18,959
    Gender:
    Male
    First Name:
    Chris(Topher)
    Lago Vista, TX
    Vehicle:
    10 Taco 4x4
    A bunch a cool stickers, a bada ass MetalMiller Tx Longhorns grill emblem painted Hemi Orange, JBA long tube headers with o2 sims, Diff breather mod, Red LED interior lights, Fancy head unit that plays ipod n movies, Also DIY install factory stuff like, factory cruise control, factory intermittent wipers, OME nitro struts with 886x springs and toy tec top plate, JBA high caster UCA's for better alignmnet and dey beefier too, Old Man Emu Dakar leaf springs in da rear with the gear, U bolt flipper, Ivan Stewart TRD rims with 33" K Bro 2's, some bad ass weather tech floor liners so I don't muck up my interior, an ATO shackle flipper for mo travel in da rear wit the gear, also super shiny Fox 2.0 shocks back there too, all sorts of steal armor for bouncing off of the rocks like demello sliders, AP front skid, trans skid, n transfer skid, demello gas tank skid, and a tough as nails ARB bumper with warn 8k winch, I'm sure there's more
    Put heat on the LCA casing to expand the metal so that the bushing will go in easier. Put a little bit of gear oil on the new bushing to help it slip in. You may opt to press them in, bit doing all this will make it smoother.
     
  5. Jul 29, 2018 at 8:17 AM
    #5
    Sandman614

    Sandman614 Ex-Snarky TWSS elf, Travis #hotsavannahdotcom

    Joined:
    Oct 26, 2010
    Member:
    #45273
    Messages:
    36,012
    Gender:
    Male
    First Name:
    Tim
    Garner, NC/Boone, NC
    Vehicle:
    '06 SR5 Off Road
    ARB Front Bumper, Projector Headlights w/Slimcubby 4300K HID's, Oznium LED's, LED taillights, DIY Washable Cabin Moose Filter, Sockmonkey SR5 Off Road, Aux Audio plug, OME 886x, OME Nitrochargers, Wheelers 3 Leaf Progressive AAL, ImMrYo Rear-View Mirror Lift Bracket, Dodge D-Rings
    What brand did you get? Moog are crap and not worth your time.. I pushed a set fully in by hand and they will pop back out.
     
  6. Jul 29, 2018 at 8:18 AM
    #6
    DukesTaco

    DukesTaco Well-Known Member

    Joined:
    Feb 19, 2015
    Member:
    #149086
    Messages:
    5,673
    Gender:
    Male
    AZ
    Vehicle:
    2nd Gen Double cab Pre Runner
  7. Jul 29, 2018 at 8:20 AM
    #7
    Slamuel

    Slamuel [OP] Well-Known Member

    Joined:
    Jun 23, 2018
    Member:
    #257264
    Messages:
    466
    Gender:
    Male
    First Name:
    Sam
    Vehicle:
    Tacoma
    I was thinking freezer for the bushings and bjs and heat on the inserts. I made op last night at like 3:00 and was dazed lol. Think that’ll work? If nothing else it’ll make it really easy to press.
     
  8. Jul 29, 2018 at 8:20 AM
    #8
    Sandman614

    Sandman614 Ex-Snarky TWSS elf, Travis #hotsavannahdotcom

    Joined:
    Oct 26, 2010
    Member:
    #45273
    Messages:
    36,012
    Gender:
    Male
    First Name:
    Tim
    Garner, NC/Boone, NC
    Vehicle:
    '06 SR5 Off Road
    ARB Front Bumper, Projector Headlights w/Slimcubby 4300K HID's, Oznium LED's, LED taillights, DIY Washable Cabin Moose Filter, Sockmonkey SR5 Off Road, Aux Audio plug, OME 886x, OME Nitrochargers, Wheelers 3 Leaf Progressive AAL, ImMrYo Rear-View Mirror Lift Bracket, Dodge D-Rings
  9. Jul 29, 2018 at 8:21 AM
    #9
    Slamuel

    Slamuel [OP] Well-Known Member

    Joined:
    Jun 23, 2018
    Member:
    #257264
    Messages:
    466
    Gender:
    Male
    First Name:
    Sam
    Vehicle:
    Tacoma
    DukesTaco[QUOTED] likes this.
  10. Jul 29, 2018 at 8:24 AM
    #10
    DukesTaco

    DukesTaco Well-Known Member

    Joined:
    Feb 19, 2015
    Member:
    #149086
    Messages:
    5,673
    Gender:
    Male
    AZ
    Vehicle:
    2nd Gen Double cab Pre Runner
    You have to keep reading the thead. Most people get them pressed for around$30 . Or if you have a big vise a pipe and some sleaves at home like I do.
     
  11. Jul 29, 2018 at 8:32 AM
    #11
    Slamuel

    Slamuel [OP] Well-Known Member

    Joined:
    Jun 23, 2018
    Member:
    #257264
    Messages:
    466
    Gender:
    Male
    First Name:
    Sam
    Vehicle:
    Tacoma
    He installed white lines though. I’ll sort through the whole thread if there’s honestly an answer in it. I kinda assumed the removal was all I would get from Croms poast.

    In the meantime.. IF I still struggle with it can I just use a BJ press?
     
  12. Jul 29, 2018 at 8:33 AM
    #12
    Sandman614

    Sandman614 Ex-Snarky TWSS elf, Travis #hotsavannahdotcom

    Joined:
    Oct 26, 2010
    Member:
    #45273
    Messages:
    36,012
    Gender:
    Male
    First Name:
    Tim
    Garner, NC/Boone, NC
    Vehicle:
    '06 SR5 Off Road
    ARB Front Bumper, Projector Headlights w/Slimcubby 4300K HID's, Oznium LED's, LED taillights, DIY Washable Cabin Moose Filter, Sockmonkey SR5 Off Road, Aux Audio plug, OME 886x, OME Nitrochargers, Wheelers 3 Leaf Progressive AAL, ImMrYo Rear-View Mirror Lift Bracket, Dodge D-Rings
    Just saying if you got Moog don't bother continuing the install.. Get factory or Whiteline.
     
  13. Jul 29, 2018 at 8:54 AM
    #13
    Slamuel

    Slamuel [OP] Well-Known Member

    Joined:
    Jun 23, 2018
    Member:
    #257264
    Messages:
    466
    Gender:
    Male
    First Name:
    Sam
    Vehicle:
    Tacoma
    Man you didn’t even read the first two lines and you’re telling me that. Come on now:rofl:
     
  14. Jul 29, 2018 at 8:56 AM
    #14
    Sandman614

    Sandman614 Ex-Snarky TWSS elf, Travis #hotsavannahdotcom

    Joined:
    Oct 26, 2010
    Member:
    #45273
    Messages:
    36,012
    Gender:
    Male
    First Name:
    Tim
    Garner, NC/Boone, NC
    Vehicle:
    '06 SR5 Off Road
    ARB Front Bumper, Projector Headlights w/Slimcubby 4300K HID's, Oznium LED's, LED taillights, DIY Washable Cabin Moose Filter, Sockmonkey SR5 Off Road, Aux Audio plug, OME 886x, OME Nitrochargers, Wheelers 3 Leaf Progressive AAL, ImMrYo Rear-View Mirror Lift Bracket, Dodge D-Rings
    Just saying
     
  15. Jul 29, 2018 at 9:07 AM
    #15
    Unchained 5150

    Unchained 5150 Rick

    Joined:
    Sep 25, 2014
    Member:
    #139054
    Messages:
    65,355
    Gender:
    Male
    First Name:
    Rick
    Auburn Ma
    Vehicle:
    2021 TRD Poser Pro Manual.
  16. Jul 29, 2018 at 11:16 AM
    #16
    DukesTaco

    DukesTaco Well-Known Member

    Joined:
    Feb 19, 2015
    Member:
    #149086
    Messages:
    5,673
    Gender:
    Male
    AZ
    Vehicle:
    2nd Gen Double cab Pre Runner
  17. Jul 29, 2018 at 11:45 AM
    #17
    Chuy

    Chuy Well-Known Member

    Joined:
    Aug 4, 2008
    Member:
    #8328
    Messages:
    4,108
    Gender:
    Male
    Lakeside, CA
    Vehicle:
    07 V6 DCLB 4X4 Sport
    Silver Taco
    Yes, use the outside lip to press the bushing into the LCA. The large bushing takes a 2.5"ID cup to press in. I don't recall the size of the smaller bushing. I only remember the large one cause you need the same cup to remove a Moog BJ and this size cup does not come in any bushing or bearing kit on sale when I did this project. If you reside near southern Cal, you are welcomed to my press and tools. I would avoid heating up a new bushing for fear the heat would affect the new rubber. Yes, bushings are tapered. I believe the Whitelines are not, which is why you need a press to install them.

    You can use a threaded rod technique to install the bushings, but I would avoid using a socket to press in the bushings as the socket edges are tapered/recessed and you may end up bending the bushing lips. I used a press but could've used the bolt I used to remove them; see post #80 in link below.

    https://www.tacomaworld.com/threads/redneck-lower-control-arm-lca-bushing-press.134846/
     
    Slamuel[OP] likes this.
  18. Jul 30, 2018 at 12:34 AM
    #18
    Slamuel

    Slamuel [OP] Well-Known Member

    Joined:
    Jun 23, 2018
    Member:
    #257264
    Messages:
    466
    Gender:
    Male
    First Name:
    Sam
    Vehicle:
    Tacoma
    Okay everything is done. Thanks for the pointers guys. I’ll make a poast that covers everything for others to look back at in the future when they do it!:burnrubber:
     
  19. Jul 30, 2018 at 12:56 AM
    #19
    ahkouchi

    ahkouchi Well-Known Member

    Joined:
    Aug 5, 2016
    Member:
    #193829
    Messages:
    652
    Gender:
    Male
    First Name:
    Andrew
    Big Island Hawaii
    Vehicle:
    2016 Magnetic Gray Metallic Tacoma
    Front Elka 2.5 non resi with 650lb spring Rear Serviceable 5160's with AAL 265/75/r16 BFG KO2
    I'm glad you got it done. There is a local machine shop here that does it for like 40 bucks. I found it less of a headache to just bring it to them lol
     
    Slamuel[OP] likes this.
  20. Jul 30, 2018 at 8:54 AM
    #20
    Slamuel

    Slamuel [OP] Well-Known Member

    Joined:
    Jun 23, 2018
    Member:
    #257264
    Messages:
    466
    Gender:
    Male
    First Name:
    Sam
    Vehicle:
    Tacoma
    I wish I had someone I trusted who was as meticulous as I am. I will say; when it is done by my hands I tend not to worry about it when I’m driving.
     

Products Discussed in

To Top