1. Welcome to Tacoma World!

    You are currently viewing as a guest! To get full-access, you need to register for a FREE account.

    As a registered member, you’ll be able to:
    • Participate in all Tacoma discussion topics
    • Communicate privately with other Tacoma owners from around the world
    • Post your own photos in our Members Gallery
    • Access all special features of the site

Let the conversion begin :P

Discussion in '2nd Gen. Tacomas (2005-2015)' started by atalladega, Feb 28, 2012.

  1. Jul 25, 2012 at 12:29 PM
    #61
    atalladega

    atalladega [OP] Well-Known Member

    Joined:
    Feb 26, 2012
    Member:
    #73660
    Messages:
    105
    Gender:
    Male
    Citrus Springs, FL
    Vehicle:
    06 double cab, 4x4 TRD off-road
    Thanks man, still workin on it. It's a Nova in front.

    The Mud Fugger just turned 240k miles and is still running strong! :) well as strong as those 3.0L were lol. I do think it has a small gas leak on a fuel line by the tank but, should be a quick fix. These hardbodies were the shiz, hard for me to even think about selling mine too.
     
  2. Jul 25, 2012 at 1:10 PM
    #62
    atalladega

    atalladega [OP] Well-Known Member

    Joined:
    Feb 26, 2012
    Member:
    #73660
    Messages:
    105
    Gender:
    Male
    Citrus Springs, FL
    Vehicle:
    06 double cab, 4x4 TRD off-road
    Took a few pics at lunch with my phone, I'll try to get better ones with the good camera when I get home.

    taco.jpg
    winch.jpg
    photo.jpg
    panel4.jpg
    panel3.jpg
    panel2.jpg
    panel.jpg
    switch.jpg
    rear view.jpg
     
  3. Jul 25, 2012 at 6:50 PM
    #63
    Slimwood Shady

    Slimwood Shady I love your mom!

    Joined:
    Jul 12, 2009
    Member:
    #19585
    Messages:
    11,693
    Gender:
    Male
    First Name:
    Linwood
    San Antonio, TX
    Vehicle:
    '23 TRD Pro Tundra; 996TT; '16 Odyssey
    #nomods
    :popcorn: LOVE the switches...
     
  4. Jul 26, 2012 at 8:42 PM
    #64
    atalladega

    atalladega [OP] Well-Known Member

    Joined:
    Feb 26, 2012
    Member:
    #73660
    Messages:
    105
    Gender:
    Male
    Citrus Springs, FL
    Vehicle:
    06 double cab, 4x4 TRD off-road
    K, finally sunny and I took some pics today, trucks still dirty. If you want to read the descriptions of what I did, try to click on the pic. Should show up. I'm still going to make a build page just going to take me time to put it together. And I gotta find all the other pics from along the way.

    Thanks

    Side view with my D21 in back
    [​IMG]

    [​IMG]


    Trucks
    [​IMG]

    [​IMG]

    [​IMG]

    [​IMG]

    [​IMG]

    Switch Panel
    [​IMG]

    [​IMG]

    [​IMG]


    [​IMG]

    [​IMG]

    [​IMG]


    Interior pics

    [​IMG]


    [​IMG]


    [​IMG]

    [​IMG]


    [​IMG]
     
  5. Jul 27, 2012 at 8:13 AM
    #65
    atalladega

    atalladega [OP] Well-Known Member

    Joined:
    Feb 26, 2012
    Member:
    #73660
    Messages:
    105
    Gender:
    Male
    Citrus Springs, FL
    Vehicle:
    06 double cab, 4x4 TRD off-road
    I haven't had time to build or do anything with the doors but, something will happen with them. The gears are still turning in my head figure out exactly what I want to do.
     
  6. Jul 27, 2012 at 11:12 AM
    #66
    griffin407c

    griffin407c Well-Known Member

    Joined:
    Oct 18, 2009
    Member:
    #24489
    Messages:
    748
    Gender:
    Male
    First Name:
    Ryan
    Upstate NY
    Vehicle:
    '12 DCLB MGM 4x4 Sport w/Entune
    OME 885s on Bilstein 5100s set at 0 with 1/2" plate spacers. OME Dakars with Bilstein 5100 Extended Length Shocks. 16" Pro Comp 7032 wheels wrapped with 285/75-16 Duratracs
    do you have any progress pics from building the switch panel?
     
  7. Jul 27, 2012 at 12:17 PM
    #67
    atalladega

    atalladega [OP] Well-Known Member

    Joined:
    Feb 26, 2012
    Member:
    #73660
    Messages:
    105
    Gender:
    Male
    Citrus Springs, FL
    Vehicle:
    06 double cab, 4x4 TRD off-road

    I'm still looking for them, I'm pretty sure I took some however apparently they were not on my iPhone. I'm going to search the other cameras and computers. I'll definitely post them if I find them, I'll be really bumbed if I can't find them. The switch panel seems to be stirring a lot of interest.
     
  8. Jul 27, 2012 at 9:54 PM
    #68
    atalladega

    atalladega [OP] Well-Known Member

    Joined:
    Feb 26, 2012
    Member:
    #73660
    Messages:
    105
    Gender:
    Male
    Citrus Springs, FL
    Vehicle:
    06 double cab, 4x4 TRD off-road
    Got off my butt tonight and shot some iPhone pics of the light output. Going to line both trucks up one night and do a side by side with halogen VS HIDs. BTW, it's pitch black out, no street lights anywhere near and the trees are about 250ft away.

    These first sets are from the driver seat:

    Headlights only
    [​IMG]

    Headlights + driving lights
    [​IMG]

    Headlights + driving + HID roof lights
    [​IMG]

    HID roof lights only
    [​IMG]


    Standing outside the truck

    Headlights only
    [​IMG]

    Headlights + driving
    [​IMG]

    Headlights + driving + Off road lights
    [​IMG]

    Off-road lights only
    [​IMG]


    Back LED lights, need to adjust them up a bit, they are aimed down a little, extremely happy with output. Pics don't do any of these lights justice.
    [​IMG]

    [​IMG]


    Just after I mounted all the lights
    [​IMG]
     
  9. Sep 5, 2012 at 4:25 AM
    #69
    ProForce

    ProForce IG @proforce.expeditions OB#5411

    Joined:
    Oct 12, 2009
    Member:
    #24205
    Messages:
    7,078
    Gender:
    Male
    First Name:
    Anthony
    SoCal - Fontana
    Vehicle:
    09 MGM TRD Sport DCSB 4.0 Auto 2wd
    Too many to list. See build page. Link in signature
    subbed
     
  10. Sep 5, 2012 at 4:41 AM
    #70
    Slimwood Shady

    Slimwood Shady I love your mom!

    Joined:
    Jul 12, 2009
    Member:
    #19585
    Messages:
    11,693
    Gender:
    Male
    First Name:
    Linwood
    San Antonio, TX
    Vehicle:
    '23 TRD Pro Tundra; 996TT; '16 Odyssey
    #nomods
    Can you post up pictures of how you ran your roof rack lights? Thanks in advance...
     
  11. Sep 5, 2012 at 4:42 AM
    #71
    XPOTRON

    XPOTRON Is LIVE on the GRID.

    Joined:
    Feb 1, 2011
    Member:
    #50358
    Messages:
    6,808
    Gender:
    Male
    First Name:
    Stefen
    Chandler, Arizona
    Vehicle:
    IG: @ST3F3NS
    DUROBUMPS Use TRON10 for 10% Off & Free Shipping
    I love the switches!! And you can never go wrong with the jesters, i want some myself!! great build man +1
     
  12. Sep 6, 2012 at 2:38 PM
    #72
    atalladega

    atalladega [OP] Well-Known Member

    Joined:
    Feb 26, 2012
    Member:
    #73660
    Messages:
    105
    Gender:
    Male
    Citrus Springs, FL
    Vehicle:
    06 double cab, 4x4 TRD off-road

    I'll try to snap some pics later. But I drilled through the factory black rubber strip in a smaller diameter than the 4 conductor (x2) I ran for the lights. Then drilled through the channel underneath it. Rubber grommets and silicone to seal it up. The seal on the 4 conductor jacket is pretty tight to keep water from running down past the rubber into the channel. And I'm sure water goes under the rubber from else where so I siliconed it up anyway. Been through unrelenting rain this summer and a hurricane and not a single drop in the ceiling, so i'm happy. I ran two 4 conductor sets so I have extra options up there for future use. I also used water proof connectors for the lights so I can remove the rack if I so choose. I'll try to get some pics, it's raining hard here today.

    Thanks! And I love my Jeters! Get lots of complements and heads turning. I like the red accents and I'm trying to carry out the black with red accents around the rest of the truck. Good thing no one has them around here and hopefully it will stay that way. I haven't seen them anywhere yet on another truck. :D

    Update

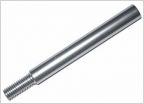
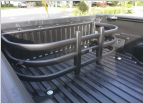
    I bought a slim tool box from Lowes for $150 or something like that and bedlined it black. I know it's not the most sturdy thing but it'll do for now.

    I also fabricated up some pretty cool mounts for the factory tie downs which allow me to use my roof racks for my daily driver in the bed. It's nice because I just have to loosen the factory tie downs slip these in and tighten down. They have a rise to them so anything that is long can clear the toolbox. Or they can be put in from under the tie down to sink down into the bed. I put a lip on the end that goes behind and to the side to keep them from sliding out or just being pulled up or down. IE the knob has to be loosened far out enough to clear these lips (safety and functional feature). I TIG welded every thing from 1.5" flat stock, 3/4" and 1" square stock. Only thing is I need to get longer Thule load bars. The ones I have are too short (for a Jetta wagon). I can attach my bike racks, snowboard racks, surf racks or anything else I want back there. I like it! :)

    These aren't the best pics, heck I didn't even tighten the racks down I was just getting a working idea. I'll go take some of them not installed when it stops raining. The last pic you can kinda see the lip underneath, so you can see how it keeps them from pulling up or allows them to be used upside down. My cousin is a lawyer and thinks it's such a neat idea he is looking into patent. LOL

    I'm trying to save up for sliders and a rear bumper now... Looks like it's gonna be a while though.... :(

    [​IMG]

    [​IMG]

    [​IMG]

    [​IMG]

    [​IMG]

    [​IMG]
     
  13. Sep 6, 2012 at 7:30 PM
    #73
    atalladega

    atalladega [OP] Well-Known Member

    Joined:
    Feb 26, 2012
    Member:
    #73660
    Messages:
    105
    Gender:
    Male
    Citrus Springs, FL
    Vehicle:
    06 double cab, 4x4 TRD off-road

    Nice man! Love the Pathy! I had one and would probably still have it if I didn't get car jacked and the dude totaled it! Here's a couple pics.... Loved that truck!

    [​IMG]

    [​IMG]

    [​IMG]


    [​IMG]


    :(


    [​IMG]
     
  14. Sep 6, 2012 at 7:39 PM
    #74
    atalladega

    atalladega [OP] Well-Known Member

    Joined:
    Feb 26, 2012
    Member:
    #73660
    Messages:
    105
    Gender:
    Male
    Citrus Springs, FL
    Vehicle:
    06 double cab, 4x4 TRD off-road
    Pics of the tie down rack mounts.

    This is how you slide them down; Unscrew the tie down all the way out then slide them in and tighten until it clicks.
    [​IMG]


    [​IMG]


    [​IMG]


    Mounted from the bottom

    [​IMG]

    [​IMG]


    Just some playing a couple weeks ago.
    [​IMG]


    [​IMG]


    [​IMG]


    [​IMG]


    [​IMG]


    [​IMG]
     
  15. Sep 8, 2012 at 2:49 AM
    #75
    ProForce

    ProForce IG @proforce.expeditions OB#5411

    Joined:
    Oct 12, 2009
    Member:
    #24205
    Messages:
    7,078
    Gender:
    Male
    First Name:
    Anthony
    SoCal - Fontana
    Vehicle:
    09 MGM TRD Sport DCSB 4.0 Auto 2wd
    Too many to list. See build page. Link in signature
    I love it all man great job!! I am ordering my leather kit this next week and also plan on dying my panels the same as you did on the bottom of the seats. I am still debating on dying the center console or not. I also am looking to change to color of the carpet...

    Tomorrow I am going to do some research and find out if the carpet from a 2012/3 is identical and if so, how much. Ill let you know what I find out.

    couple questions for you since I am doing pretty much this same thing this month:

    -What leather kit is that? I was going to order a catzkin kit with the perforation like yours. I might add TRD embroidery and contrast stitching though.

    -Before you sprayed the dye, exactly what steps did you take to prep the plastic?

    -Did you put a clear coat on after the dye? I heard you can do this to prevent the accidental scratched like you mentioned already happening.

    -Do you think the Duplicolor dye you used can also be used to spray the shift bezel with the cup holder? Im assuming since you said you already sprayed it that it will work fine but just wondering what you though?

    -Ever considered dying the door sill trim pieces to help complete the 2-tone look? My worry would be the high traffic on them might wear quickly, but Im debating that part still.

    And did you know that the same exact spray you used for the dash can be used on the carpet as well. If it is the Dupli-color vinyl/plastic dye then it will work great. Probably saves about $150-200 on a new carpet. I think dying the carpet then putting some weather techs over them would hold up well and look great.

    Sorry for all the questions... Just really interested because I am doing the exact same upgrade/mod.

    Keep up the great work!!
     
  16. Sep 8, 2012 at 8:00 AM
    #76
    themuffinman619

    themuffinman619 Play stupid games, win stupid prizes

    Joined:
    Aug 22, 2009
    Member:
    #21561
    Messages:
    2,783
    Gender:
    Male
    First Name:
    themuffinman
    Location: Here
    Vehicle:
    Your moms house
    What kind of roof basket is that? I'm really liking it.
     
  17. Sep 8, 2012 at 11:29 AM
    #77
    atalladega

    atalladega [OP] Well-Known Member

    Joined:
    Feb 26, 2012
    Member:
    #73660
    Messages:
    105
    Gender:
    Male
    Citrus Springs, FL
    Vehicle:
    06 double cab, 4x4 TRD off-road

    Thanks! I didn't go with the catskinz, I got them of of ebay. (second vehicle I've gotten them for) really good quality and color options also available, custom stitching available, etc. just much less expensive. I think I paid $450 shipped. If you want two tone its the same price just have to wait a while. Below is a like to them, they are called Clazzio.

    http://www.ebay.com/itm/Toyota-Taco...fits=Model:Tacoma&hash=item337b6baeca&vxp=mtr

    I clean the panels really well with mineral spirits and my little trick that has always seem to work is dry them with a heat gun and then before I hit them with the dye I warm up the panels with the heat gun again to try to open up the "pores" in the panel. Then I spray with adhesive promotor. Heat again and then hit with several light coats of the dye to keep the texture. I have used a satin clear coat in the past but didn't in this case and it has held up really well. The scratch on the back of the center console was so deep that it went down into the plastic more like a gouge than a scratch so no coating would have prevented it.

    Yes, I know I can dye the carpet as well, but I'm trying to see if I can replace the whole thing just because of some wear spots but, it's looking like I may go that route and do weather techs like you are planning on doing. A few trips to the forest and the cloth TRD ones are looking well used already, probably was a mistake going with the cloth ones. But I was in a hurry and they were cheap. But definitely let me know if you find out about the carpet!!!

    For the gear shift bezel I used SEM dye, I've never gone wrong with it, I also painted the radio trim and a/c bezel with the same SEM for a better match. Holding up really well to the abuse of being a flat surface and many cups going in and out of the holder. Everything else was Duplicolor product and I have to say it has help up just as well.

    I haven't done anything with the doors yet, I'm still debating on whether to do a stereo in here or not and that will dictate whether or not I customize the doors. But, I will tell you I have an idea and color scheme in mind if I don't. just haven't revealed it yet.


    Thanks, The roof basket is a rhino basket now. It used to be a Rage basket when I bought one for my D21 pickup, but I guess they merged or Rhino bought it or something. I had to search for it because I did like it so much on my D21 I wanted another for the Taco. I believe I got it off of Amazon, and it's much less expensive than other baskets on the market. I noticed that now that its a Rhino it also comes with a plastic faring but I didn't use it, it goes right where my front facing lights are.

    o_O they've gone up in price! I think mine was $189+, seems they are now $230+, but still a nice basket, comes with mounts for crossbars and stuff already.

    http://www.amazon.com/Rhino-Rack-Mo...=1347128521&sr=8-1&keywords=rhino+roof+basket
     
    This site contains affiliate links for which the site may be compensated.
    #77
  18. Sep 8, 2012 at 1:44 PM
    #78
    Greenbean

    Greenbean B.S. Goodwrench

    Joined:
    Aug 8, 2012
    Member:
    #84332
    Messages:
    3,253
    Gender:
    Male
    First Name:
    Zack
    Western NC
    Vehicle:
    2015 AC 2.7L 5-spd 4x4 Utility Package
    Nice work man, wow.

    Im loving the Lights,

    Also I may end up getting that same tool box and doing what you did, coat it in black,

    Thanks for the idea!
     
  19. Sep 23, 2012 at 6:12 PM
    #79
    Blygy

    Blygy Well-Known Member

    Joined:
    Jun 6, 2012
    Member:
    #80231
    Messages:
    324
    Gender:
    Male
    East of Edson
    Vehicle:
    Supercharged 2012 DCLB TRD Sport Trail Teams
    Trail Teams Edition Supercharger
    I may have missed it but where did you get the switches??

    Thank You

    Bill
     
  20. Sep 23, 2012 at 6:26 PM
    #80
    Tayysere

    Tayysere Well-Known Member

    Joined:
    Aug 7, 2012
    Member:
    #84281
    Messages:
    223
    Gender:
    Male
    First Name:
    Taylor
    Taylorsville, Utah
    Vehicle:
    06 ImpulseRed DCSB
    I like your bed rack fab pieces. Would you be interested in fabbing some more and selling them?

    Nice build man, I love your truck
     

Products Discussed in

To Top