1. Welcome to Tacoma World!

    You are currently viewing as a guest! To get full-access, you need to register for a FREE account.

    As a registered member, you’ll be able to:
    • Participate in all Tacoma discussion topics
    • Communicate privately with other Tacoma owners from around the world
    • Post your own photos in our Members Gallery
    • Access all special features of the site

Maxliner USA Fog Light Install

Discussion in 'Lighting' started by RSMick, May 28, 2013.

  1. Feb 7, 2015 at 8:05 AM
    #41
    Sparkler

    Sparkler Jedi

    Joined:
    Jan 17, 2015
    Member:
    #146566
    Messages:
    18
    Gender:
    Male
    So. Cal.
    Vehicle:
    2011 Tacoma 4x4, 4cyl.
    In the video the guy pulls the wire through using a short piece of bailing wire.
    I'm installing today and will post later about my experience.
    I'm looking to refresh my skills this morning before I start and will look for/watch the video I described. I may post a link to the video I'm talking about when I run across it.
    Note: I have a 2011 Taco, so my foglights are different. I got mine from Amazon. Cheap! :D ($35 for the whole kit including the proper illuminated dash switch) Here's a link to the lights I got:
    http://www.amazon.com/gp/product/B00BOFETFC/ref=oh_aui_detailpage_o00_s00?ie=UTF8&psc=1

    Last weekend I did my brake pads and rotors and found a couple of broken wheel studs that I had to replace. This should be a bit easier. I hope....
     
    Last edited: Feb 7, 2015
  2. Feb 7, 2015 at 8:51 AM
    #42
    Sparkler

    Sparkler Jedi

    Joined:
    Jan 17, 2015
    Member:
    #146566
    Messages:
    18
    Gender:
    Male
    So. Cal.
    Vehicle:
    2011 Tacoma 4x4, 4cyl.
    The installation video I found on youtube is in two parts.

    To get the wire through the firewall, this guy pulls it through the hood release hole.. It looks like it goes through fairly smoothly (I might add a bit of silicone lube to assist), and it fits well!

    Here's one part (wiring): http://youtu.be/-0NChPhlQTM

    Here's a second part (light installation) Not fond of his technique, but it helps to see it:
    http://youtu.be/Kao85ilTp84
     
  3. Feb 9, 2015 at 6:28 AM
    #43
    Papa K

    Papa K Well-Known Member

    Joined:
    Nov 29, 2012
    Member:
    #92074
    Messages:
    78
    Gender:
    Male
    Aurora, CO
    Vehicle:
    2013 Access Cab 4x4 4 cyl
    ^^ One the first video post above. -Where he is installing the light switch. I didn't have any empty switch slots below so I pretty much did the same method of removing the blank switch. I used a dremel tool bit where is just mentions tapping with a screw an removing the blank switch.
     
  4. Feb 13, 2015 at 10:49 AM
    #44
    jbcanes

    jbcanes Well-Known Member

    Joined:
    May 13, 2014
    Member:
    #129747
    Messages:
    226
    Gender:
    Male
    First Name:
    Justin
    Tampa, FL
    Vehicle:
    14 PreRunner double cab
    backup camera, intermittent wiper, step bars, bug deflector, window vent, console vault,solid fold 2.0, 2016 sport wheels, front camera, anytime rear front camera mod, homelink mirror, dash cam, unifilter,
    Great write up. Really gave me some good ideas for my install. Thanks!
     
  5. May 4, 2015 at 6:11 PM
    #45
    rickyricardo

    rickyricardo Active Member

    Joined:
    Mar 22, 2015
    Member:
    #151533
    Messages:
    35
    Gender:
    Male
    New England
    Vehicle:
    2015 SR5
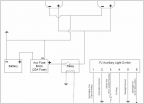
    Can someone please explain to me exactly how this goes in the fuse box? Doesnt it need a fuse?[​IMG]
     

Products Discussed in

To Top