1. Welcome to Tacoma World!

    You are currently viewing as a guest! To get full-access, you need to register for a FREE account.

    As a registered member, you’ll be able to:
    • Participate in all Tacoma discussion topics
    • Communicate privately with other Tacoma owners from around the world
    • Post your own photos in our Members Gallery
    • Access all special features of the site

Millenium Falcon Taco Build

Discussion in '1st Gen. Builds (1995-2004)' started by EB Group, Sep 17, 2015.

  1. Aug 13, 2016 at 9:51 AM
    #641
    EB Group

    EB Group [OP] Carbon Jedi

    Joined:
    Jul 14, 2015
    Member:
    #159469
    Messages:
    1,406
    Gender:
    Male
    First Name:
    Rudy
    Halifax
    Vehicle:
    2017 TRD Sport DCSB 6M
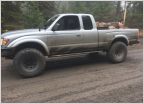
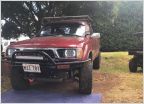
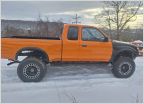
    I'm trying to decide what colour I should paint the truck.
    Either the stock Lunar Mist or the 2017 tacoma trd pro Cement.

    image.jpg
    image.jpg
     
  2. Aug 13, 2016 at 12:12 PM
    #642
    CaptAmerica

    CaptAmerica Asphalt Avenger! TTC#13

    Joined:
    Dec 29, 2014
    Member:
    #145193
    Messages:
    39,185
    Gender:
    Male
    First Name:
    Cap
    In a van down by the river
    Vehicle:
    Gen 2.9 DCLB TRD Sport w/tech
    Stickers and not enough wax
    I would think that the Millenium Taco would be a light gray with muted red and brown accents, and a bright azure "TOYOTA" on the tailgate.
     
  3. Aug 13, 2016 at 2:47 PM
    #643
    EB Group

    EB Group [OP] Carbon Jedi

    Joined:
    Jul 14, 2015
    Member:
    #159469
    Messages:
    1,406
    Gender:
    Male
    First Name:
    Rudy
    Halifax
    Vehicle:
    2017 TRD Sport DCSB 6M
    Thats sounds very complicated.
    Perhaps you can mock up a paper mache vesion to show us what you mean.
    lol
    I love the TOYOTA on the tailgate though
     
  4. Aug 13, 2016 at 10:51 PM
    #644
    w00dy

    w00dy Hey Now!

    Joined:
    Nov 7, 2009
    Member:
    #25556
    Messages:
    2,037
    Gender:
    Male
    First Name:
    Jeff
    North of the Wall
    Vehicle:
    03 dCab tURD
    BAMF kick out sliders, SkidRow skids,Pro Comp 7069, Kelly Safari TSR 285's, Elite front bumpa, OME 883 & Dakars w/ D6XL AAL, Nitro sport shocks, Eddie209 Soft topper, Satoshi, k&n fipk, Clarion vx400, Ultra Gauge, Debadgination mod
    2 bowls of frosted flakes
    1 perfectly ripe Mango
    2 laptops (my wife's laptop battery dies when i was on page 16)
    *removed contacts due to eyes becoming dry as a desert*

    I finally got thru all 33 pages of your build! Well done. I was dreading replacing my exhaust this week but not anymore.
     
    EB Group[OP] likes this.
  5. Aug 14, 2016 at 2:56 PM
    #645
    EB Group

    EB Group [OP] Carbon Jedi

    Joined:
    Jul 14, 2015
    Member:
    #159469
    Messages:
    1,406
    Gender:
    Male
    First Name:
    Rudy
    Halifax
    Vehicle:
    2017 TRD Sport DCSB 6M
    Thanks Jeff
    I aim to please, and help via my experience and pictures.
     
  6. Aug 14, 2016 at 4:09 PM
    #646
    davidpick

    davidpick NWXPDTN

    Joined:
    Jan 21, 2010
    Member:
    #29760
    Messages:
    2,380
    Gender:
    Male
    First Name:
    David
    Leavenworth, WA
    Vehicle:
    1988 Pickup 22R 5sp 2wd
    Weber 32/36, RV Cam, LCE exhaust headers, Desmogged
    Officially: "load-sensing proportioning valve." Mine also gummed up and I wanted to get rid of my ABS anyway so I redid all the brake lines from the MC to each wheel. Much simpler! Love the build -- keep it up!
     
    EB Group[QUOTED][OP] likes this.
  7. Aug 14, 2016 at 8:17 PM
    #647
    EB Group

    EB Group [OP] Carbon Jedi

    Joined:
    Jul 14, 2015
    Member:
    #159469
    Messages:
    1,406
    Gender:
    Male
    First Name:
    Rudy
    Halifax
    Vehicle:
    2017 TRD Sport DCSB 6M
    I know someone would know!
    Thanks David!
     
  8. Aug 19, 2016 at 6:13 PM
    #648
    EB Group

    EB Group [OP] Carbon Jedi

    Joined:
    Jul 14, 2015
    Member:
    #159469
    Messages:
    1,406
    Gender:
    Male
    First Name:
    Rudy
    Halifax
    Vehicle:
    2017 TRD Sport DCSB 6M
    Yesterday and today's progress.
    Got the shackles painted and installed with the new OME bushings.

    image.jpg

    image.jpg
     
    Last edited: Aug 19, 2016
  9. Aug 19, 2016 at 6:15 PM
    #649
    EB Group

    EB Group [OP] Carbon Jedi

    Joined:
    Jul 14, 2015
    Member:
    #159469
    Messages:
    1,406
    Gender:
    Male
    First Name:
    Rudy
    Halifax
    Vehicle:
    2017 TRD Sport DCSB 6M
    The shock perches look pretty sad.
    Time to glass blast and them and paint them.

    image.jpg
    image.jpg
    image.jpg
    image.jpg
    image.jpg
     
  10. Aug 19, 2016 at 6:18 PM
    #650
    EB Group

    EB Group [OP] Carbon Jedi

    Joined:
    Jul 14, 2015
    Member:
    #159469
    Messages:
    1,406
    Gender:
    Male
    First Name:
    Rudy
    Halifax
    Vehicle:
    2017 TRD Sport DCSB 6M
    I removed the rear brake line splitter from the third member, blasted it and applied several coats of paint.
    A few pictures of it installed.

    image.jpg
    image.jpg
    image.jpg
    image.jpg

    image.jpg
    image.jpg
     
    Last edited: Aug 19, 2016
  11. Aug 19, 2016 at 6:19 PM
    #651
    EB Group

    EB Group [OP] Carbon Jedi

    Joined:
    Jul 14, 2015
    Member:
    #159469
    Messages:
    1,406
    Gender:
    Male
    First Name:
    Rudy
    Halifax
    Vehicle:
    2017 TRD Sport DCSB 6M
    Blasted and painted the rear flexible brake line mount.

    image.jpg
    image.jpg
     
  12. Aug 19, 2016 at 6:23 PM
    #652
    EB Group

    EB Group [OP] Carbon Jedi

    Joined:
    Jul 14, 2015
    Member:
    #159469
    Messages:
    1,406
    Gender:
    Male
    First Name:
    Rudy
    Halifax
    Vehicle:
    2017 TRD Sport DCSB 6M
    While the gas tank and e brake was out I removed the rust from that part of the frame, applied a couple coats of that Toyota corrosion prevention primer and them painted those spots black.

    image.jpg
    image.jpg
    image.jpg
    image.jpg
     
  13. Aug 19, 2016 at 6:25 PM
    #653
    EB Group

    EB Group [OP] Carbon Jedi

    Joined:
    Jul 14, 2015
    Member:
    #159469
    Messages:
    1,406
    Gender:
    Male
    First Name:
    Rudy
    Halifax
    Vehicle:
    2017 TRD Sport DCSB 6M
    A little before and after of the load sensing proportioning valve.
    The new one actually has a mount and is in better condition.

    image.jpg
    image.jpg

    image.jpg
     
  14. Aug 19, 2016 at 6:27 PM
    #654
    EB Group

    EB Group [OP] Carbon Jedi

    Joined:
    Jul 14, 2015
    Member:
    #159469
    Messages:
    1,406
    Gender:
    Male
    First Name:
    Rudy
    Halifax
    Vehicle:
    2017 TRD Sport DCSB 6M
    Yesterday I had the new leafs in via the front bolt and shackles.
    New stuff looks pretty sweet!

    image.jpg
    image.jpg
     
  15. Aug 19, 2016 at 6:31 PM
    #655
    EB Group

    EB Group [OP] Carbon Jedi

    Joined:
    Jul 14, 2015
    Member:
    #159469
    Messages:
    1,406
    Gender:
    Male
    First Name:
    Rudy
    Halifax
    Vehicle:
    2017 TRD Sport DCSB 6M
    The previous u bolts were only on the truck for a few month and they ended up looking pretty rough very quickly.

    Today I had some longer u bolts made locally.
    Back at the shop I prepped them for paint and sprayed several coats on them and their hardware to try and slow down the rate of rusting.

    image.jpg
    image.jpg
     
  16. Aug 19, 2016 at 6:36 PM
    #656
    EB Group

    EB Group [OP] Carbon Jedi

    Joined:
    Jul 14, 2015
    Member:
    #159469
    Messages:
    1,406
    Gender:
    Male
    First Name:
    Rudy
    Halifax
    Vehicle:
    2017 TRD Sport DCSB 6M
    Before installing the perches I applied some lucas heavy dudy bearing grease to keep if from, over time, fusing to the third member via rust.

    image.jpg
     
  17. Aug 19, 2016 at 6:43 PM
    #657
    EB Group

    EB Group [OP] Carbon Jedi

    Joined:
    Jul 14, 2015
    Member:
    #159469
    Messages:
    1,406
    Gender:
    Male
    First Name:
    Rudy
    Halifax
    Vehicle:
    2017 TRD Sport DCSB 6M
    I'll have to grab pictures another day of the ubolts and perches installed.

    I have the u bolts snugged roughly in place but I am unsure of how one judges what angle to mount the perch.

    It may seem like an odd question but if you, on yhe passenger side, tighten the front u bolt more than the rear you can angle the front of the perch up thus compressing that shock more then if the u bolts were tightened in such a way so as to keep the perch level.
    Should the perch be installed level or so other way?
    I hope this explanation and question makes sence to someone.
     
  18. Aug 22, 2016 at 5:40 PM
    #658
    EB Group

    EB Group [OP] Carbon Jedi

    Joined:
    Jul 14, 2015
    Member:
    #159469
    Messages:
    1,406
    Gender:
    Male
    First Name:
    Rudy
    Halifax
    Vehicle:
    2017 TRD Sport DCSB 6M
    I dropped my fuel tank off to National Radiator to have them pressure test it and solder any holes they find.
    As part of this service they will steam clean it as well.
     
    Last edited: Aug 22, 2016
  19. Aug 23, 2016 at 9:58 AM
    #659
    EB Group

    EB Group [OP] Carbon Jedi

    Joined:
    Jul 14, 2015
    Member:
    #159469
    Messages:
    1,406
    Gender:
    Male
    First Name:
    Rudy
    Halifax
    Vehicle:
    2017 TRD Sport DCSB 6M
    I removed and cut up the exhaust.
    I'm trying to keep whats ok and replace what needs replacing. So far, the muffler and a couple small sections of pipe are what I need.
    Here are some pictures of the bad sections and the sections I will re-use.

    image.jpg
    image.jpg
    image.jpg
    image.jpg
     
  20. Aug 23, 2016 at 10:06 AM
    #660
    EB Group

    EB Group [OP] Carbon Jedi

    Joined:
    Jul 14, 2015
    Member:
    #159469
    Messages:
    1,406
    Gender:
    Male
    First Name:
    Rudy
    Halifax
    Vehicle:
    2017 TRD Sport DCSB 6M
    I tried removing my ac compressor last winter and got held up by one seized and stripped bolt in a location that it's impossible to get a bolt extractor hammered on.
    I went at it again today and got it out.
    I needed to take my prybar and smash on it with a large hammer at the location where the head of that bolt met the compressor. This enabled me to break the aluminum mount off of the compressor. Then I removed the compressor by unbolting the power steering pump and removing the air intake.
    Then I pulled the compressor bracket off of the block and put it in the bench vice where I was able to hammer a stripped bolt extractor socket on it and removed the bolt and part of the compressor housing.
    It was a last resort after much frustration.
    Actually, the last resort was pulling the engine to get at it, but I think I would rather cause myself harm than go through all that work for AC.
    Regardless, the seized compressor is out and I have the new on the motor from the parts truck to remove, clean up and install.
    I think this success deserves a dancing banana.
    :bananadance:

    image.jpg
    image.jpg
     
    Last edited: Aug 23, 2016
    TheSaint and CaptAmerica like this.

Products Discussed in

To Top