1. Welcome to Tacoma World!

    You are currently viewing as a guest! To get full-access, you need to register for a FREE account.

    As a registered member, you’ll be able to:
    • Participate in all Tacoma discussion topics
    • Communicate privately with other Tacoma owners from around the world
    • Post your own photos in our Members Gallery
    • Access all special features of the site

Millsy's Simple & Effective Build

Discussion in '2nd Gen. Builds (2005-2015)' started by Millsy, Jun 3, 2019.

  1. Jun 3, 2019 at 11:48 AM
    #1
    Millsy

    Millsy [OP] Sláinte

    Joined:
    Jun 11, 2018
    Member:
    #256083
    Messages:
    113
    Gender:
    Male
    Southern California
    Vehicle:
    Silver '13 DCSB 4x4
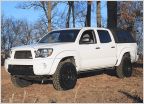
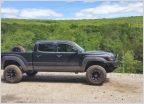
    How it sits as of October 2022
    20221027_102621.jpg

    The day I brought it home:
    2018-03-05-10.33.jpg

    I bought this 2013 DCSB 4x4 used from a local dealer with 68,000 on the Odometer in October of 2017.

    2015-02-28-13.08.jpg

    I also owned this 2001 Ranger that I bought back in 2007 that became a 2WD go-fast build. I put quite a bit of dirt miles on this truck, but it was starting to give me trouble in it's old age. I retired the Ranger a year or so after purchasing the Tacoma. I wanted this new build to be a bit of a sleeper, loaded out with the essentials, but not drawing much attention. The purpose of this build is to be highly capable of exploring the deserts and mountains and getting lost from time to time, yet remaining humble in appearance.


    --- THE LOADOUT ---

    Front Suspension:
    Fox 2.5 Remote Reservoir Shocks
    650 lb. King Coils
    Camburg Balljoint UCAs
    Sway Bar Delete
    Energy Suspension Bump Stops
    Crown Extended Steel-Braided Brake Lines


    Rear Suspension:
    Fox 2.0 Performance Shocks - Stock Location
    Icon RTX Leaf Springs (Stage 1 Configuration)
    Wheelers U-Bolt Flip Kit with SuperBumps
    Crown Extended Steel-Braided Brake Lines
    Stock Leafs with Wheelers Add-A-Leaf - REMOVED

    Wheels & Tires:
    265/75R16 Yokohama Geolandar X-AT G016
    Pacer Nighthawk 166SB Wheels 16x8
    Bora .75" Front Spacers


    Lighting Solutions:
    Diode Dynamics SS3 Amber Sport Fog Light Kit
    Diode Dynamics SSC2 White Sport Combos on Winch Bumper.
    KC C2 LED Floods on Cali Raised Lo Pro Ditch Brackets (Installed prior to trips)
    3 Light Chase Box behind cab. (Amber Dust Light, White/Amber Alternating Strobes)
    20W Flush Mount LED Floods in Rear Bumper
    20W Amber Fog Lights with Cali Raised Fog Bracket - REMOVED
    Amber/White Amazon LED Dust Light Bar Independently Wired - REMOVED
    KC 6" Halogens with Spread Reflectors Behind Grill - REMOVED


    Electrical / Comms:
    Blue Sea 12 Circuit Fuse Block
    100 Amp Circuit Breaker
    80 Amp Circuit Breaker for Rear of Cab
    Ulincos 19mm Push Button Switches
    Always Hot Quick Charge Dual USB Outlet with Voltmeter, and 12v Plug
    Rugged Radios VX2200 UHF Radio Mounted in Center Console
    Tech-Deck with Ram X Phone Mount

    Cobra CB Radio Mounted in Center Console Cubby - REMOVED

    Exterior:
    US Offroad Low Profile Winch Bumper
    CR Front Steel Skid Plate
    Custom Car Grills Insert
    Stubby Radio Antenna Replacement
    Trailer Harness Relocation
    Tail Pipe Chop Above Axle
    Rear Diff Breather Mod
    Uni Filter Mod
    Intake Reroute using Ram Air Scoop

    Modified Smittybilt/N-Fab Light Bar - REMOVED

    Short Bed:
    265/75r16 Matching Spare in Stock Location
    Bed Mounted Tool Box with Race Jack, Tools, Misc. Gear
    DIY Solar Shower with Electric Pump

    OBA Secured in Lockable Ammo Can Mounted to Bed Rail
    DIY Tailgate Semi-Anti-Theft Mod
    KB Voodoo Bed/Tailgate Caps
    Cargo L-Tracks and Mounting Points
    4x Innovations 4" Rise Bed Bar

    DIY Pressurized Road Shower on DIY Rail Mounts - REMOVED
    OBA Mounted Above Passenger Cubby and Tapped into Bed - REMOVED


    Double Cab Interior:
    Silver Trim Painted Flat Black
    Husky Front Floor Mats
    Quick Release Fire Extinguisher
    60% Dog Platform with 60/40 Back Panel

    Modifications Sitting in the Garage Waiting for Install:
    Rear Shock Relocation Kit
    BAMF Front Bumper Reinforcement Brackets


    Future Plans:
    Front Windows Tinted
    Synthetic Line Winch


    tacoma_01.jpg

    tacoma_02.jpg

    tacoma_03.jpg

    tacoma_04.jpg

    tacoma_interior_03.jpg
    tacoma_electrical_after_01.jpg
    tacoma_electrical_after_03.jpg
     

    Attached Files:

    Last edited: Jan 17, 2023
  2. Jun 3, 2019 at 11:49 AM
    #2
    Millsy

    Millsy [OP] Sláinte

    Joined:
    Jun 11, 2018
    Member:
    #256083
    Messages:
    113
    Gender:
    Male
    Southern California
    Vehicle:
    Silver '13 DCSB 4x4
    reserved
     
  3. Jun 3, 2019 at 11:50 AM
    #3
    Beretta4x4

    Beretta4x4 What makes the green grass grow? TTC#0114

    Joined:
    Jan 20, 2016
    Member:
    #175568
    Messages:
    30,285
    Gender:
    Male
    First Name:
    Josh
    Temple, TX
    Vehicle:
    6-speed death mobile
    Welcome and nice build!
     
    b_r_o likes this.
  4. Jun 4, 2019 at 6:21 AM
    #4
    CaliRaisedLed

    CaliRaisedLed Well-Known Member

    Joined:
    Apr 23, 2015
    Member:
    #153803
    Messages:
    8,787
    Gender:
    Male
    First Name:
    Jake
    Texas (DFW)
    Great looking build and welcome! :thumbsup:
     
    b_r_o likes this.
  5. Jun 11, 2019 at 7:06 PM
    #5
    djm68

    djm68 Well-Known Member

    Joined:
    Feb 20, 2017
    Member:
    #211181
    Messages:
    74
    Gender:
    Male
    First Name:
    Dominic
    Redwood City, CA
    Vehicle:
    2012 TRD OR AC 4x4
    Love the understated build -- that is what I am wanting to do with my 2012.

    Bunch of questions:

    The Tech Deck -- did you get the heavy duty version or the standard? I was going to install one as well, saw the the heavy duty version install is quite a bit more involved, but appears straight forward enough with modest DIY skills.

    The always hot USB charger/volt meter: did you remove one of the lighter charging sockets and replace it with the dual charger? Did you wire it to the Blu-Sea fuse block or did you connect to the cigarette lighter wires?

    Is this the type of charger you installed?

    Thanks,
    DJM
     
    Last edited: Jun 11, 2019
  6. Jun 15, 2019 at 12:30 PM
    #6
    Millsy

    Millsy [OP] Sláinte

    Joined:
    Jun 11, 2018
    Member:
    #256083
    Messages:
    113
    Gender:
    Male
    Southern California
    Vehicle:
    Silver '13 DCSB 4x4
    @djm68 For the Tech Deck I got the heavy duty one but haven't installed the extra support bar yet. I have my phone mounted 99% of the time and a small tablet only when camping in remote locations for GPS. It's held up well with no shaking of any kind with it just bolting into the sides of the head unit.

    For the USB charger, I actually installed that exact one from Amazon. I removed one of the stock lighter sockets and cut away some of the plastic as the charger needs a slightly larger hole. For the wiring, it is connected to the daisy chain of pos and neg cables that jumps from each of my 8 aux push switches, then back to the blue sea fuse block.
     
    djm68 likes this.
  7. Jun 15, 2019 at 1:47 PM
    #7
    troopah43

    troopah43 Blood Taco

    Joined:
    Oct 29, 2015
    Member:
    #168119
    Messages:
    59
    Gender:
    Male
    First Name:
    Ben
    Ashland, OR
    Vehicle:
    Cheaply Built ‘05 DCSB SR5
    Toytec Boss CMC Chinese Light Bar (front & rear) Stereo Other cheap DIY mods
    Love this build! I think the 'sleepers' are pretty cool, I mean as much as I like light bars mounted to every surface and all...

    Side note: Do you have any detailed pictures of your bed storage? I've been looking at low profile ways to store everything and haven't found a great way without spending a lot of $$
     
  8. Jun 15, 2019 at 2:46 PM
    #8
    djm68

    djm68 Well-Known Member

    Joined:
    Feb 20, 2017
    Member:
    #211181
    Messages:
    74
    Gender:
    Male
    First Name:
    Dominic
    Redwood City, CA
    Vehicle:
    2012 TRD OR AC 4x4
    @Millsy Thanks a bunch for the addition info -- most appreciated.

    Cheers,
    DJM
     
    Millsy[QUOTED][OP] likes this.
  9. Jun 18, 2019 at 9:41 AM
    #9
    Millsy

    Millsy [OP] Sláinte

    Joined:
    Jun 11, 2018
    Member:
    #256083
    Messages:
    113
    Gender:
    Male
    Southern California
    Vehicle:
    Silver '13 DCSB 4x4
    @troopah43 Here are a couple photos of the bed box. The box contains a floor jack, tire iron, wood block, wheel chocks, large bolt cutters, small shovel, hatchet, jumper cables, recovery gear, tie downs, and basic tool box. I still have a good amount of space left over for more gear when I need it on a trip.

    tacoma_bedbox_01.jpg

    tacoma_bedbox_02.jpg
     
    Kuntrykid likes this.
  10. Jun 18, 2019 at 10:21 AM
    #10
    Millsy

    Millsy [OP] Sláinte

    Joined:
    Jun 11, 2018
    Member:
    #256083
    Messages:
    113
    Gender:
    Male
    Southern California
    Vehicle:
    Silver '13 DCSB 4x4
    Spent a few hours this weekend getting my air compressor permanently mounted. Was a bit of a pain in the ass to get it bolted down, but the end result is clean. Mounted the compressor to the top of the storage cubby so it sits between the bed and fender behind the tail light. Then ran the air line to a quick connect in the bed.

    compressor_01.jpg compressor_02.jpg compressor_03.jpg compressor_04.jpg compressor_05.jpg
     
  11. May 18, 2020 at 11:29 AM
    #11
    Millsy

    Millsy [OP] Sláinte

    Joined:
    Jun 11, 2018
    Member:
    #256083
    Messages:
    113
    Gender:
    Male
    Southern California
    Vehicle:
    Silver '13 DCSB 4x4
    This thread could use some updated love. I have done quite a bit of work/mods since last I posted:

    I went and built a dog platform for the rear of the double cab since my pup rides back there more than human passengers. I removed the stock storage bins to allow for more storage space for extra gear.

    dogplatform01.jpg
    dogplatform02.jpg dogplatform03.jpg

    I think she likes it!
    dogplatform04.jpg

    Not too long ago I replaced the strap on the vertical piece with some rubber hood latches I grabbed from Amazon.

    dogplatform05.jpg

    I was cleaning out the garage and stumbled upon a few items. One was a mounting kit for a mag-lite, that I mounted to the drivers seat.
    maglightmount01.jpg

    and the other was a clamp on exhaust tip. So far its held up and hides my butchered sawzall job.
    exhausttip01.jpg

    Some time went on and I decided to build a pressurized water tube and mount it to the bed side.
    watertube01.jpg

    It was nice addition...but then having to pull the compressor lines out to pressurize, and turning on the compressor got old real quick. I decided to change things up and add a 12v pump to it.
    waterpump01.jpg
    waterpump02.jpg

    I cut and modified the tube in order to attach a hose and added an on/off switch for the pump.
    waterpump04.jpg

    I picked up a cubby door and added a lock to it.
    waterpump06.jpg

    Hose and spray nozzle all locked up.
    waterpump07.jpg


    Because I added the 12v pump, I had to relocate my OBA Compressor as it was mounted above the cubby in the fender space. I figured nice and simple was the way to go. I had a spare ammo can lying around and mounted the compressor inside. The mounted the can to the bed rail.
    OBA02.jpg

    Then to keep honest people honest, I installed a can lock.
    OBA03.jpg


    A little ways down the time line I picked up a few items:

    A tailgate mount from Cali-Raised, for a new CB coax and antenna I ordered:
    cbmount01.jpg
    cbmount03.jpg
    cbmount05.jpg


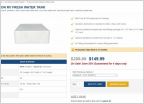
    A battery tray to secure my yellow top:
    batterytray01.jpg
    batterytray02.jpg


    And some Husky Floor mats for the front seats:
    husskymat01.jpg


    A few months go by then I ordered the Bed Cap Kit from KB Voodoo and man did that clean up the bed lines!
    voodoo01.jpg
    voodoo02.jpg
    voodoo03.jpg


    Shortly after I ordered an Add-A-Leaf and U-Bolt flip kit from Wheelers to get rid of the Bro-Lean. Now I need some new bump stops.
    wheelers01.jpg
    wheelers02.jpg

    Slight rake but it will settle.
    bend01.jpg


    And just recently I used a 3M kit to restore my headlights, which was much needed.
    Before:
    headlights_before.jpg

    After:
    headlights_after.jpg


    I also installed a usb extension for my phone to clean up power cables hanging on the console.
    usb01.jpg
    usb02.jpg

    And then installed some ABS to clean up the aux switches as well as a dimmable RGB LED strip to give some lighting to the console area at night.
    auxswitches01.jpg


    I got a few things ordered and waiting arrival, so I'll update this again once those are completed. Quarantine is getting boring/expensive.
     
    lo2hi, dpele and djm68 like this.
  12. Jul 28, 2021 at 10:56 AM
    #12
    Millsy

    Millsy [OP] Sláinte

    Joined:
    Jun 11, 2018
    Member:
    #256083
    Messages:
    113
    Gender:
    Male
    Southern California
    Vehicle:
    Silver '13 DCSB 4x4
    This thread could use some love...

    I was able to get quite a bit of work and modifications done to the truck during the pandemic.

    Soon after this thread's last update, my set of At The Helm bed stiffeners arrived and since I was working from home I had them installed the same day upon delivery.

    00_ATH01.jpg

    00_ATH02.jpg

    While I was at it installing the stiffeners, I finally got around to installing the rear diff breather mod (the parts had been sitting on my work bench for almost a year)
    01_Breather_01.jpg

    02_Breather_02.jpg


    With the pandemic giving me ample time to clean out the garage, I stumbled upon a shift knob still in the box (most likely for the Ranger, since I needed a thread adapter to use on the Tacoma) Feels pretty good compared to stock.

    Stock:
    03_ShiftKnob01.jpg

    Not Stock:
    04_ShiftKnob02.jpg


    A couple months go by, and after a day trip out to Anza with a buddy, my steering wheel had finally begun to deteriorate. I ordered a wrap off Amazon and spent a couple hours sewing it in place. The new wrap made a world of difference. I also painted the side panels black to eliminate the oem silver.
    05_SteeringWheelCover&Paint01.jpg


    Next on the modification list was a throttle controller. I went with a SpeedFrom Controller given the decent price point and overall good reviews. I am thoroughly satisfied with this modification. The truck now had solid acceleration and no bullshit electronic delay.
    06_ThrottleController01.jpg

    07_ThrottleController02.jpg


    I eventually got tired of the Cali Raised Fog Light Bracket and Pod and ordered a set of Diode Dynamics SS3 Sports to replace them. Luckily I kept the OEM fog housings and reinstalled them once the SS3's arrived.
    08_SS3FogLights01.jpg

    09_SS3FogLights02.jpg


    On the topic of light replacement...I've had these KC SlimLites for nearly 15 years on multiple vehicles and they are still going strong. I decided to replace the original Spot Reflectors with Spread Reflectors to open the light output more.

    Old Spot:
    16_SlimLite01.jpg

    New Spread:
    17_SlimLite02.jpg


    Later on I replace the OEM front bump stops with a set Energy Suspension ones.
    12_BumpStops01.jpg

    13_BumpStops02.jpg


    After a bit of time, I decided to work on improving the interior of the truck. I sound deadened the rear of the cab and began to install carpet over the matting. I had extra carpet left over from the dog platform.
    14_RearSoundDead01.jpg

    15_RearSoundDead02.jpg


    I also added a rubber mat that I cut to size for the dog platform to give my lab more comfort.
    10_RubberMat01.jpg

    11_RubberMat02.jpg

    I think she is happy with it!
    10.jpg


    Continuing with the interior work, I wanted to clean up the control console area. It was still bugging me having rushed the install of auxiliary switches. I picked up a new OEM console piece from my local dealership for a decent price.

    I then spent a good week taking my time with drilling, dremeling, wiring, soldering, and cable management to make the console as clean as possible. I installed a new USB/Voltmeter that showed red lighting, as well as a new 12v Plug (both being always hot...drove me nuts that the truck had to be on to use the outlets). I moved the OEM USB/Aux plugover and installed a dimmer knob to control interior red LED strips (One in each footwell, and one below the tech-deck)

    I installed the new console and properly labeled the switches.

    26_ControlConsole01.jpg

    27_ControlConsole02.jpg

    28_ControlConsole03.jpg

    The Control Center!
    29_ControlConsole04.jpg


    Moving on... I then installed a set of L-Tracks to the bed. You can never have too many tie down points.
    18_LTracks01.jpg
     
    lo2hi likes this.
  13. Jul 28, 2021 at 11:06 AM
    #13
    Millsy

    Millsy [OP] Sláinte

    Joined:
    Jun 11, 2018
    Member:
    #256083
    Messages:
    113
    Gender:
    Male
    Southern California
    Vehicle:
    Silver '13 DCSB 4x4
    This was a fun install! My wife surprised me with a 56qt fridge for valentines day!

    19_Fridge01.jpg

    Having a fridge for camping meant I now had an excuse to get solar!! and the wife did not object!

    I purchased a Victron MPPT Solar controller to install next to the battery. (I am not running a dual battery setup, just a single deep cell agm) and added a quick connect cable for the panels.
    21_SolarController01.jpg

    I then installed a fuse panel and 12V outlets in the rear of the cab.

    22_12VOutlets01.jpg

    Followed by securely mounting the fridge to the dog platform behind the driver seat.

    23_Fridge02.jpg

    Ordered a 100W Foldable Panel Kit, then put it to use on a group trip out to JT BLM. This setup did not skip a beat!
    24_SolarPanel01.jpg

    25_SolarPanel02.jpg
     
  14. Jul 28, 2021 at 11:22 AM
    #14
    Millsy

    Millsy [OP] Sláinte

    Joined:
    Jun 11, 2018
    Member:
    #256083
    Messages:
    113
    Gender:
    Male
    Southern California
    Vehicle:
    Silver '13 DCSB 4x4
    Over the weekend I installed a larger secondary fire extinguisher on a quick release mount.

    30_FireExtinguisher01.jpg

    And the Amazon emergency led lightbar I modified as a chase bar finally crapped out on me after 2 years. We had a spare trailer light box laying around the warehouse at work that I was allowed to take, so I ordered some LED trailer lights and put together new chase lights. The left amber is on its own switch, while the white and right amber are on another that's connected to a strobe controller. I like the old school/race truck/utility truck looks of it.
    31_ChaseLights01.jpg
     
    lo2hi likes this.
  15. Jul 28, 2021 at 11:36 AM
    #15
    Millsy

    Millsy [OP] Sláinte

    Joined:
    Jun 11, 2018
    Member:
    #256083
    Messages:
    113
    Gender:
    Male
    Southern California
    Vehicle:
    Silver '13 DCSB 4x4
    Here are some photos from pandemic trips.

    01.jpg

    02.jpg

    03.jpg

    04.jpg

    05.jpg

    06.jpg

    07.jpg

    08.jpg
     
  16. Mar 3, 2022 at 2:31 PM
    #16
    Millsy

    Millsy [OP] Sláinte

    Joined:
    Jun 11, 2018
    Member:
    #256083
    Messages:
    113
    Gender:
    Male
    Southern California
    Vehicle:
    Silver '13 DCSB 4x4
    Some more projects completed/WIP.

    Cut the back panel of the dog platform into a 60/40 split to give better access to items stored behind it when I have my fridge installed behind the drivers set.

    20220118_083632.jpg

    20220118_083702.jpg

    Then added 2 more hinges to give more stability and replaced all the chrome screws with black ones.

    20220223_091401.jpg


    Bought a flush mount plug extender for the solar set up. Installed the plug into the nfab lightbar to give easy access when plugging in the solar panels.

    20220227_124715.jpg

    20220303_112717.jpg


    Decided I wanted to redo my On Board Water set up:

    I bought a compressor box to replace the oem cubby that was currently housing the 12v water pump and hose/sprayer. The box allowed for more internal storage room which is what I was wanting as the oem cubby was at it's limit.

    I ordered a selectable valve to toss in the water line. This allows me to pull water form the DIY solar shower tube, or an external water source like my scepter can.

    20220223_140336.jpg

    Installed a quick release to the out-port of the pump and the hose.

    20220303_120000.jpg

    20220303_120113.jpg

    20220303_120152.jpg

    Just need to swap the latches with locking ones.

    20220303_120219.jpg
     
    lo2hi likes this.
  17. Mar 6, 2022 at 6:24 AM
    #17
    demo243

    demo243 Well-Known Member

    Joined:
    Dec 23, 2011
    Member:
    #69298
    Messages:
    661
    Gender:
    Male
    First Name:
    Devon
    Topsfield MA
    Vehicle:
    2015 DCLB TRD 4x4
    Dig your build!

    Maybe I missed it… but what box did you use for your AUX fuse panel? Thinking about redoing mine and would love to enclose it away from all the dust in the engine bay.
     
  18. Mar 6, 2022 at 11:02 AM
    #18
    Millsy

    Millsy [OP] Sláinte

    Joined:
    Jun 11, 2018
    Member:
    #256083
    Messages:
    113
    Gender:
    Male
    Southern California
    Vehicle:
    Silver '13 DCSB 4x4
  19. Mar 6, 2022 at 1:54 PM
    #19
    demo243

    demo243 Well-Known Member

    Joined:
    Dec 23, 2011
    Member:
    #69298
    Messages:
    661
    Gender:
    Male
    First Name:
    Devon
    Topsfield MA
    Vehicle:
    2015 DCLB TRD 4x4
    awesome! Just what I needed! was planning on redoing my set up to add a few more fuses and I think I’m going to go this route. It will let me clean everything up, move the relays inside, and just make everything more accessible. Thinking I might add a quick disconnect bulk head plug too it too to make for quick easy removal of the panel for future wiring.

    thanks!
     
    Millsy[QUOTED][OP] likes this.
  20. Mar 24, 2022 at 2:57 PM
    #20
    Millsy

    Millsy [OP] Sláinte

    Joined:
    Jun 11, 2018
    Member:
    #256083
    Messages:
    113
    Gender:
    Male
    Southern California
    Vehicle:
    Silver '13 DCSB 4x4
    I've been working on the rear suspension getting it dialed in. Ordered a set of Icon RTX's in December of 2021, picked them up locally in late February 2022, and found time earlier this month to install them.

    Currently have them set to Stage 1 configuration:

    20220303_155812.jpg

    20220317_122244.jpg

    After getting them installed, the OEM bumps were an eye sore so I ordered a set of Wheelers Super Bumps to replace them.

    Old:
    20220324_132210.jpg

    New:
    20220324_132723.jpg


    I also rerouted the air intake to a front scoop to make room for my compressor that I'm planning on relocating, yet again, to the engine bay. My plan is to tuck a quick connect on the inside of the nfab mounting bar.

    20220303_113034.jpg

    20220303_113009.jpg
     
To Top