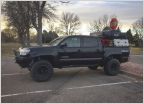
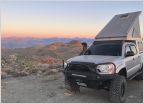
1. Welcome to Tacoma World!

    You are currently viewing as a guest! To get full-access, you need to register for a FREE account.

    As a registered member, you’ll be able to:
    • Participate in all Tacoma discussion topics
    • Communicate privately with other Tacoma owners from around the world
    • Post your own photos in our Members Gallery
    • Access all special features of the site

My 2008 Tacoma DC Off Road Build

Discussion in '2nd Gen. Builds (2005-2015)' started by colenaymark, May 13, 2016.

  1. May 13, 2016 at 1:24 PM
    #1
    colenaymark

    colenaymark [OP] Well-Known Member

    Joined:
    Jan 5, 2016
    Member:
    #174088
    Messages:
    79
    Gender:
    Male
    First Name:
    Cole
    Vehicle:
    08 Tacoma
    Hi Folks,

    I wanted to keep good documentation of this build. I learned many interesting things about accomplishing this (as I did 99% of the work) and I wanted to share this so people didn't have to go searching for hours on end as I did. In addition, should someone see this in the future, please feel free to text or call if you have a specific build question, or if you're asking for where to send the beer to. PS, at the bottom of the tread will be a slide show with full resolution pictures on my Flickr account and links to everything I've bought for parts!!!.

    Enjoy,
    Cole 612-327-3714

    I bought this truck stock (Off Road Model) w/ BFG KO 265 tires on it. Hm, mudflaps, NOPE, those went into the trash when I got home. The stock radio had to go:

    thread avatar you skeezy bitches ;)
    [​IMG]

    At the dealer:
    [​IMG]

    Radio before
    [​IMG]

    Radio After
    [​IMG]

    I took the sub out of my Subaru, which I had made the box (original box listed in above parts list) to fit in the wheel well, so I had to chop it a little further to make it fit behind the seat but, it fit and sounds great, Wired in an inexpensive amp to match the sub

    [​IMG]

    [​IMG]

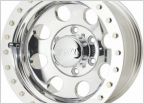
    After, the stock rims had to go. I read about what would work best with lifting the truck as that was the end goal. Many people pointed out additional back spacing (offset) was indeed beneficial for a lift. The stock offset is +30mm for second gen Tacomas. From forums, I had gathered the ideal rim offset was ~0.0mm. I went with a rim that was -6.0mm and it seemed to be good for about 0.5" of tire showing or extending past the fenders. Here's a link to some basic understanding of offset if you need:

    http://www.tirerack.com/wheels/tech/techpage.jsp?techid=101

    [​IMG]

    I had the front windows tinted close the rear which was factory tint (see end picture). Next my decisions were really based on cash flow and how much time I wanted to spend under a truck dripping snow. So I decided to install the winch. I went with a bumper carrier, 10k winch with synthetic rope to keep limbs intact and a remote option. The package was great as it came with shackels, remote, and a well fitted winch to the bumper tray.

    You have to cut off one tow hook, forgot to grab the grinder from work and took 10 minutes with my dremel instead.

    [​IMG]

    [​IMG]

    [​IMG]

    [​IMG]

    wiring in the wireless remote, silicon and hot glue are your water proofing friends
    [​IMG]

    [​IMG]

    Next, and as you could probably see from standing next to the wall I decided to do the rock sliders. I liked the rear bumpout look and aspect of protection so I went with some pretty basic stuff. They arrived in MANY pieces. I was suspecting this would be the case so made for a solid 6 hours of welding. Didn't take a ton of process photos but I'm very happy with the quality and durability. Originally I painted them black, bad idea...it wears off quickly and looks like shit. I went and got a urethane bed coating from Napa. MAKE SURE YOU GET SOMETHING WITH URETHANE if you do this. If not it will flake off.

    Prepping rock sliders
    [​IMG]

    [​IMG]

    finished with paint
    [​IMG]

    refinished with polyurethane dupli-color bed liner
    [​IMG]

    [​IMG]

    Note, on the rock slider install, make sure you have good door clearance and I would say a minimum of 0.25" of clearance from the rock slider stand offs to the body rails to avoid road noise and vibrations.

    Next I wanted to ensure my overland activities weren't impeded by lack of battery power, that's power to run accessories and the winch. I researched this to great depth. Originally I was going to go with a large isolator. The main problem with this is that you need to charge your batteries at different rates IF...IF you have two different types of batteries. If you are running two of the same batteries, you may be able to get away with an isolator only. I went with an AGM cell battery and the National Luna charging system to partition the charging. In addition, it allows for bridging the batteries in several modes so it is an attractive clean system. I also fabricated a solid steel plate, with a cheap plastic battery tray on top and a rubber strap to hold the battery in place. It's not moving...seriously...

    [​IMG]

    [​IMG]

    [​IMG]

    controller for battery charging
    [​IMG]

    I installed a Dnyomax exhaust. Really liked it, it was a quick install and added a silencer section to quiet it up. See the links at the bottom for both parts.

    Now it was time for some fuel tank protection. I went with an aluminum skid plate for weight and durability to the elements. Very quick bolt on -

    [​IMG]

    Now it was time for the suspension. There are a lot of companies that provide packages out there. Tracy at AllPro was very nice and great a contacting me with updates but they had many issues with their supply chain so I sourced everything independently from either Toytec or Amazon. It was a pretty good combo all said and done. I went with the Fox long travel suspension, 2.5 coilovers in front with standard shocks in the rear. Dakar 2.5" lift springs, Total Chaos upper control arms, Toytec brake lines, Toytech flip bolts and plates, Toytec Axle shims, Old Man Emu center bearing carrier for the drive shaft drop spacers, Fox swaybar spacers, and Toytec polyurethane flipped bump stops in the rear.

    The front is pretty straight forward but here are some tips. Measure your driveline transmission angles before you start...

    vertical transfer case machine face to front drive shaft
    vertical transfer case machine face to rear drive shaft
    rear pinion flat surface to rear shaft

    Now back to the front suspension. Only back off the locking bolt on the shock spring collar just enough to where it feels like you could turn it with ease. If you pull it out, the spring collar will jump threads with enough spring tension. I used two 7mm allen hex sockets (3/8" drive) with an 8" socket extension to turn the collars to increase spring preload (with WD40). The sockets fit perfectly in the preload collar holes. When you pull out the UCA bolt that's 14" long out, you'll need to bend back the inner fender sheet metal. I used a big fu*king crescent wrench to basically crank the sheet metal away from the head of the bolt...pretty easy after that.

    stock
    [​IMG]

    mmm, shocks
    [​IMG]

    good thing I'm not married
    [​IMG]

    ridiculous control arm bolt
    [​IMG]

    happy..
    [​IMG]

    I set the preload via a guess at where I thought may be close to 3" of lift. Drove it for a week to let it settle and reset the preload once the suspension was broken in a bit. Turns out there is more corner weight on the front drivers side of the vehicle

    For the rear, and this is why I said take measurements...Every vehicle will be slightly different but the steeper your transmission angles are in the driveline, the more quickly you'll wear out your yolk joints in the driveline. Think of trying to turn a socket with a u-joint extension at 90 degrees of a bolt head...SUPER hard to get the proper torque you need. I used 4 degree axle shims with my leaf spring install to get the pinion back to +1 degree of where my original measurements were. My driveline is not perfectly aligned as it was from factory but it is very close and I don't have any driving vibrations (also why I installed the carrier bearing drop spacers). I had to use additional washers on the drop bearing to ensure the proper drive shaft angle.

    my chicken scratch driveline measurements
    [​IMG]

    actual measurements (used an inexpensive angle finder from Harbor Freight)
    [​IMG]

    [​IMG]

    center carrier drop
    [​IMG]

    because I'm basically as mature as an 18 year old boy
    [​IMG]

    [​IMG]

    The shims come with bolt spacers so you still pilot correctly on the axle. Use a clamp to hold the springs together before you pull the center bolt out to insert the spacer. You may have to use your feet to kick the axle back into place.

    [​IMG]

    bump stops required drilling a hold in the upper frame pot
    [​IMG]

    steel brake line extensions (of course you'll have to bleed the brakes after)
    [​IMG]

    omg, are we done yet? We'll throw this in since my friend took it...that dick
    [​IMG]

    Okay, so, suspension done, winch done, rock sliders and fuel tank slider done, Oh, yeah, when you do your sway bar relocation, just remove your front skid plates and life will be easier. I had Firestone do a lifetime alignment on the front end. Not all locations will do it but if you call around you should be able to find someone to help you. It will be worth it after you off road a few times.

    Now I had RSG do the body mount chop to give more clearance for the 285 tires I put on. This isn't my truck but they did a great job and sent me a few photos of a 2013 Tacoma they chopped

    process:
    [​IMG]

    end (they did a fantastic job)
    [​IMG]


    Last thing I did was put in t-slot nuts into my bed rails with rubber straps (you'll need 3/8" bolts for them) to hold my highlift jack, my axe and my shovel. Here is a picture but again, the parts are in the list above

    [​IMG]

    So, that's pretty much it, hopefully this didn't drag on too much. Here are the end pictures and slide show to the full side pictures as well,
    Thanks
    Cole

    [​IMG]

    [​IMG]

    also used the bed liner on my pitted chrome bumper, pretty happy (Also got 285s instead of the 265s and upgraded to the KO2 BFG Tires)
    [​IMG]

    headed to Moab, otherwise the tire stays under the truck
    [​IMG]

    tool holders
    [​IMG]

    Slide Show/link to album
    https://flic.kr/s/aHskwu6Z24

    planet audio head unit with double din faceplate. Great bluetooth unit for the money, don't have andriod integration (although it connects to android just fine) it won't show things like texts or the name of who's calling
    http://www.amazon.com/Planet-Audio-...&redirect=true&ref_=oh_aui_detailpage_o09_s00

    Amp, get's it done, remote level adjustment. No cons
    http://www.amazon.com/JENSEN-POWERP...&redirect=true&ref_=oh_aui_detailpage_o05_s00

    Faceplate adapter
    http://www.amazon.com/Metra-95-8214...&redirect=true&ref_=oh_aui_detailpage_o09_s00

    wiring kit for audio
    http://www.amazon.com/Audio-Amplifi...&redirect=true&ref_=oh_aui_detailpage_o09_s00

    audiobahn 10" sub
    http://www.amazon.com/Audiobahn-10-...169854&sr=8-8&keywords=audiobahn+10+subwoofer

    Box Subwoofer
    http://www.amazon.com/Atrend-E10St-10-Inch-Single-Sealed-Enclosure/dp/B0013MYXD4/ref=sr_1_9?ie=UTF8&qid=1463169894&sr=8-9&keywords=10"+subwoofer+box

    floor mats (really like these actually!!!)
    http://www.amazon.com/Genuine-Toyot...&redirect=true&ref_=oh_aui_detailpage_o08_s00

    oh shit handle ram ball for phone mount
    http://www.amazon.com/Ram-Mount-Mot...&redirect=true&ref_=oh_aui_detailpage_o02_s00

    phone mount
    http://www.amazon.com/Cradle-Holder...&redirect=true&ref_=oh_aui_detailpage_o03_s00

    ram extension
    http://www.amazon.com/Mount-Double-...&redirect=true&ref_=oh_aui_detailpage_o02_s00

    Bed t-slot nuts (you need 3/8" bolts for this)
    http://www.amazon.com/T-Slot-Finish...&redirect=true&ref_=oh_aui_detailpage_o08_s00

    Tool/accessory holders
    http://www.amazon.com/Original-Quick-Fist®-mounting-equipment/dp/B000CQPANY?ie=UTF8&psc=1&redirect=true&ref_=oh_aui_detailpage_o07_s00

    http://www.amazon.com/Quick-Fist®-Clamp-mounting-equipment/dp/B003TUBTSA?ie=UTF8&psc=1&redirect=true&ref_=oh_aui_detailpage_o07_s00

    Old Man EMU Carrier Bearing Drop kit
    http://www.amazon.com/ARB-FK29-Old-...&redirect=true&ref_=oh_aui_detailpage_o01_s00

    Fox 2.0 long travel rear shocks PN980-24-675
    http://www.amazon.com/Fox-Racing-Sh...&redirect=true&ref_=oh_aui_detailpage_o02_s00

    Fox 2.5 Shocks PN883-02-025
    http://toyteclifts.3dcartstores.com...for-2005-Tacoma-07-FJ-03-4Runner-_p_1483.html

    Total Chaos UCA
    http://toyteclifts.3dcartstores.com/Total-Chaos-UCAs-05-Tacoma-07-FJ-Cruiser-03-4Runner_p_1009.html

    U bolt flip kit
    http://toyteclifts.3dcartstores.com/Ubolt-Flip-Kit-05-Tacoma_p_389.html

    bump stops
    http://toyteclifts.3dcartstores.com/99109G--Energy-Suspension-25-Bump-Stops_p_1457.html

    Rear brake lines
    http://toyteclifts.3dcartstores.com...Steel-Brake-Lines-for-05-UP-Tacoma_p_296.html

    Axle Shims (I needed 4 degrees)
    http://toyteclifts.3dcartstores.com/Zinc-Rear-Axle-Shims_p_273.html

    Rear Old Man Emu Dakar Spings
    http://toyteclifts.3dcartstores.com/OME-Rear-leaf-springs-2005-Tacoma-SET_p_18.html

    Rims MB 352 -6 offset
    http://www.discounttire.com/dtcs/wheels/mb_wheels/product/submitProductSize.do?r=CODINT|pc|80210&pc=16987

    Tires (got rid of the 265s for 285s):
    http://www.4wheelparts.com/Tires/LT...aspx?t_c=13&t_s=536&t_pt=101509&t_pn=BFG05855

    US Off Road Winch/Bumper carrier combo
    https://www.usoffroad.us/store/bump...1-tacoma-bumper-engo-10k-winch-shackle-combo/

    RCI skid plate fuel tank (super cool guys)
    http://www.rcimetalworks.com/05-15-Tacoma-Fuel-Tank-Skid-Plate-TACO-05-13-04.htm

    Rock sliders (just went with the standard HREW w/kickout)
    http://www.4xinnovations.com/2005--2016-Dbl-Cab-Shrt-Bed-Tacoma-Rock-Slider_p_74.html

    National Luna Charging system
    http://www.equipt1.com/item/dual-battery-system-kit-with-surface-mount-controller

    Second Battery
    https://www.batteriesplus.com/battery/car-and-truck/toyota/tacoma/2008/v6-4.0l-585cca/sli24fagmdp

    These guys did the body mount chop, did a great job!
    http://www.rsgoffroad.com/

    Bed liner used for rock rails and rear bumper:
    http://www.autobodytoolmart.com/dup...sgktgJgbn7zO4HjloHCAervAk9mVE57mvEaApxY8P8HAQ

    dynomax exhaust
    http://www.amazon.com/Dynomax-39447-Stainless-Exhaust-System/dp/B00503PRVO

    silencer (only used 1 of the 3 sections)
    http://www.summitracing.com/parts/cci-3di25r

    Firestone Lifetime Alignment (lifetime cost me $180)
    http://www.firestonecompleteautocare.com/repair/alignment.jsp
     
    Last edited: May 19, 2016
  2. May 16, 2016 at 7:51 AM
    #2
    colenaymark

    colenaymark [OP] Well-Known Member

    Joined:
    Jan 5, 2016
    Member:
    #174088
    Messages:
    79
    Gender:
    Male
    First Name:
    Cole
    Vehicle:
    08 Tacoma
    Just some short video from my Moab trip this weekend

    Hell's Revenge and Hell's Gate

    <iframe width="560" height="315" src="https://www.youtube.com/embed/ZWbSB1t6Fl8" frameborder="0" allowfullscreen></iframe>
     
  3. May 19, 2016 at 2:00 PM
    #3
    colenaymark

    colenaymark [OP] Well-Known Member

    Joined:
    Jan 5, 2016
    Member:
    #174088
    Messages:
    79
    Gender:
    Male
    First Name:
    Cole
    Vehicle:
    08 Tacoma
    Damn, thought someone might be interested in this...hah...just another taco build...I need to start putting a picture of a chick at the top for the post avatar
     
    Christopherseren likes this.
  4. May 19, 2016 at 2:16 PM
    #4
    Red Baron

    Red Baron Let's call it livabetes, no more die

    Joined:
    Nov 11, 2014
    Member:
    #142111
    Messages:
    5,697
    Gender:
    Male
    First Name:
    Aaron
    Lost on a roundabout
    Vehicle:
    07 Radiant Red DCSB
    Things with metal, dog hair, more metal and lights
    Damn man you have been busy, good build so far.
     
  5. May 19, 2016 at 3:23 PM
    #5
    Capt. Obvious

    Capt. Obvious Fearless Keyboard Warrior

    Joined:
    Aug 4, 2014
    Member:
    #135396
    Messages:
    1,637
    Gender:
    Male
    First Name:
    Darrick
    Gig Harbor
    Vehicle:
    '12 DCLB TRD
    6" body lift, LEDs errwhere, Jesus mural on the hood
    Looks great. It's like a short bed version of my truck. :)
     
  6. May 19, 2016 at 3:27 PM
    #6
    ChadsPride

    ChadsPride Tacoma Owner & Enthusiast

    Joined:
    Nov 26, 2014
    Member:
    #143119
    Messages:
    127,315
    Vehicle:
    Sponsored by TacomaWorld.com
    Sweetness :thumbsup:
     

Products Discussed in

To Top