1. Welcome to Tacoma World!

    You are currently viewing as a guest! To get full-access, you need to register for a FREE account.

    As a registered member, you’ll be able to:
    • Participate in all Tacoma discussion topics
    • Communicate privately with other Tacoma owners from around the world
    • Post your own photos in our Members Gallery
    • Access all special features of the site

My brand new...antique???

Discussion in '1st Gen. Builds (1995-2004)' started by Obsessed2000, Mar 14, 2016.

  1. Mar 14, 2016 at 2:04 AM
    #1
    Obsessed2000

    Obsessed2000 [OP] Just a big dummy

    Joined:
    Mar 7, 2016
    Member:
    #180533
    Messages:
    368
    Gender:
    Male
    First Name:
    John
    NC/VA line
    Vehicle:
    2000 SR5 4x4 3.4
    Deck plate mod Bilsteins All pro leaf springs All pro greasable shackles Camburg UCA Interior Led conversion Tundra TRD springs Extended SS brake lines Seat covers 33" yokos White herculined exterior
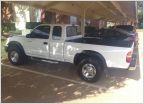
    Well on Friday I found a guy selling his 1996 Tacoma. He had a lower ball joint break on her about two years ago and has had it sitting ever since. But since it is a Tacoma we jumped her and she started up with zero hesitation. The body has about 340,00 miles on it but the 3.4 engine only has approx 90,000. He was going to begin parting it out so I made an offer so that I could keep her alive. I have intentions of driving her for a short time but to ultimately resell to another Tacoma enthusiast.

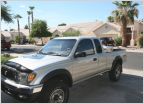
    How she sits now

    IMG_4833_zps3dzjwggj_e4cef790ffb150ff9753b775c05053e30e9696ac.jpg


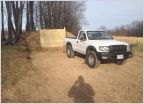
    The day I got her (12MAR2016)

    IMG_4499_zpsmujvd8xw_99037505e1d0b1fb6280763977a59c7318e011f9.jpg IMG_4502_zpsdedsvt6b_d8fc5fefccbf3fa24481dd2a505c4381b0075a9a.jpg IMG_4500_zpswkzrls5s_51d3c91c1daa888348507c4afc827e000189e623.jpg IMG_4501_zps3qlx6lut_175df10a25da97eb2bc8876a98122b0062cc1b17.jpg IMG_4503_zpsserqxzgr_de358a17902cf12d533ae8cc9a586939147e7c6e.jpg IMG_4505_zpszcdz3nuc_848af339ee883928c478dee34bdc1c13227ea469.jpg IMG_4504_zps36amvsru_4b09011f658e3db487f052eec13cec3ac6e9d7b4.jpg IMG_4506_zpsuqxomaqz_5db8c2ae3af11622d2b94f8c42d8039d740edf23.jpg IMG_4507_zpsjqexnjjx_ba38aa190a6a368a52485111a216264629237865.jpg


    Specs:

    • 1996 4X4
    • 3.4L V6
    • Automatic Tranny
    • Current Mileage: 340,000 body and 90,000 on the engine (MAR2016)

    Suspension:

    • Rancho shocks and struts
    • Revtek 2" spacer in the front
    • Homemade leaf springs

    Armor/Recovery:

    • I was happy when I finally found factory skids for less than $100.

    Wheels/Tires:
    • Newer Tacoma rims bedlined and color matched Toyota emblems
    • 33" tires

    Exterior:
    • Bedlined with Monstaliner (Midnight Special)

    Interior:

    • Almost clean
     
    Last edited: Nov 20, 2016
    Plain Jane Taco and Speedytech7 like this.
  2. Mar 14, 2016 at 2:13 AM
    #2
    Theloraxcross

    Theloraxcross "He's Got the Crazy Eye"

    Joined:
    May 4, 2013
    Member:
    #103459
    Messages:
    1,206
    Gender:
    Male
    First Name:
    Joseph
    San Angelo Tx
    Vehicle:
    08 AC TRD OR
    Wow. Always nice to see someone willing to put some effort into what's still a great truck.
     
  3. Mar 14, 2016 at 2:14 AM
    #3
    Obsessed2000

    Obsessed2000 [OP] Just a big dummy

    Joined:
    Mar 7, 2016
    Member:
    #180533
    Messages:
    368
    Gender:
    Male
    First Name:
    John
    NC/VA line
    Vehicle:
    2000 SR5 4x4 3.4
    Deck plate mod Bilsteins All pro leaf springs All pro greasable shackles Camburg UCA Interior Led conversion Tundra TRD springs Extended SS brake lines Seat covers 33" yokos White herculined exterior
    So when she dropped luckily it was in a parking lot but in the process it popped both ball joints out leaving them in the LCA and UCA. Who knows where the steering knuckle landed, the brake lines got ripped out, the CV axle split down the middle, and the inner tie rod snapped right off leaving a little of it on the rack still.

    And for 20 yrs old the frame ain't all that bad.

    The rack appears to still be good with no play. So I'm going over to check out a parts 1998 4Runner that's totaled later today. I'll be grabbing the steering knuckle, CV, and maybe a set of stock skids and the inserts that go under the headlights.

    In addition I've ordered the entire front end suspension (inners and outers, ball joints for UCA and LCA, some Monroe shocks for all four corners, and I got a set of springs in the garage off my other truck that I'm gonna stick on there)

    Also got some brakes coming and everything needed for a good tune up. Denso spark plugs, tranny filter, thermostat and such.

    I'm going to attempt to take as many pics during this build to hopefully help anyone out that doesn't find the tutorials in the other 18 spots there located.:thumbsup:

    Let me know what you guys think please and I'm up for any suggestions you can throw my way!!!!
     
  4. Mar 14, 2016 at 2:18 AM
    #4
    Obsessed2000

    Obsessed2000 [OP] Just a big dummy

    Joined:
    Mar 7, 2016
    Member:
    #180533
    Messages:
    368
    Gender:
    Male
    First Name:
    John
    NC/VA line
    Vehicle:
    2000 SR5 4x4 3.4
    Deck plate mod Bilsteins All pro leaf springs All pro greasable shackles Camburg UCA Interior Led conversion Tundra TRD springs Extended SS brake lines Seat covers 33" yokos White herculined exterior
    Thanks!!! Its also to help me stop doing pointless things to my other Taco. Wife was starting to get wise to random little things "breaking". I'm thinking about doing the Herculiner on this one too once I get the fender and rocker panel straight. Going with a dark blue for the truck and lighter/brighter blue for all the suspension parts I redo.
     
  5. Mar 14, 2016 at 2:21 AM
    #5
    Theloraxcross

    Theloraxcross "He's Got the Crazy Eye"

    Joined:
    May 4, 2013
    Member:
    #103459
    Messages:
    1,206
    Gender:
    Male
    First Name:
    Joseph
    San Angelo Tx
    Vehicle:
    08 AC TRD OR
  6. Mar 14, 2016 at 2:25 AM
    #6
    Obsessed2000

    Obsessed2000 [OP] Just a big dummy

    Joined:
    Mar 7, 2016
    Member:
    #180533
    Messages:
    368
    Gender:
    Male
    First Name:
    John
    NC/VA line
    Vehicle:
    2000 SR5 4x4 3.4
    Deck plate mod Bilsteins All pro leaf springs All pro greasable shackles Camburg UCA Interior Led conversion Tundra TRD springs Extended SS brake lines Seat covers 33" yokos White herculined exterior
    Also just came across a guy selling some 4.10 gears for dirt cheap with ubolts, SS brake lines and a couple other goodies. Come to find out this truck is geared at 3.91. Its not a huge jump but for the price I think it will be worth it.
     
  7. Mar 17, 2016 at 1:16 AM
    #7
    Obsessed2000

    Obsessed2000 [OP] Just a big dummy

    Joined:
    Mar 7, 2016
    Member:
    #180533
    Messages:
    368
    Gender:
    Male
    First Name:
    John
    NC/VA line
    Vehicle:
    2000 SR5 4x4 3.4
    Deck plate mod Bilsteins All pro leaf springs All pro greasable shackles Camburg UCA Interior Led conversion Tundra TRD springs Extended SS brake lines Seat covers 33" yokos White herculined exterior
    So the last week I've been calling around to everyone in my area trying to find me a steering knuckle for a decent deal. Come to find out there not as common as I thought they'd be.

    IMG_4536_zpskajcxlto_1fdbe9012a2355e5cb90d673006589703c105fc4.jpg
    The one on top is a good knuckle with a bad CV and the other one is a good CV with a bad knuckle. The hardest thing at the moment is getting the CV disconnected because its not connected to anything. The guy also threw in a decent set of skid plates for free seeing that the truck didn't come with any sadly.
    IMG_4537_zps5qe5kyne_084097ecc865b2dd6d4ec511d26d85605ac8151e.jpg

    IMG_4515_zpssweytqme_aeecae82efd037bf864922196f0bcc02b60def34.jpg

    I finally had time to start pulling everything apart. So I started with taking off the wheel/tire.
    IMG_45162%20copy_zpsn5jvrgzv_6585173e2099bee89388a2438c7c50d4cb89e712.jpg
    Now I'm trying to disconnect everything including the CV axle so to do so you need to remove the dust plate. All I did was use a flat head and tapped it all the way around and did a little prying. Its no big deal if you end up bending it a little it bends right back.
    IMG_4518_zpsr7wob3jy_0046c0d07c0f0d021e7966b89aeb5e8fb8e75120.jpg
    With the dust plate removed now all you need to do is take out the cotter pin and the green plate/nut/I have no idea what it is.
    IMG_4519_zpsa8ziprke_cf5141a211759bbefe2b9878a881b2788843df8c.jpg
    The nut in there is torqued to something crazy (like 173 ft lbs if I remember or maybe 137...don't quote me, I'll specify when I put her back together) so its recommended to put the wheel back on and apply the weight of the truck so you can break it. It's a 34mm bolt but I was able to get it off with zero issues using a 35mm which is easier to find at the auto store.

    IMG_4521%20copy_zps45dbysox_92e14e6a58fb5ba711bc1eecd328f4b546dd7df2.jpg IMG_4522_zpsyb1yswyi_7f0185fa979c0fe2cbd9e9c4c408c0bddfce339c.jpg
    I'm removing the brake caliper so something I learned is to put a plastic bag under the lid of your master brake cylinder lid to create a suction. Green arrow above shows where this is.
    IMG_4520%20copy_zpsh84y8ojm_1589b11fcb1c45bbb92a851146ad18af8c95082f.jpg IMG_4523_zpsjw8n9egn_5b6e0a0d37c3f621fb636e3e2b37ce29b2345b66.jpg

    To take off the caliper disconnect the brake line (Blue arrow) this will start to spill fluid so be ready with a shop towel and rubber band and just tuck it away up high. the remove the two bolts (green arrows) you can't see the top one in the pic but you get the idea. Then use a rubber mallet and knock the caliper off along with the rotor.

    Now at this point I did not take a picture of every bolt I took off, but off the top of my head you need to remove the following:

    IMG_4524%20copy_zps53tvjwrq_def23d23e81b199750e94a379ac0d66b3dc52551.jpg

    • lower ball joint castle nut (Lime green arrow)
    • tie rod from the steering knuckle (Blue arrow)
    • 4 bolts in the bottom of the lower ball joint (Dark green arrow)
    • remove the nut from the bolt hold the strut/shock to the LCA (Yellow arrow)
    • disconnect the brake line from the steering knuckle (Purple arrow)
    • castle nut on the upper ball joint
    • three bolts at the top of the shock assembly (not the one in the center though, that will be for later)
    • two bolts holding the brake caliper in
    • disconnect the sway bar, or remove entirely (this is important if your removing the CV axle, other wise it gets in the way)
    • tap the CV axle to with a socket and hammer to pop it loose and use a pry bar to pull it out where it connects the diff (its already taken out in the pic)
    • I'm sure I missed something but this will give you a good idea
    I'd highly suggest loosening all bolts before you start removing anything entirely. Once you start taking things off you might not be able to get the same leverage as you did before.

    IMG_4526_zpsxtjcjsh2_2df4f70c506251d66622d803520f59cf6ba8385f.jpg

    I will be replacing all my ball joints and tie rods so disconnect the items I use these two awesome tools. But if your reusing these items find a more gentle tool. This thing tears up the boots to all hell.

    For fun I'm also removing my UCA's to replace bushings and refinish the metal. To do so you need to remove the stock air intake like so.
    IMG_4527_zpslmgm6euo_9697274b6861ced6ab34910d1aa2e1947ff180c1.jpg IMG_4528%20copy_zpsxhprx1fa_9d487397aa88a06f124a6a4f565dcbfa8ce4849b.jpg
    Remove these three bolts.
    IMG_4529%20copy_zpselnphdng_8a7792d5b9f6361301bef6272361c29c76e48506.jpg
    Along with all the hoses and MAF wire.
    IMG_4532_zpsdcavwsuq_3c296231de672db5d7a64fad0ae0156a9f192ac8.jpg
    Then you need to bend the metal I'm showing here towards you to allow the nut of the UCA to pass by. I used just a set of pliers.
    IMG_4530%20copy_zpsegs4jext_6ca82ebd9b5150d38a41617df19b5c82ceaffc2b.jpg
    The UCA is held in by a single big ass bolt (I didn't know this back when I tried this on my other truck) so all you need to do is remove the nut and pull it out through the engine bay. Id recommend already disconnecting the ball joint from the UCA but mine is stuck pretty good so I'm SOL.

    IMG_4538_zpsrvmbkdzd_3a31ede900f85c74783ee3ce567fa6a8624d25a6.jpg
    Now its time to disconnect the steering knuckle from the UCA and I used this combination which are pars from the set that you rent from Advance Auto Parts.
    IMG_4541_zpsikcsvjuy_7bb68311284b9eed1096f8e180fd47765bb6fb0a.jpg
    Its ugly but it worked.
    IMG_4544_zpswvfvzdfg_4bd15cda2a75b2cbe6b2880628ebbcd49b432128.jpg
    This is the combination that worked for me to remove the ball joint. I used the 35mm socket from earlier.
    IMG_4543_zpsihhwwm1h_c1d5b2bdf32ee3b601bea953bdbd519ff4885d49.jpg
    IMG_4545_zpsqcvqj2ti_3614b473ece9ef7b054886c8c499a6b5e1383baf.jpg
    This is the same socket I used to remove the CV axle nut.
    IMG_4546_zpsroqqhqkq_0c70b622db8449840b6f24c7638131e1a023ebb1.jpg
    Once I got it to the point where I couldn't crank the breaker bar anymore, I used my best buddy here to wack the shit out of the end next to it in the pic there to knock it out the rest of the way.

    EDIT:
    When removing the Upper ball joint from the knuckle there is a retaining clip. You can try to use needle noses or buy some fancy tool. All I did was wedge a small screw driver under the opening and push it up. Followed up by using a larger flat head to go around it till it went flying away somewhere in the garage. Also tried to be all fancy with this one and use the ball joint press...got pissed b/c it wasn't working and whacked the hell out it with my favorite hammer till she popped out of there.
    IMG_4581_zps42jjrd4p_9723012c74952c9919409732e227ade27aec772e.jpg


    And that's about as far as I got today/tonight. I need to figure out how I'm going to get the CV's off the knuckle of the other two I got. If anyone has suggestions let me know....that is if honestly I'm not just talking to myself right now...:boink::sadviolin::help:
     
    Last edited: Mar 22, 2016
    Theloraxcross likes this.
  8. Mar 18, 2016 at 12:05 AM
    #8
    Theloraxcross

    Theloraxcross "He's Got the Crazy Eye"

    Joined:
    May 4, 2013
    Member:
    #103459
    Messages:
    1,206
    Gender:
    Male
    First Name:
    Joseph
    San Angelo Tx
    Vehicle:
    08 AC TRD OR
    Man your write-ups are better than a Chilton Manual. Kudos
     
    Dalandser likes this.
  9. Mar 18, 2016 at 1:57 AM
    #9
    Obsessed2000

    Obsessed2000 [OP] Just a big dummy

    Joined:
    Mar 7, 2016
    Member:
    #180533
    Messages:
    368
    Gender:
    Male
    First Name:
    John
    NC/VA line
    Vehicle:
    2000 SR5 4x4 3.4
    Deck plate mod Bilsteins All pro leaf springs All pro greasable shackles Camburg UCA Interior Led conversion Tundra TRD springs Extended SS brake lines Seat covers 33" yokos White herculined exterior
    Between kids soccer practice and a few other things I was able to get the lower control arms off. When I did this on my 2000 it went a whole lot smoother. Here are some pics though.

    To get at the LCA's you need to disconnect a bunch of crap from your steering rack.
    IMG_4553%20copy_zps0od57pka_934f59557178b4394cf72696e648223930f5b803.jpg
    IMG_4555%20copy_zpsvjg2z5xh_b23e37bf1731240caa85a339a830123d20658a76.jpg
    So with this, I do not know if I'm doing it right, and if someone with a clue wants to chime in feel free. But you need to be able to push the steering rack up a bit to get the bolts off that hold you LCA's on. I dont really understand the design, but someone got big money for it.

    Start with taking your sway bar off. Its a mix of using all your extensions and different length sockets, swearing, a couple tears till your wife notices and then its swearing time. Have fun...I broke a bolt.:annoyed:

    There's one bolt on the left (drivers side) that I just took off the nut but couldn't get the bolt off which is good b/c you dont want the whole thing to fall off while the power steering lines are still attached to the rack.

    Next there's a bolt in the middle. For what ever reason what you see at the bottom is not a nut but a fixed point of the truck (don't try to turn this lol) but on top you'll find I believe a 19mm bolt I was able to squeeze a short socket and a breaker in there to get loose and continue with the short socket on a ratchet till it's loose. Then use your fingers. If you try to back it out all the way with a ratchet you'll probably get stuck...like I did.:frusty:

    Then go to the right side where you'll find two bolts. The bottom one is normal...top one is just a solid bolt of threads with a nut. I took the nut off and then used a 10mm on the end and backed it out. Once again, I'm kind of a dumb hill billy so this might be normal or unnecessary, but I couldn't figure it out.

    Now with the steering rack loose start backing out the LCA bolts. They suggest to mark these to keep your alignment close but I'll be resurfacing all items and the marks will be lost so I skipped this. Also I left my strut attached with the bolt so that once I pull the LCA bolts it doesn't fall completely aimlessly:crazy:. It was pretty stuck so do what you want. (blue arrow) Sway bar link. This was taken before I got the say bar off, but in case you made it this far take that off...

    FYI: To get the LCA bolts out you need to work the steering rack a little. On my other truck I just used a jack and moved it a little. That didn't cut it this time, the angles were all wrong. Ended up wedging my breaker bar in around the area and cranking that bitch while my wife pushed out the bolt. Be careful, I'm sure this could hurt the steering rack. Passenger side is easier than the Drivers. Also suggest to just take off your boots to avoid them getting damaged.
    IMG_4558%20copy_zps2319a9g7_0ba407160ade760896f287fb1c983b0ffdc8ff26.jpg
    If your repainting the LCA or replacing the bump stops see the next pic (they screw on). Went smooth with this truck but on my 2000 I broke one of these off and Tried drilling it, using the reverse drill bit thing and eventually broke the weld that held the part you thread into it. When replacing it I took steel putty and packed it on the new bump stop threads and sat her in there. Its been months now and it hasn't budged.
    IMG_4561_zps3npyiqsa_267b7dcd8ef04740b88a69c85bbfc6ebde6265a9.jpg
    I'll also be repainting my skids to so I took these off. I didn't take any pics before hand but its not rocket science, just remove four bolts for each. Also in the pic you see my sway bar for the other truck. See how useful that thing is nowadays.
    IMG_4559_zpsvkeqbk4o_c507f62759e5a5f5b162c4ab57c0a39f3d18a1a7.jpg
    Still can't get these effin CV's seperated from the the knuckles, happy to hear opinions if someones got one. (I don't have air tools!!)
    IMG_4560_zpshz4obgk3_cb553feca1dd42240a7f9504e6cd33732b740a13.jpg
     
  10. Mar 20, 2016 at 9:17 PM
    #10
    Obsessed2000

    Obsessed2000 [OP] Just a big dummy

    Joined:
    Mar 7, 2016
    Member:
    #180533
    Messages:
    368
    Gender:
    Male
    First Name:
    John
    NC/VA line
    Vehicle:
    2000 SR5 4x4 3.4
    Deck plate mod Bilsteins All pro leaf springs All pro greasable shackles Camburg UCA Interior Led conversion Tundra TRD springs Extended SS brake lines Seat covers 33" yokos White herculined exterior
    Finally got the CV's apart. Bottom line if there no longer on the truck you have to use air tools.

    Next thing to do is take off the passenger side LCA. Should have only taken me 10 minutes tops.

    But the right sides camber/caster adjuster is seized inside the sleeve...

    IMG_4564_zpscdpv84nf_dc77917cc89420a80a76da15ee1857f557eee6af.jpg

    So, I got it to move around enough where I could get a "wonder bar" in and wedge on it a little till this damn thing broke off.

    IMG_4566_zpsjvtiuiqw_603c717d057fd3df13cc81b2f5b1d2b80648b487.jpg

    Now I'm pissed because of this thing breaking means I'll have to order new ones which retail for 40 bux plus shipping for a pair. In addition there is no way for me to cut just it out so I have to mess up the metal parts belonging to the bushing rendering my energy suspension bushings worthless for this one. :violent:

    NEXT.....:sawzall:

    IMG_4568_zpsiip02aa3_68aaefc29a1bc6efca1434c3c1de2d6325ca54b7.jpg
    So I used an angle grinder where I could but it was a tight space so I had to rely on the Sawzall for most of it. After about 4 supposedly good metal blades I finally got her out.

    IMG_4569_zpsr9afln4x_bc221257fc23b09eeceb8ba9d5d01cdd354a5da7.jpg
    I had to cut right behind the bushing on one side and then the little bit of the bolt sleeve that was seized on the other.

    IMG_4570_zpsls6etv3v_9ff122d27f706d32a19a4eb587cfb2e7f329b710.jpg
    IMG_4571_zps8n63aqri_d72d922cb920986a8317293d51c790b036a91c37.jpg

    Got these out too, BTW for anyone working on them, invest in a 14mm ratcheting wrench. Makes this part soooo much easier. Did it once without and never will again.

    IMG_4562_zpskgnluflw_a10ffe6e39cfb4e9639eb96d383b1cba0489651d.jpg
     
  11. Mar 20, 2016 at 9:25 PM
    #11
    Obsessed2000

    Obsessed2000 [OP] Just a big dummy

    Joined:
    Mar 7, 2016
    Member:
    #180533
    Messages:
    368
    Gender:
    Male
    First Name:
    John
    NC/VA line
    Vehicle:
    2000 SR5 4x4 3.4
    Deck plate mod Bilsteins All pro leaf springs All pro greasable shackles Camburg UCA Interior Led conversion Tundra TRD springs Extended SS brake lines Seat covers 33" yokos White herculined exterior
    I started cleaning all the parts to get them prepped for some Corroseal, primer, and some new blue paint. Luckily my kids broke this just recently and gave me something to soak this many parts in. Threw a bunch of simple green and Dawn in there and let it sit for 24hrs. They came out a lot better but still had to give each piece a little one on one attention afterwords.
    IMG_4575_zpsaxisfv6d_ed6d86b18589ef7a654a8b345cd660b89f0d5751.jpg
    IMG_4576_zpsdu4idfn1_08e25b681d09db0f71a2de70b18a0c867bb68663.jpg
    IMG_4577_zps1qjct8hd_8571b89e51c4934f887020dd4a678e6e8658cd27.jpg
    Also took these out back and sprayed them, I didn't wanna mix with all the other crud that was going to come off the other parts.
    IMG_4579_zpshgsob6mn_de0933897db5b9272849510e1f610d6659553d2c.jpg

    While working on all of this I've destroyed and neglected the garage so instead of working on the truck any further I had to start cleaning some stuff up. It was getting to the point where I couldn't move.
    IMG_4580_zpsxdj074mf_f37fe4e96d23bc751665dfa04fcb3e93e3d984b8.jpg
     
  12. Mar 22, 2016 at 1:03 AM
    #12
    Obsessed2000

    Obsessed2000 [OP] Just a big dummy

    Joined:
    Mar 7, 2016
    Member:
    #180533
    Messages:
    368
    Gender:
    Male
    First Name:
    John
    NC/VA line
    Vehicle:
    2000 SR5 4x4 3.4
    Deck plate mod Bilsteins All pro leaf springs All pro greasable shackles Camburg UCA Interior Led conversion Tundra TRD springs Extended SS brake lines Seat covers 33" yokos White herculined exterior
    So went ahead and started removing the bushings from my LCA's using another members idea as seen below.
    [​IMG]
    Here's a link to the thread.
    https://www.tacomaworld.com/threads/lca-bushings-oem-energy-suspension-whiteline.394935/
    It worked awesome up to the jack breaking on the 4th bushing which luckily was the one I had to cut out earlier anyways.
    So I used a Sawzall to cut the outer most metal bushing. Bent it in, beat on it with a pipe and a hammer. Used same hammer to beat bottom too. With a little persistance I got it out after about 15-20 mins. The other 3 took less time than that.
    IMG_4586_zpszvlih3y7_c7cd908116d99c4876b5250cc6194ea741cc48b4.jpg
     
  13. Mar 22, 2016 at 1:53 AM
    #13
    Obsessed2000

    Obsessed2000 [OP] Just a big dummy

    Joined:
    Mar 7, 2016
    Member:
    #180533
    Messages:
    368
    Gender:
    Male
    First Name:
    John
    NC/VA line
    Vehicle:
    2000 SR5 4x4 3.4
    Deck plate mod Bilsteins All pro leaf springs All pro greasable shackles Camburg UCA Interior Led conversion Tundra TRD springs Extended SS brake lines Seat covers 33" yokos White herculined exterior
    I got around to taking off the LCA's bushings. After I started and got stuck I managed to learn how Google worked and found a good write up and used some of their pointers.

    All I used were these items:
    IMG_4587_zpsx4msb1nc_56e116e454d9c8f269e53570c403a6203c6561ab.jpg
    Start by placing the bushing into this thing...I found it in the ball joint press kit I got from Advance auto.
    IMG_4589_zpsqhrca4gj_8c61391043b88e8854fbfe19675434567950b579.jpg
    Then size it in to the C clamp so your not having to do too much work while its hot like so, just leaving enough space to slide it in and out.
    IMG_4590_zpsotxhqgx9_70786ee131677f3198f73ffab946d5e8a00630e0.jpg
    Now go ahead and use the torch to warm up only the outer ring. I did this for approximately one minute.
    IMG_4591_zpsqrar2zph_04ff8750f20f1ac504df32ef812b5a9ded16f341.jpg
    Now using the thing that it's sitting in move it to the press and get it seated and hand tightened. I then used a ratchet to start tightening it, but I found it need my breaker bar and my foot on it to actually get it to the point where the outer ring pops off. You'll know when this happens, it makes a loud noise that makes you think you broke something. With the outer ring popped off go ahead and back everything off.
    IMG_4592_zpsfr17oegw_01dc4c143a754e5402ff0c6accd0957d4cf3fb24.jpg
    This is what your trying to pop off.
    IMG_4593_zpsmgufp6qt_d2e184e8103cf093de2e25d2855639f52dd1747e.jpg
    Now set it into this...other thing that I found in the same kit.o_O
    IMG_4595_zpswmbn9knm_43d1ac80a34d4d60f01997001e0b68fc1e712370.jpg
    Like the other one get this one all sized up so your not scrambling while its hot.
    IMG_4596_zpsgy4u6jce_0940f187a78300a55b88bcbd65bb23b406f30156.jpg
    Place the flame on the inside and use the base to keep in rotating. I did this for approximately a minute and a half, or till the base was starting to get hot through my gloves.
    IMG_4597_zpsizmwhlzl_c392cb4ff357c41902cc51fb1cedec1b8833b290.jpg
    Once its hot you'll be able to place it in the C clamp and use minimal force to slide it out. Be sure at this point you work fast and use the wife's kitchen knife or a razor to scrape the rest of the rubber off that inner sleeve. Remember that thing will be hot as hell.
    IMG_4598_zpsfi1w0hww_bb50666178985ffe8163ef9bd294693673458053.jpg
    So after the first one taking forever and not coming out all that great I found this awesome dude whos write up also shows how to put the new ones in. I owe the simplicity of the other two to this guy:bowdown:. My way was much more complicated...

    https://www.tacomaworld.com/threads/how-to-replace-upper-lower-control-arm-bushings.280375/
     
  14. Mar 24, 2016 at 7:03 AM
    #14
    Obsessed2000

    Obsessed2000 [OP] Just a big dummy

    Joined:
    Mar 7, 2016
    Member:
    #180533
    Messages:
    368
    Gender:
    Male
    First Name:
    John
    NC/VA line
    Vehicle:
    2000 SR5 4x4 3.4
    Deck plate mod Bilsteins All pro leaf springs All pro greasable shackles Camburg UCA Interior Led conversion Tundra TRD springs Extended SS brake lines Seat covers 33" yokos White herculined exterior
    I got all the bushings cleaned out, took forever. I'm guessing if I would have used the Sawzall like the guy in the other post did it would have gone smoother but I feel like mine came out a lot cleaner/better looking.

    IMG_4599_zpscei8oaxt_a42d5d1e86b024b1571e7b902fcca2569f7e082d.jpg
    After putting the bushing in a vice I warmed up the outside. For the most part this method worked, but if you don't mind the smell you can always hit the rubber directly with the flame.

    IMG_4600_zpsa2wbepzl_3f97620eda7ab2a11f81fa7b0003a33fa5dff565.jpg
    IMG_4601_zps82ukcdcs_d5e0eecc50b66711d670916bf80965ba5684092a.jpg
    I'd use the old steak knife to stab into the edge as close to the metal, and then slide/spin it around to get as much separated.
    IMG_4602_zpsxozfy51r_d42ca418452d35c9b5a5f6f9cb32e84ee3527e84.jpg

    This is the old lift I took off my 2000 Tacoma when I upgraded everything. Figured since it was sitting in the garage I might as well make some use out of it.

    IMG_4603_zps71eras7a_2bb17376ae3fe791025dcfc63b72835b3c878f0b.jpg

    I have everything sanded, wire wheeled, washed, and then wiped down with some acetone and ready for the Corroseal treatment. Here's a couple of pictures.

    IMG_4611_zpsksp2pezw_b2267c7fd1d2eac089a7b9c8f63b44fcd1868227.jpg
    IMG_4604_zpswph2mosl_84a016f35935311971d9445ae26a4c976440e6b6.jpg
    Afterwords.
    IMG_4605_zpsa2ibmima_5445a23cae8c03f802a1cc86c39359e295190d8d.jpg
    Wet Corroseal.
    IMG_4606_zpsr82uv9bx_123122a19133512a64489f569e6822dc23a2c45c.jpg
    IMG_4607_zpsytpyt6do_29eb9a9dc34a632c5ef395c803c03f0fa2625eb6.jpg
    IMG_4608_zpsiwqfp6j7_a6bca2f46c4ebe2f505ebc122f8ed57f7f2ca695.jpg
    IMG_4609_zps7g6ayrao_d1d8d7046a03efc85e4d70dc491c01eb8fa9cc8c.jpg IMG_4610_zpsk6mi4eyg_8fa91d81aa3d57d7fcd9f9a96c2cf06f10974fe8.jpg
    So far everything is coming out great. Gotta let this stuff dry for 24 hours and then start painting them a light blue.
     
    FirstGen Jer and ChadsPride like this.
  15. Mar 25, 2016 at 6:03 AM
    #15
    FirstGen Jer

    FirstGen Jer Well-Known Member

    Joined:
    Oct 15, 2015
    Member:
    #166714
    Messages:
    3,691
    Gender:
    Male
    First Name:
    Jeromey
    big bear lake, CA / lake havasu, AZ
    Vehicle:
    1999 toyota tacoma 3.4l v6 sr5 4x4
    Nice write-ups:thumbsup:
     
  16. Mar 25, 2016 at 6:24 AM
    #16
    BossFoss

    BossFoss If your over 40 feet back, you ain't suspicious.

    Joined:
    Nov 14, 2014
    Member:
    #142355
    Messages:
    3,064
    Gender:
    Male
    Wyoming
    Vehicle:
    01 DC Tacoma
    Nice work man. Got a 99 with 278,000 that I've been spiffing up. It's fun once you get into it. Breathing new life into something
     
  17. Mar 30, 2016 at 8:48 AM
    #17
    Obsessed2000

    Obsessed2000 [OP] Just a big dummy

    Joined:
    Mar 7, 2016
    Member:
    #180533
    Messages:
    368
    Gender:
    Male
    First Name:
    John
    NC/VA line
    Vehicle:
    2000 SR5 4x4 3.4
    Deck plate mod Bilsteins All pro leaf springs All pro greasable shackles Camburg UCA Interior Led conversion Tundra TRD springs Extended SS brake lines Seat covers 33" yokos White herculined exterior
    Thanks brother!!!:thumbsup:

    Not only fun but addictive. I kept doing random worthless stuff to my 2000 Tacoma, so decided to buy this one so I could back into major projects. Thanks for reading
     
  18. Mar 30, 2016 at 8:55 AM
    #18
    Obsessed2000

    Obsessed2000 [OP] Just a big dummy

    Joined:
    Mar 7, 2016
    Member:
    #180533
    Messages:
    368
    Gender:
    Male
    First Name:
    John
    NC/VA line
    Vehicle:
    2000 SR5 4x4 3.4
    Deck plate mod Bilsteins All pro leaf springs All pro greasable shackles Camburg UCA Interior Led conversion Tundra TRD springs Extended SS brake lines Seat covers 33" yokos White herculined exterior
    Easter weekend slowed me down a bit, but finally got the three coats of paint on the parts. Gotta do 2 more coats of clear coat and they'll be ready to reassemble. The morning after I did the first coat I walked in and was thinking holy shit this is super blue...but really think once the truck is bed lined with a midnight blue color this will bring it all together.

    IMG_4614_zps80oksrxu_3c2075eb93bcb5c293688416bfeb80f84588f171.jpg
    IMG_4613_zps4y1tanqo_e9a106a00a818e6db610edf52b6316a814309098.jpg
    Under the skid plates I dropped a good amount of paint. :spy:
    IMG_4615_zps3vmlvyxp_8a34241fa02369961f56d5538549633bebf68c40.jpg
    IMG_4616_zpsjivhar9c_a7a03e51da9743c09595103573fedeb6d150b998.jpg
     
  19. Apr 10, 2016 at 2:24 AM
    #19
    Obsessed2000

    Obsessed2000 [OP] Just a big dummy

    Joined:
    Mar 7, 2016
    Member:
    #180533
    Messages:
    368
    Gender:
    Male
    First Name:
    John
    NC/VA line
    Vehicle:
    2000 SR5 4x4 3.4
    Deck plate mod Bilsteins All pro leaf springs All pro greasable shackles Camburg UCA Interior Led conversion Tundra TRD springs Extended SS brake lines Seat covers 33" yokos White herculined exterior
    I started installing the Energy Suspension bushings. The uppers went on with zero issues.

    IMG_4626_zpsgfzd9mep_89a603dff77c558ec9c79ae233f422bfeacd3d56.jpg
    Moved on to the lowers. To start with I took a wire brush to the outer sleeves to clean them up a bit.
    IMG_4627_zpsgmzkimtz_f4d024f0dbcf9dd71ddc0289f7aac27a38f960d3.jpg
    Applied a butt load of anti-seize.
    IMG_4628_zpslc9zojim_e9bcf5b07091fa3518d0dc1230aacbc082609fb0.jpg
    Pressed them nice and tight using this configuration. (the green/black is an old sock I was using to hope avoid scratching the paint to bad)
    IMG_4629_zpsjj0z1iuh_4e6ccc25f3388f5d4fa5da2027a3a367bfad66e2.jpg
    The greased the hell out of the bushings. And simply hit them in using a rubber mallet.
    IMG_4630_zpsw5cfbkn9_911d5d1a1792ccb85f730685368e88857b6b33aa.jpg
    To get the inner sleeve back in threw the arm into a vice grip and cranked my little heart out. Once again got it nice and flush.
    IMG_4631_zpsy18gyqsi_46e46bd532989d2ee6b90a29f410eb2c12400d4c.jpg
    Now I needed to bend the washers back to a good curve, they get bent when you bust them off. I found a 24mm gear wrench socket is a perfect match. Threw it into the C clamp and applied a good deal of pressure.
    IMG_4633_zps9ktc6gq1_5ad4686db4d3afa2ca95e48882abc192d6f4babe.jpg
    IMG_4634_zps6zh8ms7e_0ad106e340c9c5213279c68a69c5bc244b49a428.jpg

    Now all you need to do is simply figure out some way to perfectly match up the groves and apply just the right amount of pressure as to not bend anything but get it seated back where it was. I bent the receiving end in a bit along with filing a little bit of it away. I put it in a vice. I tried the C clamp, I then tried a hammer. At this point I said fuck my life. Id jacked up two of the three I had and there was no point in continuing on. No matter what I did I could not get the washer back on. Pissed off that I spent probably a good 2-3 hours...maybe more burning the old rubber out and making sure everything was clean I took it all back apart and bought MOOG parts which is what I should have done in the first place. Amazon has them for a good deal with prime shipping. :smash::drunk::frusty::annoyed::lalala::pout::violent::sadviolin::brianr: (this about sums up all my emotions at this point.)

    Once I got the Moog parts in It took a solid 30 minutes to get all four of them installed.

    Lubed the shit up out of them and used the following configuration and happily moved on with my life.
    IMG_4642_zps8bdtbd3n_eba439f7c0a6d1ea26c43da42c017d8e8c8d824a.jpg
    Part number if anyone wants it.
    IMG_4644_zpsd8tcpics_15a77aa59806982bec1d44d8ff4e4d0c9951db0c.jpg
    And all bushings in:rofl:
    IMG_4643_zpstdfpqnuz_435882a3324d3fd819c24500674d7abbc1cc7b9b.jpg

    Got around to dissasembling my old struts. I have my coils off Maria that only had 140k miles on them. So I figured I'd use those but still need the top off the old ones as mine were jacked from the other truck. So to get these apart I rented a coil compressor and slapped it on like so...
    IMG_4635_zpssvivz0hv_18662ffa40e07c719dca25dff824a4afc27e7680.jpg
    Once you crank it down to where the strut/shock moves freely I cut the inner plastic shield so I can get to the actual shaft.
    IMG_4636_zpse0blhzb7_fe3415da91a5174c885f3c74372fb5d08a7b9e0b.jpg
    Now pull that down and apply a set of vice grips. When I did this on Maria all I needed was the one set, but with both of these I needed two. Go figure.
    IMG_4638_zpsn5hd1bb7_544d6214c68574ef7ca1d3660ed68c292d07b90a.jpg
    IMG_4639_zpsgnyqa5jh_b9a83417e6f9218d52258ca7f9ed23fd1c529e2d.jpg
    Now that's nice and secure take off the bolt on top.
    IMG_4640_zpsrypkrioh_515023a74c755f03e650c827a6ac0e4ed17a1067.jpg
    Then rip the washer "should" come right off. I needed to beat it with a hammer till it popped off and rip the rubber apart. Shit was old! So old that 2 hours later the shocks hadn't decompressed from when I took them out. I wonder how long the guy had been driving around on these.
    IMG_4641_zpshmmmq7bo_55f94bed14b151e2ac99ea9a4cfe587c42c68274.jpg
    Morale of this section is replace your damn shocks. I'd recommend every 100k miles. Also screw a whole bunch of Energy Suspension. There suck a hassle theres no way its worth it in the end. Also buy air tools. I did this with and without and let me tell you what. I regret not just forking over the dough years ago for the tools. Thanks for reading yall. If you have questions let me know.
     
    FirstGen Jer likes this.
  20. Nov 20, 2016 at 4:15 PM
    #20
    Obsessed2000

    Obsessed2000 [OP] Just a big dummy

    Joined:
    Mar 7, 2016
    Member:
    #180533
    Messages:
    368
    Gender:
    Male
    First Name:
    John
    NC/VA line
    Vehicle:
    2000 SR5 4x4 3.4
    Deck plate mod Bilsteins All pro leaf springs All pro greasable shackles Camburg UCA Interior Led conversion Tundra TRD springs Extended SS brake lines Seat covers 33" yokos White herculined exterior
    Well, its been a really long time since I posted on here. Since the last update I've done the following:

    Put her all back together
    Monstalined the entire truck with Midnight Special.
    Made a set of leaf springs using additional springs from another Tacoma
    cleaned her up a bit
    Used rustoleum re-color on all the inside and outside black
    Painted the engine bay as to avoid it standing out b/c it was so bright
    put newer rims and tires on her
    Herculined the bumpers
    Put in a new cup holder in the back
    replaced the shocks and struts along with a 2 inch lift
    Sprayed in a new bedliner

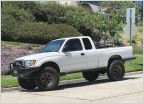
    All together nothing too special other than the paint job. I'm gonna list her on CL and see what I can make off her. Here she is today.

    IMG_4833_zps3dzjwggj_e4cef790ffb150ff9753b775c05053e30e9696ac.jpg IMG_4834_zpslz9vs5wl_8aaaad85d4743ae5d7900aa19ac7af941b7326bb.jpg IMG_4835_zps9kj2opgg_2ac40a4396e321ea00f58eca160d1fbeaf8223be.jpg IMG_4836_zpsk4fz3gbx_8d5f3d6a3f6a390547095dab911c01558170a740.jpg IMG_4837_zpsef31gekb_1fcb6e8958368ab14e624e916f75f3b02b7ff17c.jpg IMG_4838_zpshn00hxp5_26cbac540245b98bd7895c2ac32d1a8b8d6e0db7.jpg IMG_4839_zpsnyw65reg_3a644ac0825c5c298230ae7205f1648a6d409942.jpg IMG_4840_zpsofpmwfcw_12f84a544387becae424aeb4b73ec8b550d8cfa8.jpg IMG_4841_zpsrfaotbu6_2fc497d1553eeac114313a6531ebfca8ed9d91c3.jpg IMG_4849_zpshpdrzpht_fc0aea26e3e6ae6977584509cafc69d68784e27f.jpg
     
    Dalandser and SnowroxKT like this.

Products Discussed in

To Top