1. Welcome to Tacoma World!

    You are currently viewing as a guest! To get full-access, you need to register for a FREE account.

    As a registered member, you’ll be able to:
    • Participate in all Tacoma discussion topics
    • Communicate privately with other Tacoma owners from around the world
    • Post your own photos in our Members Gallery
    • Access all special features of the site

My close to flush NV TRD center caps

Discussion in '3rd Gen. Tacomas (2016-2023)' started by Hogpauls, Oct 29, 2017.

  1. Oct 29, 2017 at 3:27 PM
    #1
    Hogpauls

    Hogpauls [OP] Hmmmmmm.

    Joined:
    Mar 30, 2016
    Member:
    #182800
    Messages:
    335
    Gender:
    Male
    Near Boise
    Vehicle:
    '16 Tacoma BBP TRD OR Dbl cab mt ftw
    To begin, I have Method machined NV wheels. I really like the wheel but the gargantuan center cap in my tasteful opinion is an eye sore. I was inspired to come up with a solution by BeePee https://www.tacomaworld.com/threads/how-to-custom-flush-mount-trd-center-caps.278294/. My approach was similar but modified for the NVs. I know a lot of trucks here are running these wheels and hope it’ll help someone else with a distaste for the NV proboscis.

    Alright let’s jump into this. I bought the TRD center caps from here: https://www.sparksparts.com/oem-parts/toyota-trd-center-cap-ptr1835092/?c=YT10b3lvdGE= $55 shipped, the only other expense was a metal/plastic epoxy. I bought 2 “syringes” of clear Gorilla Glue brand, $10 and used roughly 1 1/2. Then throw in $XXX for your favorite libations.

    Got that wheel removed yet? good! Now grab a rubber mallet and flat blade screw driver to persuade the NV schlong off the wheel holder thingy. Now that it’s off, disassemble it. There’s two main parts held together by three socket cap screws, the other three are fake that easily pop out once you break the tabs on them. Oh yeah, don’t lose or misplace the rubber rings off the schlongs, you’ll need them later.


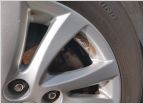
    Now you need to measure how far the axle/hub thingy sticks out from where the center cap gets seated. Like this:
    1.jpg
    I added another 1/8” of an inch to this measurement so the inside of TRD cc would for sure clear it. This is the part you’re gonna cut down to that measurement:
    2.jpg
    Now wrap it in tape and transfer that measurement to it. Measure from the bottom, the top where the socket cap screws went is waste. I used a angle grinder with a cut off wheel and a belt/disc sander to clean and tune up the cut. Like this:
    3.jpg
    Don’t worry about the holes, I’ll explain later, just start shooting them with your favorite color rattle can paint that’s lying around.


    Now onto the top plastic portion of the old cc.. Method threw us a bone on this one and designed this part just for our application. The tabs on the back side of the TRD cc fit damn near perfect into the bottom of the plastic part like such:
    4.jpg
    Next You’ll want to lose the metal tab retainer on the TRD cc, the cap doesn’t want to sit flush with it installed.
    5.jpg
    Now we'll make a depth gauge from the plastic top portion. I cut about 1/4" before the cc starts it's taper:
    6.jpg
    To ensure the cut was even all the way around I put a cutoff wheel on a Dremel arbor and chucked it up in the drill press. I raised the table up where the cutoff wheel was right at the cut line. Take progressively light cuts till you’re all the way through, if not the plastic heats up too much and gets grabby on the cutoff wheel.

    Back to some heavy lifting, install the cut down metal portion back on the hub with the rubber “O” ring. Put the wheel on and snug down the lug nuts, 3 lug nuts will do the trick. You just want to make sure the metal portion is seated all the way in. Now what’s left of the cutoff plastic piece slide it into the metal cc body where you made the cut. Make sure it bottoms out on the hub and scribe a line all the way around. This is the measurement that the final cut will be made. I cut it about a blonde one shorter for extra clearance which turned out to be right around the length of the TRD cc tabs. It should look like this:
    7.jpg
    Now to epoxy this to the TRD cc. Note the orientation on how I put them together:
    8.jpg
    Tape the TRD cc face to protect from scratches, apply the epoxy and clamp it up.
    9.jpg
    While that’s curing let’s turn our attention back to the metal portion of the cc. Remember those holes? Those are for locating pins. First off I cut out piece of scrap wood with a hole saw then turned it down on the lathe to the ID of the metal portion. This helped with retaining the shape while punching and drilling.
    10.jpg
    The pins were made from drill rod I had laying around, 12 in all.
    11.jpg
    The three holes that were drilled line up with the tabs on the TRD cc. Alrighty then, once the epoxy is cured on the TRD cc portion lets mate it to the metal body, make sure the plastic tabs line up with those locating holes. I used the drill press and the round scrap I turned earlier to lightly press it to the desired depth and verified it with my trusty eyecrometer. When you're happy with the depth of the TRD cc in the metal body drill through the locating holes through the TRD's plastic tabs.

    We're getting close. Now mix up more epoxy, I mixed 4 separate batches one for each cc. First I put a drop of epoxy in a locating hole then inserted the pin, once the other pins are inserted I liberally applied the rest of the batch to all contact areas and repeated for the other ccs.
    12.jpg Any epoxy that was dripped onto the inside wall of the metal body I scraped off after it was cured so it would slide somewhat easier over the hub. Here's the finished product:
    13.jpg
    Now is not the time to gloat about your work, you still have to put them on the truck. Instead of just installing it willy nilly look at the orientation of the Method logo and lug nuts so that when they are installed TRD and Method logos line up. Like such:
    14.jpg
    There's about 3/8" stick out:
    15.jpg
    Before:
    16.jpg After:
    17.jpg
    Now you can pop the top off your favorite IPA, pour maybe a shot or two of orange vodka and enjoy your work. All I need to do is find blue TRD stickers to overlay the red on the ccs. Cheers!
     
    TSAVO, Orangecrush, Hank Heel and 9 others like this.
  2. Oct 29, 2017 at 3:54 PM
    #2
    MESO

    MESO Major Modder Vendor

    Joined:
    Feb 16, 2015
    Member:
    #148809
    Messages:
    16,294
    Gender:
    Male
    State of Jefferson
    Vehicle:
    2016 DCLB TRD HELLCAT SWAP
    Looks great, good job. The brushed TRD cap matches the finish of the methods really well. Are you afraid of the epoxy breaking loose at high speeds?
     
    Sandeman and PapaBear like this.
  3. Oct 29, 2017 at 3:56 PM
    #3
    PapaBear

    PapaBear Never test how deep the water is with both feet.

    Joined:
    Feb 10, 2014
    Member:
    #122782
    Messages:
    3,564
    Gender:
    Male
    First Name:
    Austin
    SIN CITY
    Vehicle:
    07 DCSB PR 4.0... Aaaand she’s GONE
    Soft Suspension Hard Rubber ®
    I love NV's but they already look like fine dining in the first place, brushed caps add to the effect. Not a fan but awesome work nonetheless.
     
  4. Oct 29, 2017 at 4:06 PM
    #4
    Hogpauls

    Hogpauls [OP] Hmmmmmm.

    Joined:
    Mar 30, 2016
    Member:
    #182800
    Messages:
    335
    Gender:
    Male
    Near Boise
    Vehicle:
    '16 Tacoma BBP TRD OR Dbl cab mt ftw
    No, that was one reason for putting the pins in to give it more of a mechanical connection than just relying on the epoxy. Yesterday I drove down a rutted dirt road and on the way home tried to hit every pot hole and man hole cover available, they were still there. Only time will tell but I think they’ll be fine.
     
    MESO[QUOTED] and PapaBear like this.
  5. Oct 29, 2017 at 4:07 PM
    #5
    MESO

    MESO Major Modder Vendor

    Joined:
    Feb 16, 2015
    Member:
    #148809
    Messages:
    16,294
    Gender:
    Male
    State of Jefferson
    Vehicle:
    2016 DCLB TRD HELLCAT SWAP
    Ah, I missed the pins part. Killer job
     
  6. Oct 29, 2017 at 4:12 PM
    #6
    Sandeman

    Sandeman Well-Known Member

    Joined:
    Oct 13, 2016
    Member:
    #199692
    Messages:
    327
    Gender:
    Male
    Home of the Headless Horseman, NY
    Vehicle:
    '17 TRDOR, '04 GX470
    Awesome work OP! Way better than those crazy huge caps that stick out 3 inches!

    Just curious, is it possible to get the caps completely flush to the wheel or do the round hub bore prevent it? I did a quick read through your write up, I apologize in advance if I read over it
     
  7. Oct 29, 2017 at 4:34 PM
    #7
    Hogpauls

    Hogpauls [OP] Hmmmmmm.

    Joined:
    Mar 30, 2016
    Member:
    #182800
    Messages:
    335
    Gender:
    Male
    Near Boise
    Vehicle:
    '16 Tacoma BBP TRD OR Dbl cab mt ftw
    Thanks!
    Maybe if you’re using spacers the caps could be flush but without them the hub protrudes slightly from the wheel. Thanks.
     
    Hank Heel and Sandeman[QUOTED] like this.
  8. Oct 30, 2017 at 7:44 AM
    #8
    Dirty Harry

    Dirty Harry Well-Known Member

    Joined:
    Jun 21, 2016
    Member:
    #190180
    Messages:
    2,599
    Gender:
    Male
    First Name:
    Andrew
    SW Florida
    Vehicle:
    2021 Tacoma 2.7 SR 4x4
    I kind of like the way both look, but this looks like solid work and I can definitely appreciate that. Nice job.
     
  9. Oct 30, 2017 at 7:52 AM
    #9
    GHOST SHIP

    GHOST SHIP hates you.

    Joined:
    Mar 9, 2015
    Member:
    #150537
    Messages:
    22,399
    First Name:
    GHOST
  10. Jan 28, 2018 at 6:29 AM
    #10
    Stefan_Ray

    Stefan_Ray Tacoma TRD Life

    Joined:
    Oct 20, 2017
    Member:
    #233606
    Messages:
    1,768
    Gender:
    Male
    First Name:
    Stefan
    Concord,North Carolina
    Vehicle:
    2021 TRD Pro
    Cooper STT Pro’s
    Awesome work!
     
    Hogpauls[OP] likes this.

Products Discussed in

To Top