

-
Welcome to Tacoma World!
You are currently viewing as a guest! To get full-access, you need to register for a FREE account.
As a registered member, you’ll be able to:- Participate in all Tacoma discussion topics
- Communicate privately with other Tacoma owners from around the world
- Post your own photos in our Members Gallery
- Access all special features of the site
 Timing belt kit and pump
 New ignition cylinder
 Favorite Wiper Blades?
 2002 Tacoma Codes P0440, P0441, P0446
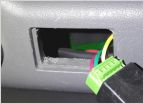 Lightbar switch that fits 1st Gen center console?
 ISO silver limited fender flares
my first attempt at rust repair
Discussion in '1st Gen. Tacomas (1995-2004)' started by megalodon, Dec 3, 2019.
Page 2 of 3
Page 2 of 3

