

-
Welcome to Tacoma World!
You are currently viewing as a guest! To get full-access, you need to register for a FREE account.
As a registered member, you’ll be able to:- Participate in all Tacoma discussion topics
- Communicate privately with other Tacoma owners from around the world
- Post your own photos in our Members Gallery
- Access all special features of the site
 ECT Mod -- ON ALL the time
 Slide in camper setup.
 ARB compressor in bed storage??? - anyone running one???
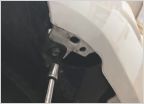 Front Body Mount Noise Fix - That noise may not be your leaf springs
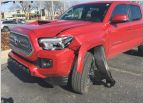 New truck and first wreck :-/
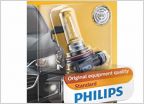 2019 SR5 Dim Headlamp Solution
Natika Mount for Pro Grill
Discussion in '3rd Gen. Tacomas (2016-2023)' started by s7726, Dec 8, 2020.
Page 2 of 2
Page 2 of 2


