1. Welcome to Tacoma World!

    You are currently viewing as a guest! To get full-access, you need to register for a FREE account.

    As a registered member, you’ll be able to:
    • Participate in all Tacoma discussion topics
    • Communicate privately with other Tacoma owners from around the world
    • Post your own photos in our Members Gallery
    • Access all special features of the site

NCtaco13's Build

Discussion in '2nd Gen. Builds (2005-2015)' started by NCtaco13, Feb 17, 2018.

  1. Feb 17, 2018 at 12:51 AM
    #1
    NCtaco13

    NCtaco13 [OP] Well-Known Member

    Joined:
    Mar 12, 2017
    Member:
    #213047
    Messages:
    211
    Gender:
    Male
    North Carolina
    Vehicle:
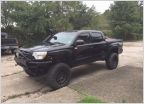
    2013 Gray DCSB 4x4 V6
    • 2013 Tacoma, purchased used in Feb. 2017 with ~72,000 miles on it
    • V6 engine with 4x4, double cab short bed
    • previous owner had heated seats and Weather Tech mats in the front when I got it
    Figured I'd start a build thread to help me remember what I've done lol, and to share with everyone what all I've done to maybe inspire some people along the way.


    The day after I picked it up from the dealership, had to test out my 4x4 on the beach

    Mods:
    1. Tailgate Lock (very easy followed instructions on the thread, got the clamp from Amazon)
    2. Lug nuts (they fit great, they're one piece not like the Toyota ones that are two pieces)
    3. Leather Steering Wheel Cover (size M+)
    4. Add W1 oil catch can (the thread has lots of good information)
    5. Toyota bed mat
    6. Speakers upgraded all the way around (post no. 2)
    7. Sound deadening in all four doors, floor, and back wall (post no. 3)
    8. Bed Stiffeners (post no. 4)

    100,000 Mile update (post no. 5)
     
    Last edited: May 31, 2018
  2. Feb 17, 2018 at 1:10 AM
    #2
    NCtaco13

    NCtaco13 [OP] Well-Known Member

    Joined:
    Mar 12, 2017
    Member:
    #213047
    Messages:
    211
    Gender:
    Male
    North Carolina
    Vehicle:
    2013 Gray DCSB 4x4 V6
    Speakers I used:

    Tweeters: Alpine SPS-110TW
    I took the stock tweeters out and tore all of the stock tweeter out of the frame. I stuck the Alpine in there and soldered everything up to the stock connector. Soldered in the capacitor and wedged it into a hole so it's tight in the little cubby I found in the door. To hold the new tweeter into the frame, I put some RTV around the rim of the tweeter and mashed it into the stock frame. Haven't had any problems yet.

    Front door speakers (size: 6x9): Rockford Fosgate Prime R169x2, Metra 71-035LC Speaker adapter harness, Metra 82-8146 Mounting bracket
    Speakers went in fine, had no problems with the mounting bracket or the speaker adapter harness. Very easy to do.

    Rear door speakers (size: 6 1/2): Kicker 43DSC6504, Metra 71-035LC speaker adapter harness, Metra 82-8148 mounting bracket
    Equally easy as the front speakers, absolutely no problems at all.

    I decided to keep the stock stereo, I don't need anything crazy. You can definitely tell a difference in sound quality just from new speakers, everything is much more crisp. You don't realize how muffled the stock speakers sound until you upgrade I was shocked at the difference. I know that I've got 3 different brands of speakers mixed together but I had the Alpines for a couple of years and I got the other two sets based on wattage and price because like I said, I'm not trying to go crazy with it, I wanted better quality and that's exactly what I got and I'm very happy with the results.

    Sorry for no pictures, I just figured that pictures of speakers were kinda pointless lol
     
    WyldeRayne06 likes this.
  3. Feb 17, 2018 at 1:21 AM
    #3
    NCtaco13

    NCtaco13 [OP] Well-Known Member

    Joined:
    Mar 12, 2017
    Member:
    #213047
    Messages:
    211
    Gender:
    Male
    North Carolina
    Vehicle:
    2013 Gray DCSB 4x4 V6
    Sound deadening:


    Sound deadening is probably the greatest thing I've done so far besides the speakers. I did the floor, back wall, and all four doors. I will do the roof soon.
    I stripped out the whole truck (sorry no write up or links, I went at it and used half common sense and half was winging it) after that, sound deadening was very easy to install. I wore gloves to put it all in, as I've read that some people get torn up pretty bad doing this. I used Noico 80 mil that I got on Amazon, 36 sq. ft. for ~64$. I got two boxes of 36 sq. ft. and I have more than enough left to do the roof of my double cab.

    When I put the mats down on the floor, I didn't bother to pull the paper off the back and stick them down because I figured gravity would do that job for me and if anything happened and ever needed to get through or to the floor for some reason, I don't have to pull up all that gunked up mess that would've been mashed into the floor.

    There is definitely a noticeable difference in the sound in the cab from driving in town to the highway it sounds great - very quiet I imagine that's what a luxury car would sound like on the inside lol
     
  4. May 31, 2018 at 11:25 PM
    #4
    NCtaco13

    NCtaco13 [OP] Well-Known Member

    Joined:
    Mar 12, 2017
    Member:
    #213047
    Messages:
    211
    Gender:
    Male
    North Carolina
    Vehicle:
    2013 Gray DCSB 4x4 V6
    Installed bed stiffeners from @At The Helm (https://www.tacomaworld.com/threads/bedside-reinforcements-tie-downs.476123/), very high quality, well built, and comes with a bottle opener built into them lol. Install was very easy, there was a video linked in the thread (the link in this post) and came with instructions that were also very helpful. I don't think it took more than a few hours, but I wasn't really paying attention (who pays attention to time when you've got plenty of it and plenty of beer?) I took my time to make sure I did everything right and I broke out some wire brushes and scrubbed the rust off my bed bolts at the same time.
    Bonus: these bed stiffeners have a bottle opener built into them

    20180531_210754.jpg

    Install in progress, using the cargo strap to pull the bed back in

    20180601_002032.jpg

    Final product. It could be prettier, but it's a truck bed and I use it like one lol. I didn't install my D-rings back in because there's a mounting point down in the corner, and I don't see me needing to crank anything down super tight so that point should be sufficient for whatever I need to strap down.

    It's amazing to see how much the bed expands and these really do make a world of difference holding the bed in place. It looks like it should which is awesome
     
    At The Helm likes this.
  5. May 31, 2018 at 11:43 PM
    #5
    NCtaco13

    NCtaco13 [OP] Well-Known Member

    Joined:
    Mar 12, 2017
    Member:
    #213047
    Messages:
    211
    Gender:
    Male
    North Carolina
    Vehicle:
    2013 Gray DCSB 4x4 V6
    100,000 mile update:

    Only driven it for about 28,000 miles, so not a whole lot going on

    Maintenance:
    -Regular oil changes (5,000 miles) with Toyota filter (90915-YZZD3) and whatever high mileage oil is on sale at an auto parts store
    -Rotate tires every 7,500 miles (as per Haynes repair manual)
    -Changed spark plugs around 90,000 miles I think, replaced them with Denso plugs
    -Transmission flush at about 98,000 miles
    -Dropped fuel tank and cleaned fuel pump filter screen (about 2 weeks after I got my truck). It was my own dumbass fault, I poured 8 month old gas in the tank I had in my garage and I guess it clogged up the screen because I haven't had any problem since
     
To Top