

-
Welcome to Tacoma World!
You are currently viewing as a guest! To get full-access, you need to register for a FREE account.
As a registered member, you’ll be able to:- Participate in all Tacoma discussion topics
- Communicate privately with other Tacoma owners from around the world
- Post your own photos in our Members Gallery
- Access all special features of the site
 How do I know if I need a relay?
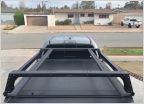 Rooftop tent modified install
 6 speed shenanigans. RA60F swap to RC62F
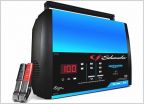 What battery charger are you using?
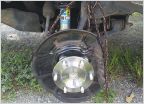 Strange "howl" coming from front wheel?
OBA -> On Board Air Mega Thread & BS
Discussion in 'Technical Chat' started by Gunshot-6A, Oct 20, 2013.
Page 122 of 127
Page 122 of 127
Products Discussed in


