

-
Welcome to Tacoma World!
You are currently viewing as a guest! To get full-access, you need to register for a FREE account.
As a registered member, you’ll be able to:- Participate in all Tacoma discussion topics
- Communicate privately with other Tacoma owners from around the world
- Post your own photos in our Members Gallery
- Access all special features of the site
 Bilstein 5100 Series Ride Adjustable
 Who works at Toyota?
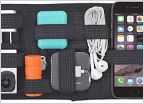 Console organization?
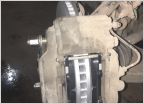 2nd Gen recommended rotors?
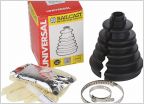 Squeaky CV boots
 Check engine light o2 sensor 05 Tacoma
Oil Catch Can Install Guide
Discussion in '2nd Gen. Tacomas (2005-2015)' started by CayucosTacoma, Jul 25, 2012.
Page 45 of 58
Page 45 of 58
Products Discussed in


