1. Welcome to Tacoma World!

    You are currently viewing as a guest! To get full-access, you need to register for a FREE account.

    As a registered member, you’ll be able to:
    • Participate in all Tacoma discussion topics
    • Communicate privately with other Tacoma owners from around the world
    • Post your own photos in our Members Gallery
    • Access all special features of the site

Pioneer DMH-WT7600NEX flush mount install

Discussion in 'Audio & Video' started by fishpick, Sep 8, 2021.

  1. Sep 8, 2021 at 7:29 AM
    #1
    fishpick

    fishpick [OP] Well-Known Member

    Joined:
    Aug 28, 2021
    Member:
    #375494
    Messages:
    64
    Gender:
    Male
    Non city part of NY w/ high taxes
    Vehicle:
    2018 TRD Sport
    Since there seems to be no thread specifically for the install - only references of the install in other threads... I figured I should take my experience and start a thread on it!

    IMG_1320.HEIC.jpg
    Yes - I have it tilted "ever so slightly" towards the driver by design - the passenger side is slightly revealed by maybe a 1/8" out and the driver side is slightly recessed by maybe 1/8" - I like this since I'm the one that looks at it the most - and it helps reduce glare. I stole this idea from my C7 Z06 and how it subtly tipped things towards the driver. But - even with that - it fits the factory bezel so well it looks like it was built that way!

    One of the best threads I started with is Plims Taco Build - but I would say to make life a little easier these were the changes in the installation process I'd recommend if you are going to put the WT7600 into a 3rd Gen.

    Hell yeah - I know the WC6600 is sorta the "go to" - but I completely fail to see WHY the WT7600 isn't... maybe there's an extra step - BUT - you get a bigger screen, it fits flush like stock and all the functions you expect are there and work like a charm! AND - it really is a simple install

    First - I ordered from Crutchfield - I added in the full kit they suggest and the adapter pack for the GPS and Satellite antenna connections - simple.

    Step one was pull out the Maestro RR and program it. I got the RR not the RR2 becasue I'm not going to be adding anything else on and that would benefit from the RR2's added ports - and the RR is cheaper and the config is supposedly more better well baked - so that's why.

    Then I pulled out the iDatalink HRN-RR-TO2 harness and the harness plug with pigtails for the 7600 - threw them on the bench and started soldering and shrink wrapping the connections. The wiring diagram Crutchfield provides that tells you what color wire to match is perfect... and it was confusing - when I got to the blue, blue/white "power on trigger" wire - it said to also splice in a 3rd wire from the Metra 40-LX11 Antenna Adapter... Which seemed janky - so I called them. And man am I glad I did!
    To be clear - it's not janky - it's how it should be wired... BUT - contrary to a bunch of otehr posts I have seen here and otehr places - you DO NOT need to cut off the grey and white RCA plugs on the iDatalink HRN-RR-TO2 to connect the wires to the stereo... INSTEAD - the correct wiring of the WT7600 in a truck with the JBL setup is - plug the white and grey RCS's into the Front Output RCA's on the head-unit (that's a separate dongle from the bare wire harness). That's it. Done for sound. All the other wires on both the HRN-RR-TO2 and the head unit are NOT needed - and you can safely tape them off and you are done. The JBL splits the signal for you. I thought he was crazy - it works like a champ!

    Now once you get the factory head-unit out - Plim's Taco build - plastic box thing
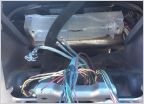
    In the back is this silly plastic box around the wiring harness in the truck serving some purpose probally to center the harness when the truck is being built. It's not needed... so - instead of trying to carefully cut the top off like the post above - you can stick a panel removal tool under the ends and pop the clips out of the steel cross bar. Then using a razor blade cut off the electrical tape - and ta-da - rotate the sucker and remove it - now it's gone completely and the harness can be sorta slid down in the crack behind the metal cross bar - now - nothing will bind with the WT7600 when you get to mounting it.
    IMG_1323.HEIC.jpg

    I did add a front camera as I had a NATIKA laying around I was going to add to my GT500 but didn't like the crappy electronics to do it in a new car - so it's been sitting on a shelf. This was probably the "hardest part" of the radio install - even tho it's got nothing to do with it really. I end up running the RCA able and the power for the camera through the same hole in the firewall that the hood release goes through. That way I didn't have to worry about screwing up any real wiring and it was also part of the rubber boot as designed. The key was - get a long screw driver through the boot into the cab... tape the quick release of the NATIKA cable to the screw driver in line - so it stays as narrow as you can... then from the engine bay - spray some silicone lube into the rubber boot where the screw driver is and pull slowly and steadily - and it works like a charm. The risk to this approach - you don't get it through the first time - you are fighting silicone on everything forever... But ti worked great. Then you just rout the RCA plug behind the dash using zip ties to the head unit and take the power that comes in and route that to a fuse tap in the kick panel fuse box to switched power and bobs your uncle - done!

    Somewhere I saw a post of someone taking a box and putting it over the center console shifter and using that as a table to work off of when fitting the headunit - that's brilliant - do that!

    Let's talk the most frustrating part IMHO - mounting. I say that because I'm both a spaz and exacting...
    So start with Plim's Taco build - screw placement in the mounting bracket and go from there. Why do I say go from there - because how you want it to sit will matter. As I posted above - I wanted a very slight angle on mine... I have seen people go from completely flush, I have seen slightly recessed, slightly exposed, poking way out... like - whatever you want - you can do - it just takes time and patience.
    Here's his picture - marked up - for the other adjustments I made it to it.
    2021-09-08_10-01-44.jpg
    The red arrow indicates an adjustment I didn't think to make until beating my head against the dash for an extra hour of my life. Following his instructions I added the relief to the lower screw placement and then I aligned the top of the bracket with the top of the radio... I'd test fit - and the top of the bracket was flush to the dash but the bottom 2 mounting bolt points were out by 1/4"... and while the bracket is plastic I didn't think installing it by using the bolts to pull it flush was a great idea. FINALLY it hit me - when you loosen the screws - you can rotate the bracket (red arrow) and that will magically (through the application of geometry) make things flush if they are off a little -and keep the depth the same. So that solved one issue.
    The green arrow is there to let you know there's a little design cutout on the unit chassis there behind the plastic in the pic - but it's a great reference point for how far in and out each side is in the bracket.
    The yellow line - is where I cut the front flanges off - nothing gets attached and the were just touching the screen when I got things adjusted and it seemed like a plastic on plastic opportunity for things to rattle - so - off with them!

    I followed @plim 's idea of mounting the unit high and letting the screen hand down... BUT - after getting things mounted - I realized I didn't like how the floating screen was attached... If you look at this next picture - you can see the bracket you mount to the unit and the red arrows are showing how you slide the screen down onto the brackets. When mounting like this at the highest position - you can only get 1 screw per side into the bracket - and that annoyed me. SO... I did the green arrow - and flipped the whole damn thing over in the "American International TOYK974 Dash Kit" - so the head unit was still at the top of the double din opening - I changed the screw holes in the bracket some - but still used the guide photo above and now the bracket with the red arrows below was pointing DOWN - so I could get 2 screws to secure the screen in place. Trade off - you can't use the plastic trim piece to cover up the bracket that comes with the WT7600... which is irrelevant because all that is inside the dash anyhow!
    What am I saying here - install the bracket to the head unit like you would expect, then flip the head unit upside down and mount it that way. The bracket on the front will extend farther DOWN that way - so you can use all 4 screws on the bracket to the screen to really make the screen secure.
    2021-09-08_10-11-28.png
    Once I made that change - it was an exercise in jamming all the wires and the SXM tuner and the Maestro RR into the spaces and buttoning things up.
    IMG_1314.HEIC.jpg
    This pic was before adding the cardboard table to making plugging things in and then plugging in the head unit easy.

    Couple of final thoughts.

    So - my final verdict - it's easy and IMHO nicer than a WC6600 just because the screen itself is bigger. but that's me. I love tossing the phone on the charging pad and just having CarPlay work - that's fancy!

    IMG_1321.HEIC.jpg
    IMG_1322.HEIC.jpg
     
    Last edited: Sep 8, 2021
    Branski, MGMDesertTaco, s0ar and 10 others like this.
  2. Sep 8, 2021 at 6:11 PM
    #2
    Gerrrr

    Gerrrr Well-Known Member

    Joined:
    Aug 20, 2013
    Member:
    #110850
    Messages:
    105
    Gender:
    Male
    First Name:
    Jeremy
    Ottawa, Canada
    Vehicle:
    2017 Blazing Blue Metallic (Limited 2013 Silver Streak DC Auto - Retired)
    Starting over.......
    Super post - thanks for taking the time. I am going to order the 7600 now!
     
    fishpick[OP] likes this.
  3. Sep 8, 2021 at 6:32 PM
    #3
    destin_meeks

    destin_meeks I used to fix people's crappy stereos

    Joined:
    Jul 14, 2017
    Member:
    #223997
    Messages:
    3,633
    Gender:
    Male
    First Name:
    Destin
    Tuscaloosa, AL
    Vehicle:
    2017 SSM DoubleCab TRD Off-Road 4x4
    So for clarification and certainty, it fits in the factory bezel with no modification, just trial and error getting the depth correct?
     
  4. Sep 8, 2021 at 10:13 PM
    #4
    fake4x4

    fake4x4 Well-Known Member

    Joined:
    Jun 20, 2015
    Member:
    #157787
    Messages:
    835
    Gender:
    Male
    Los Angeles, California
    Vehicle:
    3rd Gen Tacoma TRD Off-Road DCSB
    Cool stuff
    I might have to try this
     
  5. Sep 8, 2021 at 11:38 PM
    #5
    pochoboy

    pochoboy Well-Known Member

    Joined:
    May 20, 2019
    Member:
    #293791
    Messages:
    447
    nice write-up
     
    Anton338 and fishpick[OP] like this.
  6. Sep 9, 2021 at 5:17 AM
    #6
    fishpick

    fishpick [OP] Well-Known Member

    Joined:
    Aug 28, 2021
    Member:
    #375494
    Messages:
    64
    Gender:
    Male
    Non city part of NY w/ high taxes
    Vehicle:
    2018 TRD Sport
    Absolutely it does - no modification at all needed - and it fits damn near perfect. If you are being like insanely picky - and you stick your face like a foot away from it directly in front - the radius of the corner on the screen is slightly tighter than the bezel... but - if that bothers you - you have ODC well beyond the "fun" kind in a forum ;) It's basically a perfect fit!

    FUCK YEA!
     
    copsnok likes this.
  7. Sep 9, 2021 at 5:59 AM
    #7
    fake4x4

    fake4x4 Well-Known Member

    Joined:
    Jun 20, 2015
    Member:
    #157787
    Messages:
    835
    Gender:
    Male
    Los Angeles, California
    Vehicle:
    3rd Gen Tacoma TRD Off-Road DCSB
    Cool stuff
    My issue is my AVIC8500 is extremely buggy at times and it looks like these models a buggy as well , just hopefully less buggy
     
  8. Sep 9, 2021 at 6:46 AM
    #8
    fishpick

    fishpick [OP] Well-Known Member

    Joined:
    Aug 28, 2021
    Member:
    #375494
    Messages:
    64
    Gender:
    Male
    Non city part of NY w/ high taxes
    Vehicle:
    2018 TRD Sport
    I dunno - so far I haven't had anything out of the ordinary happen with mine. The buttons all work - CarPlay starts wirelessly every time and hasn't dropped - I can change inputs fine.

    I had a Sony unit in my 2010 Tundra and that one had a weird audio thing that was annoying - so I'm expecting that sort of behavior from this one at some point... but - I will tell you - this is 100% better than the factory unit any day of the week - any time... so - whatever little issue there are ahead - I'm cool with it.

    I still can't explain the monumental disappointment I felt when I pull off the lot with this new to me 2018... pulled over in a parking lot to get my phone hooked in and sat there like - "WTF - this thing has no CarPlay - who builds a non-base model in 2018 without CarPlay..." - Ohh what a feelin... This solved that - and I'm happy with all the features so far.

    And honestly - if it does get buggy where it requires a reboot - I will wire in a press button off switch to the hot line and put it somewhere hidden but accessible and can reboot the thing on the fly if needed. But I'm hoping that's never an issue - like I said - so far - lots of fiddling and driving with it - it's freakin great!
     
  9. Sep 18, 2021 at 6:36 PM
    #9
    Gerrrr

    Gerrrr Well-Known Member

    Joined:
    Aug 20, 2013
    Member:
    #110850
    Messages:
    105
    Gender:
    Male
    First Name:
    Jeremy
    Ottawa, Canada
    Vehicle:
    2017 Blazing Blue Metallic (Limited 2013 Silver Streak DC Auto - Retired)
    Starting over.......
    2017 Tacoma w/ JBL Stereo

    So I did the install of the WT7600 today. Thanks to Fishpick and Plim there was plenty of tips and pointers to follow for the installation. I used the same kit as listed above and modified the TOYK971 bracket the same way and it sits very nice.

    The Maestro unit did it’s thing and pulled the steering wheel controls and vehicle data over to the head unit.

    I ran the new microphone behind the knee bolster and up the pillar and under headliner to the factory location.

    My only issue at the moment is that the volume is low - I will pull everything out in the AM and have a closer look. The fader / balance controls work so I know the Maestro is communicating with the AMP (At least that is what I think). The volume is just not there - at max (40) it is just loud.

    Hopefully it is a simple something to sort out.
     
  10. Sep 18, 2021 at 9:31 PM
    #10
    the.shelbysaurus

    the.shelbysaurus Well-Known Member

    Joined:
    Jun 21, 2021
    Member:
    #369233
    Messages:
    313
    Gender:
    Female
    Colorado Springs, CO
    Vehicle:
    2019 Cavalry Blue SR5 4x4 ACLB
    Ironman 4x4 Foam Cell Pro, SPC UCAs, 285/70/17 KO2s, 1.25" Spidertrax spacers
    I know this isn't really what you're asking about, but perhaps retaining your OEM mic with this harness is an option? I think someone was even specifically asking about use with this head unit in the thread recently.

    https://www.tacomaworld.com/threads/3rd-gen-tacoma-oem-mic-adapter.714665/
     
  11. Sep 19, 2021 at 5:18 AM
    #11
    Gerrrr

    Gerrrr Well-Known Member

    Joined:
    Aug 20, 2013
    Member:
    #110850
    Messages:
    105
    Gender:
    Male
    First Name:
    Jeremy
    Ottawa, Canada
    Vehicle:
    2017 Blazing Blue Metallic (Limited 2013 Silver Streak DC Auto - Retired)
    Starting over.......
    The Pioneer Mic works fine, better than the factory one.

    I sorted out the volume problem this morning.

    When Maestro is installed with a JBL amplifier, the overall amplifier gain is controlled digitally through the head unit in the “OEM Settings” menu. Values of 10, 20, 30, 40, 50. Mine was set to 10 for whatever reason. Once I increased it to 40 it was as loud as ever.

    The layers of different parameters take some time to get used to and familiar with.
     
    the.shelbysaurus likes this.
  12. Sep 19, 2021 at 6:03 PM
    #12
    fishpick

    fishpick [OP] Well-Known Member

    Joined:
    Aug 28, 2021
    Member:
    #375494
    Messages:
    64
    Gender:
    Male
    Non city part of NY w/ high taxes
    Vehicle:
    2018 TRD Sport
    I don’t have that option in the menu!

    I have OEM settings - but no master gain. Just setting for different notification volumes…
     
  13. Sep 20, 2021 at 5:48 PM
    #13
    Gerrrr

    Gerrrr Well-Known Member

    Joined:
    Aug 20, 2013
    Member:
    #110850
    Messages:
    105
    Gender:
    Male
    First Name:
    Jeremy
    Ottawa, Canada
    Vehicle:
    2017 Blazing Blue Metallic (Limited 2013 Silver Streak DC Auto - Retired)
    Starting over.......
    Made a video of the menu .... check it out here

    https://youtu.be/9dQQTRnWpHg

    Amazing that we both have more or less same equipment but different configurations..
     
  14. Dec 28, 2021 at 9:08 PM
    #14
    UGAFAN

    UGAFAN Well-Known Member

    Joined:
    Feb 11, 2013
    Member:
    #97287
    Messages:
    141
    Gender:
    Male
    First Name:
    George
    Atlanta, GA
    Vehicle:
    2021 TRD Off-Road
    TRD lift and 33’s.
    Hate to revive a dead thread, but I couldn’t find an answer. Do you lose any of the stock features/functionality with this head unit? Does it impact the screen in between the gauges? I’m wanting to install on my 2021, and just want to make sure I know what I’m in for.

    Thanks!
     
  15. Dec 29, 2021 at 4:49 AM
    #15
    Gerrrr

    Gerrrr Well-Known Member

    Joined:
    Aug 20, 2013
    Member:
    #110850
    Messages:
    105
    Gender:
    Male
    First Name:
    Jeremy
    Ottawa, Canada
    Vehicle:
    2017 Blazing Blue Metallic (Limited 2013 Silver Streak DC Auto - Retired)
    Starting over.......
    The only thing “lost” is NAV directions on ceter display.

    I did replace the fan in my 7600 last week since started sounding like a food processor in the cold mornings. $12 Digikey - faster than a warranty claim.
     
    doublethebass and UGAFAN like this.
  16. Dec 29, 2021 at 7:00 AM
    #16
    fishpick

    fishpick [OP] Well-Known Member

    Joined:
    Aug 28, 2021
    Member:
    #375494
    Messages:
    64
    Gender:
    Male
    Non city part of NY w/ high taxes
    Vehicle:
    2018 TRD Sport
    If you are not in a hurry to buy... I will be pulling mine and selling it along with all the harnesses / etc, hopefully sometime late January. Might save yourself some scratch.
     
    UGAFAN likes this.
  17. Dec 29, 2021 at 7:04 AM
    #17
    UGAFAN

    UGAFAN Well-Known Member

    Joined:
    Feb 11, 2013
    Member:
    #97287
    Messages:
    141
    Gender:
    Male
    First Name:
    George
    Atlanta, GA
    Vehicle:
    2021 TRD Off-Road
    TRD lift and 33’s.
    Definitely interested if everything is in good shape. Please just shoot me a PM with what you’re asking. Late January is no problem. I’m 99% certain this is the route I want to go.
     
    fishpick[OP] likes this.
  18. Dec 29, 2021 at 12:21 PM
    #18
    MR.WaynesWorld

    MR.WaynesWorld Well-Known Member

    Joined:
    Aug 28, 2021
    Member:
    #375493
    Messages:
    394
    Gender:
    Male
    First Name:
    Wayne
    North East Pa
    Vehicle:
    2021 Black Tacoma Limited
    **** 2021 Mods **** Sokietech No Drill Hood Struts Color Matched Mirror Caps Color Match Door Handles SUPAREE LED Side Mirror Turn Signal Lights AVS Dark Smoked Hood Bugflector Meso Black Interior Door Handles AVS Window Vents AUTOGINE Super Bright 6000K White LED Vanity Mirror Lights 3D Rear Tacoma Letters Matte Black OEM Blacked Out Emblems OEM Black Trim around Fog Lights Full BedRug AMP Research Bed Extender LoMax Tonneau Cover RBP 77-Spike Wheels 18X9 Nitto Terra Grappler G2 tires 285/60 Blacked out Toyota emblem on steering wheel Dark Tint Front TSS Emblem MBRP Dual Exhaust KTJO Door Pod lighting Window Tint, 5% in the back 30% up front MESO Chrome Delete center console MESO Chrome Delete Vent Rings **** 2022 Mods **** Cali Raised Front Skid Plate Ice Blue Map and Dome LED bulbs Rek-Gen XL Mud Flaps - Black on Black All interior trim painted Matte Black with Flat Clear Coat Aqua Blue Foot Lights - Front and Rear MESO Switch Panel Custom Layout MESO 3 Switch Overhead console panel MESO Chrome Delete Climate Control Rings UpTop Bravo Roof Rack Extreme LED 38 inch LED Light Bar in Roof Rack Diode Dynamics LED Strip Grill Lights Meso Ultimate Tail Lights Rock Lights - 8 Cyclone V2's UpTop Roof Rack Grab Handles UpTop Scene Pods with Baja Design Rock Lights Diode Dynamics Elite Series Fog Lights CaliRaised Stealth Bumper 30 inch Infinite Offroad LED Light Bar X2 Zeak 10,000 Winch KTJO Driver's Side Grab Handle LambTek Winch Switch Boomers "faux" TRD Pro Shift Knob Tacoma Lifestyle Smoke Third Brake Light Blacked out Instrument Panel Lens Diff Drop Dobinson's Suspension, Front Coil Overs, UCA's, Rear Shocks and Leaf Packs DB Customz Grill, Color Match with RGBW LED Letter Lighting **** 2023 Mods **** PowerTrays Tray with Busemann Fuse Relay Pioneer DMH-WC6600NEX Maestro RR2 SiriusXM SXV300 Tuner BoxWare Anti Glare Screen Protector Varity of cables and adapters Focal ACX 690 Front Speakers Focal ACX 165 Rear Speakers Diode Dynamics Rock Lights - 3 in each wheel well Raceline Compass 17X9 wheels Toyo Tires Open Country A/T III 275/70R17 Tacoma Beast Infinity Tail Lights Taco Clout Wide Angle Convex Mirrors - Heated + Turn Signals + BSM KTJO Powered Folding Mirrors **** 2024 Mods ****
    Would be interested it as well.
     
    fishpick[QUOTED][OP] likes this.
  19. Jan 21, 2022 at 1:16 PM
    #19
    doublethebass

    doublethebass aspiring well-known member

    Joined:
    Jan 1, 2017
    Member:
    #206252
    Messages:
    3,328
    Gender:
    Male
    First Name:
    Antoin
    Minneapolis MN
    Vehicle:
    ’17 6MT Pro
    you getting something different?
     
  20. Jan 21, 2022 at 1:17 PM
    #20
    doublethebass

    doublethebass aspiring well-known member

    Joined:
    Jan 1, 2017
    Member:
    #206252
    Messages:
    3,328
    Gender:
    Male
    First Name:
    Antoin
    Minneapolis MN
    Vehicle:
    ’17 6MT Pro
    is there a way to turn off the display with this head unit? I see it can power off, but would that mean if the screen's off, no music?
     

Products Discussed in

To Top