

-
Welcome to Tacoma World!
You are currently viewing as a guest! To get full-access, you need to register for a FREE account.
As a registered member, you’ll be able to:- Participate in all Tacoma discussion topics
- Communicate privately with other Tacoma owners from around the world
- Post your own photos in our Members Gallery
- Access all special features of the site
 Lighted Console-Cheap DIY Write-Up
 TRD OEM LED conversion harness DIY info
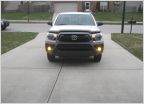 Yellow Fog Frustration
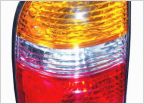 Tail lights
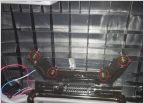
 Help,Cannot Remove Nut (rounded) to instal bracket
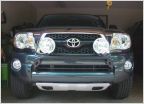 Wiring factory push button switch w/Hella 700's
Side Turn Signal Repeaters / Markers Mod
Discussion in 'Lighting' started by Crom, Apr 23, 2010.
Page 1 of 3
Page 1 of 3

