1. Welcome to Tacoma World!

    You are currently viewing as a guest! To get full-access, you need to register for a FREE account.

    As a registered member, you’ll be able to:
    • Participate in all Tacoma discussion topics
    • Communicate privately with other Tacoma owners from around the world
    • Post your own photos in our Members Gallery
    • Access all special features of the site

Sirius Install (w/photos) Factory 09 Tacoma

Discussion in 'Audio & Video' started by BPachom, Mar 1, 2009.

  1. Mar 1, 2009 at 10:29 AM
    #1
    BPachom

    BPachom [OP] Well-Known Member

    Joined:
    Jan 6, 2009
    Member:
    #12297
    Messages:
    302
    Gender:
    Male
    Long Island
    Vehicle:
    09 Tacoma SR5, 4cyl 4X4, Black
    Access roll-up tonneau cover, Factory radio W/Sirius, Tailgate clamp, HID head lights, Stainless nerf bars.
    Installed Sirius satellite in an 09 Access cab utilizing the factory satellite ready radio with "sat" button and factory satellite antenna. This was accomplished by installing the SCC1 & TOY-SC1 into/under the center console, connected to the factory radio and factory satellite antenna connection (located in the driver side kicker panel) via the SFA 12M sharkfin adapter.

    Below are photos for reference. (Hope they show up in the post)

    Equipment needed shown here on Sirius web site, plus the SFA 12M shark fin adapter (approx. $58.00) which can be found on line at other web sites and allows use of the factory installed satellite antenna.


    In order to access the kicker panel, the door sill has to be removed.


    The door sill is removed by lifting it up with your hand:


    Next step is to remove the foot rest by lifting up with your hand;


    Following this, is the plastic knob removal that simply unscrews so the kicker panel can be removed.


    The next photo shows the removal of the kicker panel;


    Pull the kicker panel towards the rear of he truck, it simply snaps out.


    Insert the SFA 12M sharkfin adapter here, and run the other end to the Sirius tuner, hiding the wire in and behind the dash.


    The above photo shows the factory radio pulled out from the dash with the factory wire connections. The black plug on the right (second to last) is disconnected, replaced by the Sirius tuner harness and this black factory unplugged connection is plugged into the Sirius harness, see next photo.


    Tuck and feed the Sirius harness thru the dash to the SCC1 & TOY-SC1 devices located in and behind the center console, (wherever they are located). Reinstall the factory radio. (FYI… if you notice the long time span between these photos, was due to me searching for the best location of the SCC1 & TOY-SC1. I took this photo after testing all devices and just before re-installing the radio.)

    [COLOR=black][FONT=Verdana]
    [/FONT][/COLOR]
    [COLOR=black][FONT=Verdana]Both units are simply wedged in and stay in place, even after driving on rough terrain. A strong double sided mounting tape would provide additional support.[/FONT][/COLOR]
    [COLOR=black][FONT=Verdana]My choice for the interface location was easy access as there are settings for display on how it appears on the factory radio (scrolling, number of characters, etc.) and a fuse on this device. So in the event I decided to change the display, or had to replace the fuse, it can be done without any tools.[/FONT][/COLOR]
    [COLOR=black][FONT=Verdana]
    [/FONT][/COLOR]
    [COLOR=black][FONT=Verdana]The above photo shows the [/FONT][/COLOR][COLOR=black][FONT=Verdana]SCC[/FONT][/COLOR][COLOR=black][FONT=Verdana]1 tuner which can be seen from this angle, but not when sitting in the vehicle and it does not interfere with your passengers feet or anything else.[/FONT][/COLOR]
    [COLOR=black][FONT=Verdana][/FONT][/COLOR]
    [COLOR=black][FONT=Verdana][COLOR=black][FONT=Verdana]
    [/FONT][/COLOR]
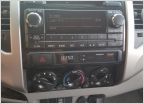
    [COLOR=black][FONT=Verdana]This is end result, with no clutter or extra components on the console, dashboard, windshield, etc. There are three “[/FONT][/COLOR][COLOR=black][FONT=Verdana]SAT[/FONT][/COLOR][COLOR=black][FONT=Verdana]” channels ([/FONT][/COLOR][COLOR=black][FONT=Verdana]SAT[/FONT][/COLOR][COLOR=black][FONT=Verdana]1 is shown) with six settings per [/FONT][/COLOR][COLOR=black][FONT=Verdana]SAT[/FONT][/COLOR][COLOR=black][FONT=Verdana]. The display setting is showing the channel name (Howard Stern Sirius 100) which by the pressing the “Text” button, can change to the channel number or what song is being played.[/FONT][/COLOR]
    [COLOR=black][FONT=Verdana] [/FONT][/COLOR]
    [COLOR=black][FONT=Verdana] [/FONT][/COLOR]
    [COLOR=black][FONT=Verdana]My estimation is from start to finish takes about an hour. [/FONT][/COLOR]
    [/FONT][/COLOR]
     
  2. Jun 6, 2009 at 11:09 PM
    #2
    TacomaCountry09

    TacomaCountry09 Member

    Joined:
    Jun 6, 2009
    Member:
    #18117
    Messages:
    13
    Gender:
    Male
    Orange County NY
    Vehicle:
    09 Tacoma TRD
    I dont see the photos......Do you still have them?
     
  3. Jun 7, 2009 at 5:37 AM
    #3
    BPachom

    BPachom [OP] Well-Known Member

    Joined:
    Jan 6, 2009
    Member:
    #12297
    Messages:
    302
    Gender:
    Male
    Long Island
    Vehicle:
    09 Tacoma SR5, 4cyl 4X4, Black
    Access roll-up tonneau cover, Factory radio W/Sirius, Tailgate clamp, HID head lights, Stainless nerf bars.

Products Discussed in

To Top