

-
Welcome to Tacoma World!
You are currently viewing as a guest! To get full-access, you need to register for a FREE account.
As a registered member, you’ll be able to:- Participate in all Tacoma discussion topics
- Communicate privately with other Tacoma owners from around the world
- Post your own photos in our Members Gallery
- Access all special features of the site
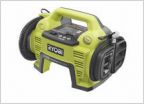 Recommendations for a Cordless Tire Inflator
 New SHELL Rotella 0w20 for Gas Engines
 Are You Really Getting Genuine Toyota OEM Parts Other Than From The Dealership?
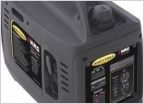 Smittybilt generator 2600 watts
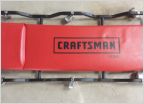 Who makes the best CREEPER?
Step by Step, How to Spray Paint with quality results.
Discussion in 'General Automotive' started by ERMB, Nov 9, 2015.
Page 1 of 3
Page 1 of 3


