

-
Welcome to Tacoma World!
You are currently viewing as a guest! To get full-access, you need to register for a FREE account.
As a registered member, you’ll be able to:- Participate in all Tacoma discussion topics
- Communicate privately with other Tacoma owners from around the world
- Post your own photos in our Members Gallery
- Access all special features of the site
 OBDII In truck scanner
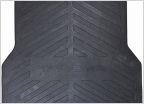 Tacoma Gift Help for Boyfriend
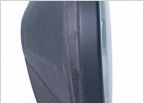 Grill fog light dilema???
 2012 OR TRD Denied Leaf even with Squeak.
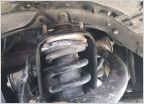 Old Man Emu Lift kit popping noise from Strut Mount
 Any tricks for keeping truck cooler? AC wise.
Striker latch rust access cab
Discussion in '2nd Gen. Tacomas (2005-2015)' started by KTM753, Nov 3, 2018.
Page 1 of 2
Page 1 of 2


