

-
Welcome to Tacoma World!
You are currently viewing as a guest! To get full-access, you need to register for a FREE account.
As a registered member, you’ll be able to:- Participate in all Tacoma discussion topics
- Communicate privately with other Tacoma owners from around the world
- Post your own photos in our Members Gallery
- Access all special features of the site
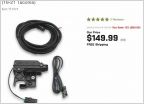 Power Tailgate Lock Conversion Kit
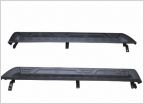 Let me see your Access Cab step bars...
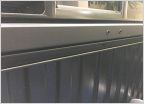 Adding a Front Header Deck Bed Rail
 Strut Top Hats
 Apple CarPlay 2017 Taco
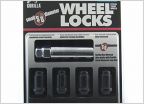 Locking Lug Nuts
Switch Pros 9100 install and BS thread
Discussion in '3rd Gen. Tacomas (2016-2023)' started by PNWTacoma, Feb 16, 2018.
Page 22 of 96
Page 22 of 96


