1. Welcome to Tacoma World!

    You are currently viewing as a guest! To get full-access, you need to register for a FREE account.

    As a registered member, you’ll be able to:
    • Participate in all Tacoma discussion topics
    • Communicate privately with other Tacoma owners from around the world
    • Post your own photos in our Members Gallery
    • Access all special features of the site

Tpp4's SR: Don't Call It a Build

Discussion in '3rd Gen. Builds (2016-2023)' started by tpp4, Nov 7, 2019.

  1. Nov 7, 2019 at 1:11 AM
    #1
    tpp4

    tpp4 [OP] Well-Known Member

    Joined:
    Oct 11, 2019
    Member:
    #307757
    Messages:
    269
    Memphis
    Vehicle:
    2018 DCSB SR
    As she sits now:


    Mods

    Interior:
    • Weathertech Floormats
    • Dashtop Single Mount - The Taco Garage
    • URPower Upgraded Dog Seat Covers
    • Center Console Organizer - OCD Organizer
    • Glovebox Organizer - OCD Organizer
    • Glovebox Letter Inserts
    Exterior:
    • Metal Tailgate Letter Inserts
    • Factory Predator Steps
    • Ripcord Camper
    • OEM Front Bed Rail
    Wheels:
    • TRD OR Rims 16"
    • Wrangler Duratrac Tires 275/65/16s
    Lighting:
    • Nitori's OEM SR Foglight Mod
    • DD SS3 Pros: Selective Yellow
    Audio/Video:
    Electronics:
    • Viper 5906v Remote Start
    Under the Hood:
    • A/C Drain Mod
    Medical:
    • Micro Jump Bag
    • Ouch Pouch
    • Blowout Kit
    Accessories:
    Planned:
    • Intermittent Wiper Mod
    • Tint
     
    Last edited: Mar 5, 2023
    davidstacoma and AramsTRD like this.
  2. Nov 7, 2019 at 1:17 AM
    #2
    tpp4

    tpp4 [OP] Well-Known Member

    Joined:
    Oct 11, 2019
    Member:
    #307757
    Messages:
    269
    Memphis
    Vehicle:
    2018 DCSB SR
    Hey y'all,

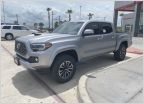
    I'm new here and to the taco life. I had been looking to get a tacoma as my next vehicle, and the week before I was set to be married, I was tboned on the highway and my mustang was totaled. Thankfully, everyone was ok. My now wife and I went from a 1 vehicle household to a 0 vehicle household. I found a 2018 basic tacoma locally that I could afford. A tornado came through the city, and low and behold blew out the back windows on my truck before I could pick it up from the dealer. I just got it back today from the paint booth where they fixed all the rock damage and replaced the glass. The dealership threw in some weathertechs, but other than that she is bone stock. She's going to need a lot of work, so I figured I would make a thread to document the journey. I unfortunately don't have any pictures that I took of her, but I will attach a dealer photo.

    Day 1:
    00S0S_lF2UJfNf8bR_600x450.jpg

    Said mustang:
    Snapchat-7788089896129225064.jpg
     
    Last edited: Dec 17, 2019
  3. Nov 7, 2019 at 1:55 AM
    #3
    tpp4

    tpp4 [OP] Well-Known Member

    Joined:
    Oct 11, 2019
    Member:
    #307757
    Messages:
    269
    Memphis
    Vehicle:
    2018 DCSB SR
    The truck came without bed cleats, so I picked up some on here from @SilverSky thanks again!
    Dealer installed the basic weathertechs, but they were free, so no complaints.
    Low and behold my vent mount for my phone broke, so I had to break down and buy the DSM kit. Oh darn, it was on sale too. Delivery expected Friday.
    I plan to install remote start/security as soon as I can negotiate a good price on one with an LCD fob. Insurance said they'd cut $17/month too!
    Next will be some SAE/DOT fogs because they are necessary down here, and not too expensive.
    And then I will be tinting it out to probably 35% all the way around with 70% on the windshield.

    Hoping to get some camping in soon. I've got a shakedown planned for this weekend, and may crawl under the hood/footwell to figure out what is up with my DRLs acting funny. I posted a thread in the lighting section about it if anyone has any ideas. I'm also going to get some rust stop and do the A/C drain mod. And probably secure my tailgate with some hose clamps for the time being.
     
    AramsTRD likes this.
  4. Nov 10, 2019 at 2:23 AM
    #4
    tpp4

    tpp4 [OP] Well-Known Member

    Joined:
    Oct 11, 2019
    Member:
    #307757
    Messages:
    269
    Memphis
    Vehicle:
    2018 DCSB SR
    Got my DSM in the mail and mounted in about 15min. 3/16 bit is the perfect size for those who have one, but not a #10. Maybe tomorrow I can run by lowes and pick up supplies for the aforementioned mods.
    20191109_185226.jpg
     
    Last edited: Nov 20, 2019
  5. Nov 12, 2019 at 11:59 PM
    #5
    tpp4

    tpp4 [OP] Well-Known Member

    Joined:
    Oct 11, 2019
    Member:
    #307757
    Messages:
    269
    Memphis
    Vehicle:
    2018 DCSB SR
    Haven't made it by lowes yet, but prioritized the remote start install on Monday because of the cold front moving through on Tuesday. Got a pretty good deal on a viper 5906v and my butt was thankful Tuesday morning after work when it was snowing.
    20191112_220255.jpg
     
  6. Nov 24, 2019 at 4:08 PM
    #6
    tpp4

    tpp4 [OP] Well-Known Member

    Joined:
    Oct 11, 2019
    Member:
    #307757
    Messages:
    269
    Memphis
    Vehicle:
    2018 DCSB SR
    I solved my DRL issue that I was having. As it turns out, the bulb has two filaments. Only one is powered when the headlights come on, and that was the bad one.

    Next up on the docket is adding fog lights. I noticed when digging around under the hood for my DRL issue that I have several wire looms with connectors that just seem to terminate in various locations. It's as if the vehicle is pre wired for several different things, but I'm not sure as to what. 2 connectors terminate behind the driver side headlight, and there are several behind the grille. I'm going to pull the housing off the steering column to see if I'm pre wired for fog lights, but I don't think I am, as it's an SR without the convenience package. I may have to post up some pictures on here to see if anyone has any ideas.

    I've picked up the parts for the A/C drain fix, but haven't gotten around to installing them yet. There's a little bit of surface rust I want to take care of first beforehand.

    Lastly, I am missing the piece that goes in the end of the bed cleat channel and the piece that secures the floormat to the floorboard if anyone knows where I can find one. I have attached pictures for reference.

    Bed cleat channel end cap missing:
    20191124_091455.jpg

    Screw? that attached floormat missing:
    20191124_091516.jpg
     
    Last edited: Nov 24, 2019
  7. Nov 24, 2019 at 5:04 PM
    #7
    tpp4

    tpp4 [OP] Well-Known Member

    Joined:
    Oct 11, 2019
    Member:
    #307757
    Messages:
    269
    Memphis
    Vehicle:
    2018 DCSB SR
    So I pulled the steering column housing, and I'm not prewired for fog lights...bummer. But now I'm even more confused about what those connectors are for. I have included pictures so that maybe someone can identify them.

    Behind Driver's side headlight:
    20191124_184636.jpg
    There's also a grey connector of some sort that looks like it's coming out of the back of the headlight maybe. I couldn't get the camera into an angle to photograph it.

    Behind the grille:
    20191124_184428.jpg

    Behind the passenger's side headlight:
    20191124_185406.jpg
     
  8. Nov 25, 2019 at 8:47 PM
    #8
    Kerleyfries

    Kerleyfries Idk what the hell I'm doing

    Joined:
    Dec 20, 2013
    Member:
    #118909
    Messages:
    7,456
    Gender:
    Male
    First Name:
    Zack
    Lebanon
    Vehicle:
    ‘17 F150 and SAS ‘98 4runner
    @Thirty8special any insight on the fogs? Was your truck prewired for them?
     
  9. Nov 27, 2019 at 5:32 PM
    #9
    Thirty8special

    Thirty8special Well-Known Member

    Joined:
    Aug 28, 2017
    Member:
    #228302
    Messages:
    138
    Gender:
    Male
    First Name:
    Lucas
    AL
    Vehicle:
    2017 Tacoma SR
    Grill, lights, wheels & tires
    Nope. I had the same harness on the bumper bar behind the grill. It seems like every 3rd gen Tacoma got those but Toyota decided it was too much cost to add the wires from that harness to the column. I just wired a switch in to the lower left cubby area with a KC harness to connect my Morimoto LED fogs.
     
  10. Dec 4, 2019 at 4:16 PM
    #10
    Fleischwagen

    Fleischwagen 2.7 > 3.5

    Joined:
    Aug 8, 2017
    Member:
    #226281
    Messages:
    329
    Gender:
    Male
    North Jersey
    Vehicle:
    2017 SR 5MT 4X4
    5.29's, ARB locker, 6112/5100, Deaver AAL, LCE Header, aFe dry-flo filter, Hurst/Core shifter, CBI T3 Front, Warn Winch, CB/UHF Radio equipment, Backrack, KC fogs and spots
    In your second to last posted picture, the 2 pin connector with the green wire and what looks to be a white with black stripe is the factory fog light harness. The one above that is for a second horn. SR trucks only have one while the others get a high and low tone setup. Now if you have the other wiring for the fog lights which is up in the steering column is the real question. If you search in the 3rd gen section, there was a really good write up about adding them if do or don't have everything to make it plug and play. Nice truck and nice choice with the silver SR!
     
  11. Dec 4, 2019 at 11:54 PM
    #11
    tpp4

    tpp4 [OP] Well-Known Member

    Joined:
    Oct 11, 2019
    Member:
    #307757
    Messages:
    269
    Memphis
    Vehicle:
    2018 DCSB SR
    It seems as though I will still need at least part of the wiring harness as I am not wired to the stalk
     
  12. Dec 10, 2019 at 8:49 AM
    #12
    tpp4

    tpp4 [OP] Well-Known Member

    Joined:
    Oct 11, 2019
    Member:
    #307757
    Messages:
    269
    Memphis
    Vehicle:
    2018 DCSB SR
    Still no progress on the fogs, hoping to get some for Christmas. I did however manage to snag a fantastic Black Friday deal on kicker speakers and a key amp from crutchfield. The whole install took about 2 days because I was doing nearly full sound deadening along with the speakers and the amp install. I'm sure that is super slow, but I have never done something like this before so I was very cautious. I put down probably close to 90% coverage with kilmat 50mil. I ordered 25sqft and probably used 21 of it. I didn't do the interior panels at the top 1/3 of the door because I was concerned about interfering with the window. Plus it also would have been very difficult to get a roller in there to get it pushed down.

    I installed the Subaru kicker tweeters in the dash, kicker cs 6x9 3ways in the front doors, and kicker 6.75 2 ways in the rear doors. The key amp was installed underneath the head unit and wired up using a PnP harness using factory connectors. I gleaned lots of information about all of it from the forums and @destin_meeks. I'm currently working on a full write up of the wiring for the harness to simplify things for those less confident with the install. The audio is lightyears ahead of where the factory sound system was, and I went for a very budget friendly build. The key amp was essentially required since I have the low end head unit of the SR. To really get the full sound out of these speakers, I needed the amp to drive them. I'm still fine tuning the EQ on the head unit to try to get the sound I like most, but wow this was a surprising improvement. I'm contemplating adding a kicker hideaway under the drivers seat, but I'm going to let this system break in first.
     
    Fleischwagen and destin_meeks like this.
  13. Dec 14, 2019 at 3:55 AM
    #13
    tpp4

    tpp4 [OP] Well-Known Member

    Joined:
    Oct 11, 2019
    Member:
    #307757
    Messages:
    269
    Memphis
    Vehicle:
    2018 DCSB SR
    davidstacoma likes this.
  14. Dec 14, 2019 at 4:08 AM
    #14
    Gearheadesw

    Gearheadesw must modify

    Joined:
    Apr 2, 2012
    Member:
    #76139
    Messages:
    5,090
    Gender:
    Male
    Davenport Fl
    Vehicle:
    1 truck 1 car 1 motorcycle
    Good job, weird deal about the tornado.
    Looks like your making the truck your own.
     
  15. Jan 4, 2020 at 12:25 AM
    #15
    tpp4

    tpp4 [OP] Well-Known Member

    Joined:
    Oct 11, 2019
    Member:
    #307757
    Messages:
    269
    Memphis
    Vehicle:
    2018 DCSB SR
    I had a successful Christmas with the wife and family, so I have some installs planned for my next day off with good weather. I have the fog bulbs already, but need to order the harness, bezels, relay, wire terminals, and a switch. I have found a short switch, but I need to source another to get the correct led color for the backlighting. I'm not sure why no one seems to have the exact color led that toyota uses.

    I will be taking more pictures of the mods that I have completed along the way, because let's be honest, a wall of text is boring.
     
  16. Apr 28, 2020 at 7:28 PM
    #16
    tpp4

    tpp4 [OP] Well-Known Member

    Joined:
    Oct 11, 2019
    Member:
    #307757
    Messages:
    269
    Memphis
    Vehicle:
    2018 DCSB SR
    So I was hit head on while sitting still back in February, and just now got my truck back. Somehow, it wasn't totaled.

    20200212_183128.jpg

    I got around to installing my fog lights today, and hit another snag in the wiring of the switch as well as the engine bay connector that has primer on the contacts...I've reached out to the body shop on fixing the harness because I'm not sure they can be scrubbed clean. Any suggestions welcome, as they seem to break more shit than they fix.

    20200428_073409.jpg

    I also wired everything up for my front camera, and no dice..no video output to my HU. So, needless to say, I'm frustrated. In other news, a very generous member on here gave me a set of predator steps that are awaiting pickup in Nashville. Unfortunately, with the covid lockdown, it hasn't been an option, especially since my wife and I are in healthcare.
     
  17. May 9, 2020 at 10:43 PM
    #17
    tpp4

    tpp4 [OP] Well-Known Member

    Joined:
    Oct 11, 2019
    Member:
    #307757
    Messages:
    269
    Memphis
    Vehicle:
    2018 DCSB SR
    May 9th, 2020:

    Accomplished a lot this weekend. I got my fog lights mounted, and fabbed up a custom harness for my OEM switch. I got my front facing camera mounted and fabbed a custom harness for it because my truck is special...I'm beginning to sense a pattern. My friend came in town, delivered my predator steps, and helped me mount them too.

    Fog Lights:

    So, I wanted to be special and have an OEM short style switch, and I quickly found out that the OEM connector apparently does not have a part number (if anyone knows of one, let me know).

    Said connector:
    20200420_133325.jpg 20200420_133332.jpg 20200420_133340.jpg 20200420_133353.jpg

    So in a strange twist of events, I ended up with a spare main wiring harness because the dealership burned the original one up. I simply cut off the connector, added on two t-taps, soldered a repair terminal on, and used a terminal connector to ground it. @caribe makaira, @Kens04Taco, and @DES2009 helped out with identifying which wires went where.

    Switch mounted up:
    20200507_161919.jpg

    For the rest of the install, I followed nitori's SR foglight mod. Because the information wasn't out there when I looked, for anyone curious, green is positive and white w/ black stripe is ground on the fog light harness. Actually, it seems that toyota uses white w/ black stripe across the board as a ground. I aimed the fogs as low as possible since these were an add-on, and I couldn't cheat to get them aimed. I will aim them properly on my next day off.

    20200507_151326.jpg

    Front Facing Camera:
    I picked up the Car Solutions Camera Controller in the group buy from @FreshMexicanTaco and nabbed my nakita 720p backup/front view camera on Amazon. Now, my radio does not have the square 8-pin connector that I believe is used for the GPS/XM antenna, so I had to get a little creative. The connector is normally placed on the bottom row to the right of the speaker connections.

    20200428_131023.jpg

    I went back to my damaged wiring harness and searched for the connector, and happened to find it. So somewhere on the basic SR, I guess it still exists. I noticed it was near one of the plugs for a cigarette outlet, so I presume it's in the lower dash or center console. I cut the connector off, isolated the wires I didn't need with electrical tape and put heatshrink over the bundle. Note here: blue is ACC power, black is ground.

    20200507_124335.jpg

    Then I used t-taps to tap into my t-harness that I made for my Kicker key amp. It is possible to do this with the metra connectors that I used for my amp harness if you don't want to tap into factory wiring. Most of the 8-pin connector is just a pass through, but two of the pins are used to power the car solutions module. I used TESA tape to make it look a little cleaner, but didn't run it to the end so that I could remember which wire was which. I reused some of the t-tap connectors off my old harness because the local auto stores don't carry the right size for some reason.

    20200507_160117.jpg

    Car solutions 8-pin male connector fits perfectly into my newly made harness.

    20200507_160335.jpg

    Other end of the connector where you can see the pinouts for ACC power and ground that I used.

    20200507_133321.jpg

    Positive and negative leads from the CS t-harness, match up to the blue and black leads of my connector.

    20200507_133253.jpg

    I also decided at the suggestion of another member on here, to remove that gunky foam wrap from the wiring and redo it with TESA tape. Oh my gosh, I wouldn't wish working with that foam shit on my worst enemy. If you do this, WEAR GLOVES! It is unbelievably sticky, like cartoon level sticky.

    20200507_160210.jpg

    After that I just hooked up the respective parts of the CS harness to the radio and factory harness. I connected the +12v output to the trigger lead using the supplied connectors and the yellow RCA cable to the front camera connector. I had to do some finagling since my kicker key amp was already back there. After the photo, I realized I still needed to move the amp a little more to the left to get it to fit. I then put the CS module in the hole to the right. I pushed all the wiring down in the channel between the amp and the dash. It was a very tight squeeze, but I was able to put the radio back in with minimal effort.

    20200507_160441.jpg

    I ran the rest of the RCA cable down the hole behind the dash that runs into the driver's side floorboard. I ziptied the cable along with other wiring to keep it out of the way. There's a bundle of probably 10ft of extra wound up, ziptied, and tucked behind the lower trim panel. I then took the rest of the cable and passed it through the firewall...that was a bitch and a half. It would definitely pay to have a friend help you with this one. I taped the RCA connector to a coathanger and shoved it through the grommet in the firewall. I made the opening large enough to pass it by using a screwdriver to pull the gasket out of the way. The rest of the video cable along with the unused camera power wires are in a loom that runs along side the headlight engine bay harness. I also ziptied it to keep it neat and out of the way. There's still a bit of extra that I bundled on the drivers side behind the bumper where the fog light harness sits. I then fed the rest of the wiring through until it reached behind the grill, and again used zipties to secure it.

    20200507_144608.jpg

    The RCA with the trigger wire was connected to the camera hookup, and the power line was connected as well. I then wrapped my connections with electrical tape to protect them from the elements and keep them semi-permanently connected. I cut the white wire, isolated the ends, and wrapped them with tape to set my camera for front use. I have not decided if I want to keep the gridlines yet. If not, I'll cut the green wire too.

    20200507_143010.jpg

    My current view with the camera mounted just to the right of my emblem. Right now, part of the grill obstructs the bumper from view. My buddy suggested flipping the mount backwards to push the camera out further, allowing me to get more of the bumper in view of the camera. I will probably experiment with this on my next day off.

    20200507_161832.jpg

    20200507_142037.jpg

    Predator Steps:
    Mounting these was painless. There are some pop-in rivets with a flat head that are removed with less than a full turn. It seems like they were just there to keep dirt and debris out. Then I just had my buddy hold one end while I put the bolts in. A little snugging, and that was it. Super simple. Somehow, I forgot to take a picture of the steps after mounting them.
     
    Last edited: May 9, 2020
    DES2009 likes this.
  18. May 10, 2020 at 7:23 AM
    #18
    Kens04Taco

    Kens04Taco Well-Known Member

    Joined:
    Sep 11, 2016
    Member:
    #196991
    Messages:
    1,770
    Gender:
    Male
    Sunland, CA
    Vehicle:
    2004 PreRunner 4x4
    kangs and thanngs
    Congrats on completing your mod buddy :thumbsup:
     
  19. May 17, 2020 at 2:28 PM
    #19
    tpp4

    tpp4 [OP] Well-Known Member

    Joined:
    Oct 11, 2019
    Member:
    #307757
    Messages:
    269
    Memphis
    Vehicle:
    2018 DCSB SR
    Took her out to the local watering hole, so I figured I'd snap a pic of the steps mounted up

    20200517_123618.jpg
     
  20. Mar 20, 2021 at 5:39 PM
    #20
    CoMo Taco

    CoMo Taco Well-Known Member

    Joined:
    Feb 20, 2020
    Member:
    #319827
    Messages:
    265
    Gender:
    Male
    First Name:
    Judah
    Columbia, Missouri
    Vehicle:
    2018 Toyota Tacoma SR Access Cab 4x4
    Alpine stereo replacement, 6x9 Kicker front door speaker upgrade, Kicker tweeter upgrade. 6000k HID upgrade, Running boards installed, Rear seats installed, Pedal Commander, Meso Map Lights, TRD pro grille, Raptor lights, TRD Pro rims, 4600's Bilsteins, Diode Dynamics SAE Yellow Fog lights, Custom fuse box.
    Did you just drill the bracket holding the camera into the grille?
     
To Top