1. Welcome to Tacoma World!

    You are currently viewing as a guest! To get full-access, you need to register for a FREE account.

    As a registered member, you’ll be able to:
    • Participate in all Tacoma discussion topics
    • Communicate privately with other Tacoma owners from around the world
    • Post your own photos in our Members Gallery
    • Access all special features of the site

Upgrade Upholstery

Discussion in '1st Gen. Tacomas (1995-2004)' started by gibsonman63, Apr 20, 2014.

  1. Apr 20, 2014 at 3:20 PM
    #1
    gibsonman63

    gibsonman63 [OP] New Member

    Joined:
    Mar 15, 2014
    Member:
    #125406
    Messages:
    4
    Gender:
    Male
    First Name:
    Bob
    Houston
    Vehicle:
    PreRunner
    Stock
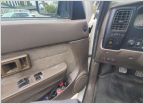
    I took a chance on eBay and bought a used passenger seat from a 1998 Tacoma. Eight bolts later, I have a new driver's seat on my 1999 Tacoma. Total time under an hour. The hardware and mounts are different from the driver to the passenger side, but the upholstery is the same and fits either side.
     
    This site contains affiliate links for which the site may be compensated.
    #1
  2. Apr 20, 2014 at 5:22 PM
    #2
    Andy.G

    Andy.G Well-Known Member

    Joined:
    Jan 31, 2014
    Member:
    #121972
    Messages:
    1,330
    Gender:
    Male
    First Name:
    Andy
    Virginia
    Vehicle:
    96 tacoma sx 4x4 2.7 5 speed
    Started automatic. Swapped to manual
    Did you skin it?
     
  3. Apr 21, 2014 at 4:13 AM
    #3
    gibsonman63

    gibsonman63 [OP] New Member

    Joined:
    Mar 15, 2014
    Member:
    #125406
    Messages:
    4
    Gender:
    Male
    First Name:
    Bob
    Houston
    Vehicle:
    PreRunner
    Stock
    No skinning required. The bottom part has four bolts holding the seat to the frame. You have to remove the plastic trim off if each side first. The top is also held on with four bolts. The seat is clipped together at the bottom. Unclip by hand and push the cover up on each side to reveal the bolts.
     
  4. Apr 21, 2014 at 6:35 AM
    #4
    Andy.G

    Andy.G Well-Known Member

    Joined:
    Jan 31, 2014
    Member:
    #121972
    Messages:
    1,330
    Gender:
    Male
    First Name:
    Andy
    Virginia
    Vehicle:
    96 tacoma sx 4x4 2.7 5 speed
    Started automatic. Swapped to manual
    Cool. So the seats are bi, only seat rails are left and right!
     
  5. Apr 21, 2014 at 7:23 AM
    #5
    Mod

    Mod Well-Known Member

    Joined:
    Jul 29, 2010
    Member:
    #40950
    Messages:
    1,787
    Gender:
    Male
    CR, WA
    Vehicle:
    1999 8 port 3RZ 4WD SR5
    stock
    So you had a 60/40,, you removed the 60 and just bolted a 40(pass seat) into those driver side mounts?
     
  6. Apr 21, 2014 at 8:26 AM
    #6
    Ice Horse

    Ice Horse Stalking horse

    Joined:
    Sep 26, 2012
    Member:
    #87761
    Messages:
    16,367
    Gender:
    Female
    First Name:
    Lauren
    Colorado
    Vehicle:
    98 3.4L V6 TRD Ext. Cab 4x4 SR5
    ADS Racing Shocks 2.5" Extended Travel Coilovers with Reservoirs, 3 inch All Pro rear suspension kit, factory E-locker, Trail Gear sliders and front stinger bumper, CBI Offroad rear tube bumper, XRC8 Winch, 33 inch BFG KM2's, 16 inch Ivan Stewart Wheels, Uniden CB radio, flip up license plate, white tail lights, LED front signals, Tundra front brake upgrade, new radio, rock lights, sub woofer, remote start, satoshi grille with Prius emblem, Rigid DOT/SAE Fog Lights, 12" Light Bar
    How does that work with the seat belts?
     
  7. Apr 21, 2014 at 4:44 PM
    #7
    Andy.G

    Andy.G Well-Known Member

    Joined:
    Jan 31, 2014
    Member:
    #121972
    Messages:
    1,330
    Gender:
    Male
    First Name:
    Andy
    Virginia
    Vehicle:
    96 tacoma sx 4x4 2.7 5 speed
    Started automatic. Swapped to manual
    Must be buckets.
     
  8. Apr 21, 2014 at 6:11 PM
    #8
    gibsonman63

    gibsonman63 [OP] New Member

    Joined:
    Mar 15, 2014
    Member:
    #125406
    Messages:
    4
    Gender:
    Male
    First Name:
    Bob
    Houston
    Vehicle:
    PreRunner
    Stock
    It only works with buckets. The seat belt clip is attached to the frame, which is not used. Sorry I did not take pictures of the process, but I was learning as I went.

    A couple more notes:

    I wasn't sure if I could get the seat belt warning sensor connector apart without breaking it. Once I removed the four hold down bolts for the seat, I had enough room to maneuver the seat around in the truck without unplugging it.

    I installed the bottom cushion on the driver seat before I removed the seat back. Once I removed the seat back from the donor seat (both cushions removed), the rails come apart. I got lucky and did things in the correct order. This would have been much harder if I had removed both before installing the donor upholstery on my existing driver seat rails.
     
    Last edited: Apr 21, 2014

Products Discussed in

To Top