

-
Welcome to Tacoma World!
You are currently viewing as a guest! To get full-access, you need to register for a FREE account.
As a registered member, you’ll be able to:- Participate in all Tacoma discussion topics
- Communicate privately with other Tacoma owners from around the world
- Post your own photos in our Members Gallery
- Access all special features of the site
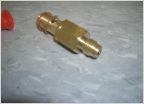 Help finding banjo take-off kit for fuel rail 3RZFE
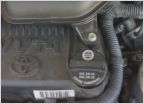 Synthetic oil chenges 2.7L
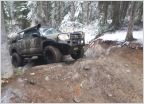 Body Armor Rear Bumper on a 4 Cyl.
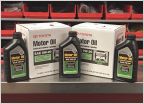 Does everyone use 0w20 synthetic
 PreRunner to 4x4 Conversion Guide
Want to make STICKY DIY Valve Cover Gasket
Discussion in '4 Cylinder' started by TurboBoss, Oct 26, 2014.
Page 1 of 3
Page 1 of 3


