

-
Welcome to Tacoma World!
You are currently viewing as a guest! To get full-access, you need to register for a FREE account.
As a registered member, you’ll be able to:- Participate in all Tacoma discussion topics
- Communicate privately with other Tacoma owners from around the world
- Post your own photos in our Members Gallery
- Access all special features of the site
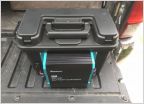 Make your own 400Wh portable power battery for less than $100
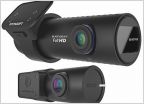 DIY dash cam
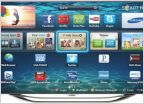 What Television should I get?
 Wireless USB
 Xbox connecting
 Questions on how to upgrade laptop specs
What did you 3D print today?
Discussion in 'Technology' started by slodoug, Apr 8, 2021.
Page 27 of 72
Page 27 of 72
Products Discussed in


