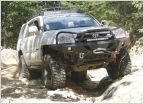
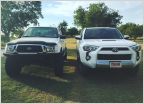
ramonortiz55 4runner build: La Venenosa - For Sale!

Discussion in '4Runner Builds' started by ramonortiz55, Apr 9, 2015.

  1. Apr 9, 2015 at 6:49 AM
    #1
    ramonortiz55

    ramonortiz55 [OP] Not A Well-Known Member

    Joined:
    Nov 28, 2012
    Member:
    #92013
    Messages:
    34,679
    Gender:
    Male
    First Name:
    Ramon
    Texas
    Vehicle:
    2015 DCSB Offroad 4x4
    stock
    So I just bought another project truck.

    2001 4runner limited.

    I am looking to building my first serious offroading rig.

    I know there are a few of 4runner forums, but you guys here have treated me well.

    Any of us have 4runner builds, preferably 3rd generation?

    Also, which of all the 4runner forums are most active?

    If so, I am looking for ideas [​IMG][​IMG]

    Order of mods:

    1. Replaced factory stereo with single din radio and @paranoid56 switch panel: Here

    2. Removed annoying door chime: Click this

    3. Replaced spark plugs: June 6th, 2015

    4. Replaced auto antenna with whip antenna: Guess what to click

    5. Always on power outlets: Not found by clicking here

    6. Installed @skygear fuse box on @Yotamac panel: Click me!

    7. Replaced fuel filter, PCV valve, and air filter: Write up

    8. Combined both radio antennas into one for better reception: Love my AM radio

    9. Installed deep cycle Excide battery and @BamaToy1997 stage 1 wiring upgrade: Power!

    10. Had sliders fitted and installed transmission cooler: Cooler write up

    11. Scooped hood: got skewp?

    12. @BeeRadd antidark hood lights: bright!

    13. Replaced the lower ball joints: September 5th, 2015

    14. Installed hood struts, switches, and primered my savage front bumper, final coat of paint on my sliders: Clicker

    15. Installed a high output alternator to accompany my deep cycle battery: love the red

    16. Installed ditch lights: every build needs these

    17. Installed ARB compressor for rear locker: Slick install

    18. Replaced radiator and condensor radiator: fun..

    19. Installed savage front bumper: Bump this

    20. Purchased Whynter fridge: Whynter FTW

    21. Installed Icon lift: Finally

    22. Installed scangauge II: Originally here but now here

    23. Installed Baja Designs lights: Love these lights

    24. Relocated rear differential breather: Slick write up

    25. Water leaking into my cabin onto passenger floorboard: ughh

    26. Disabled ABS, TRAC, VSC: Best mod yet

    27. End Cap mod: pics

    28. Slider Install: click for more pics

    29. Bajarack install: this thing is huge

    30. Powdercoat bumper: moar pics!

    31. Install bumper and winch: even more pics

    32. Install CB radio and run coaxial cable: another slick writeup

    33. Fit testing the new RTT!: click bait

    34. Installing new overhead console by @3378jakesr5 : click to love

    35. Differential and transfercase oil changes: write up

    36. Installing winch box: click this more pics here

    37. Another light! clickity

    38. Installed rear swingout here

    39. Cleaned throttle body: click me

    40. Replacing illumination bulbs light it up!

    41. Valve cover gasket job - stahp the leak

    42. OBA - Air it up

    43. New King Coils - Blueee

    44. Molle Panels - Yes!

    45. Additional Savage Swingout - Water Cans

    46. Shifter Bushings - Tighter than a frog's arse

    47. Propane holder - OAF!
     
    Last edited: Aug 27, 2018
  2. Apr 9, 2015 at 6:49 AM
    #2
    ramonortiz55

    ramonortiz55 [OP] Not A Well-Known Member

    Joined:
    Nov 28, 2012
    Member:
    #92013
    Messages:
    34,679
    Gender:
    Male
    First Name:
    Ramon
    Texas
    Vehicle:
    2015 DCSB Offroad 4x4
    stock
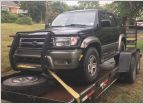
    So I went to go pick up my 4runner today. Here are some pictures:

    [​IMG]

    [​IMG]

    [​IMG]

    [​IMG]

    [​IMG]

    [​IMG]

    [​IMG]

    [​IMG]

    Paid $7000 for it, it Is in supreme, clean condition!
     
    Last edited: Apr 5, 2017
  3. Apr 9, 2015 at 6:50 AM
    #3
    ramonortiz55

    ramonortiz55 [OP] Not A Well-Known Member

    Joined:
    Nov 28, 2012
    Member:
    #92013
    Messages:
    34,679
    Gender:
    Male
    First Name:
    Ramon
    Texas
    Vehicle:
    2015 DCSB Offroad 4x4
    stock
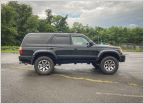
    Pavement pictures of what it looks like today, 2.19.2018


    Last edited: Aug 19, 2019
  4. Apr 9, 2015 at 6:50 AM
    #4
    ramonortiz55

    ramonortiz55 [OP] Not A Well-Known Member

    Joined:
    Nov 28, 2012
    Member:
    #92013
    Messages:
    34,679
    Gender:
    Male
    First Name:
    Ramon
    Texas
    Vehicle:
    2015 DCSB Offroad 4x4
    stock
    Last edited: Feb 25, 2016
    ChadsPride likes this.
  5. Apr 9, 2015 at 6:50 AM
    #5
    ramonortiz55

    ramonortiz55 [OP] Not A Well-Known Member

    Joined:
    Nov 28, 2012
    Member:
    #92013
    Messages:
    34,679
    Gender:
    Male
    First Name:
    Ramon
    Texas
    Vehicle:
    2015 DCSB Offroad 4x4
    stock
    Maintenance log:

    Spark plugs and spark plug wires:

    Fuel filter:

    Timing belt and water pump:

    Rear/front differential and transfercase fluid:

    Front wheel bearings:

    Radiator, radiator hoses and thermostat:

    AC condenser:

    Transmission oil drain/refill and filter replace:


    I'm going to create a list tools that I'm using to do maintenance/repairs on the 4Runner. This list will help me compose a list of tools to keep in my 4runner for offroading.

    Lower ball joints: pickle fork, tie rod end puller, 24 mm socket for lower ball joint nut (105 ft-lbs), 14 mm long socket for lower ball joint mounting bolts (59ft-lbs), 19 mm socket for tie rod end (53 ft-lbs), torque wrench, and breaker bar.

    All Pro UCAs: Spindle to uniball bolt 1-1/8" socket @ 90ft-lbs

    Icon coilovers, three bolts on top of coilovers: 30ft-lbs

    Sonoran steel adjustable panhard bar: 62ft-lbs
     
    Last edited: Apr 5, 2017
    ChadsPride likes this.
  6. Apr 15, 2015 at 8:52 AM
    #6
    Nicko

    Nicko beach bum

    Joined:
    Mar 4, 2012
    Member:
    #74169
    Messages:
    1,047
    Gender:
    Male
    First Name:
    Nicolas
    South Florida
    nice 4runner that thing is clean as can be.

    hoping to buy one myself in the next few months.
     
  7. Apr 27, 2015 at 8:14 AM
    #7
    ramonortiz55

    ramonortiz55 [OP] Not A Well-Known Member

    Joined:
    Nov 28, 2012
    Member:
    #92013
    Messages:
    34,679
    Gender:
    Male
    First Name:
    Ramon
    Texas
    Vehicle:
    2015 DCSB Offroad 4x4
    stock
    There are a bunch of nice ones out there. Make sure to do your research if you are looking for a 3rd gen, want to make sure you get the right one. :)
     
  8. Jun 1, 2015 at 9:35 AM
    #8
    ramonortiz55

    ramonortiz55 [OP] Not A Well-Known Member

    Joined:
    Nov 28, 2012
    Member:
    #92013
    Messages:
    34,679
    Gender:
    Male
    First Name:
    Ramon
    Texas
    Vehicle:
    2015 DCSB Offroad 4x4
    stock
    As I was doing my daily scroll of tacomaworld I stumbled upon @paranoid56 6 switch plate that goes under the radio:

    https://www.tacomaworld.com/threads/6-switch-plate-under-radio-location.315089/

    I figured this would be a great location to install some clean switches on the 4runner. I know I have a lot of goodies planned out for my build, so why not?

    In order for this to work I had to get rid of the factory double din radio and purchase a single din aftermarket radio. I had never installed an aftermarket radio, but what the heck, I wanted that switch panel!

    This past saturday I stopped by fry's and picked me up this Pioneer radio with bluetooth. :D


    Ignore the LED bar, that's for a future mod ;)


    Aha! The switch panel came in. It's a nice sturdy aluminum plate, very well made.


    After plasti-derp:


    Next step was to solder all the wiring in the radio harness and OEM adapter harness. This OEM adapter harness allows my radio to be plug and play to the existing OEM wiring the in 4runner. The adapter harness comes with the radio and is provided to me depending on the vehicle application.

    I solder all the wiring, making sure all colors match and use shrink wrap for a nice clean finish.


    Any unused wires were plugged. The blue wire with the flag reads "for remote", I guess this is some sort of antenna for the radio remote.

    The fry's representative told me NOT to connect the orange wires. These are for the dimmer. If I try to dim the radio using the factory dimmer, the radio will flicker. So I just sealed these off with shrink wrap and tape.

    The other blue wire is for an automatic antenna, which I do not have.


    Next comes the fun stuff!

    I grabbed some kitcken knives and wrapped them in tape to not scratch the 4runner's interior.


    Pried on the center trim piece around the shifter:


    Remove and swivel away:


    I did not remove the 4x4 shifter leather wrap. I didn't want to mess with it.

    Next I carefully removed the radio trim. This is very brittle!


    I was careful with the radio trim since there is a lot plugged into it.

    1. three power points
    2. hazard lights
    3. defroster switch
    4. clock
    5. ECT button


    Now I can pull the radio out.


    Notice there is TWO antenna cables. The bigger one is for the front antenna, the smaller one is for the rear antenna.


    I then remove the brackets that hold the radio housing in place. I will need to install these to my Pioneer.


    One thing I noticed was that my radio harness had TWO plugs.


    While the plug that was on the factory radio was one small plug. CRAP!


    No sweat! See that box? That's an amp. I unplugged the wires to the amp, and abandoned the amp in place.


    I pulled the casing off the Pioneer and mounted my brackets.


    Now, I mounted @paranoid56 switch panel:


    The holes were a little misaligned, so I grabbed a drill and fixed it.


    I connected the amp wiring to my radio harness, plugged the front antenna cable (abandoned the rear antenna cable plug) and dropped the headunit back into its location:


    I carefully put all the trim back in place. :D


    Finally, added the carling switch blanks:

     
    Last edited: Jun 1, 2015
  9. Jun 1, 2015 at 9:51 AM
    #9
    ramonortiz55

    ramonortiz55 [OP] Not A Well-Known Member

    Joined:
    Nov 28, 2012
    Member:
    #92013
    Messages:
    34,679
    Gender:
    Male
    First Name:
    Ramon
    Texas
    Vehicle:
    2015 DCSB Offroad 4x4
    stock
    picked up a @skygear fuse box when he came down to houston a few weeks ago.

    looking to get it installed this weekend.


    ChadsPride likes this.
  10. Jun 1, 2015 at 12:25 PM
    #10
    UssMoGn

    UssMoGn That Vegas dude

    Joined:
    Oct 24, 2013
    Member:
    #115139
    Messages:
    836
    Gender:
    Male
    First Name:
    James
    Las Vegas NV
    Vehicle:
    05&04 Tacoma SR5
    Home Built Front Bumper HID Headlights LED Cab lights 2013 Radio swap MOLLE DC Insert Traffic Cam F&R 6'' Procomp lift Custom Grillie
    Awsome! Im going to have to get one of those switch plates. Hit me up if you got any questions about those 4runners. Ive done a ton of stuff to mine.
     
  11. Jun 1, 2015 at 12:29 PM
    #11
    UssMoGn

    UssMoGn That Vegas dude

    Joined:
    Oct 24, 2013
    Member:
    #115139
    Messages:
    836
    Gender:
    Male
    First Name:
    James
    Las Vegas NV
    Vehicle:
    05&04 Tacoma SR5
    Home Built Front Bumper HID Headlights LED Cab lights 2013 Radio swap MOLLE DC Insert Traffic Cam F&R 6'' Procomp lift Custom Grillie
    Man I like those shifter centers area way more in the 01 then the 96.
     
  12. Jun 1, 2015 at 1:27 PM
    #12
    ramonortiz55

    ramonortiz55 [OP] Not A Well-Known Member

    Joined:
    Nov 28, 2012
    Member:
    #92013
    Messages:
    34,679
    Gender:
    Male
    First Name:
    Ramon
    Texas
    Vehicle:
    2015 DCSB Offroad 4x4
    stock
    are you making reference to a 4runner you have?
     
  13. Jun 1, 2015 at 1:34 PM
    #13
    UssMoGn

    UssMoGn That Vegas dude

    Joined:
    Oct 24, 2013
    Member:
    #115139
    Messages:
    836
    Gender:
    Male
    First Name:
    James
    Las Vegas NV
    Vehicle:
    05&04 Tacoma SR5
    Home Built Front Bumper HID Headlights LED Cab lights 2013 Radio swap MOLLE DC Insert Traffic Cam F&R 6'' Procomp lift Custom Grillie
    Yeah, I got a 96 4Runner limited same Gen as yours. They changes the centers, Yours has a cup holder and side change thingy. They changed it up a bit from my 96. Id rather have yours then mine. Ill have too hit up some junk yards and find some parts.
     
  14. Jun 1, 2015 at 2:26 PM
    #14
    ramonortiz55

    ramonortiz55 [OP] Not A Well-Known Member

    Joined:
    Nov 28, 2012
    Member:
    #92013
    Messages:
    34,679
    Gender:
    Male
    First Name:
    Ramon
    Texas
    Vehicle:
    2015 DCSB Offroad 4x4
    stock
    Ah yes! they do change them.

    you can get the center console piece and just have to relocate the emergency brake.

    are you building that 4runner?
     
  15. Jun 1, 2015 at 2:37 PM
    #15
    UssMoGn

    UssMoGn That Vegas dude

    Joined:
    Oct 24, 2013
    Member:
    #115139
    Messages:
    836
    Gender:
    Male
    First Name:
    James
    Las Vegas NV
    Vehicle:
    05&04 Tacoma SR5
    Home Built Front Bumper HID Headlights LED Cab lights 2013 Radio swap MOLLE DC Insert Traffic Cam F&R 6'' Procomp lift Custom Grillie
    Yeah im redoing it, Moving away from the BAJA going more for the Overland setup W/ SAS. I picked up 04 Tacoma that ill do the BAJA LT thingy to one day.

    I seen a write up on here about swaping it over, Moving the Parking brake looks about the hardest thing to do. Id like the whole peice, from under your Change slider all the way back. I could use the exta Power ports and places to put switchs, Id really like to get that under raido switch plate like you have, Didnt even know about it till I was reading your posts.
     
  16. Jun 1, 2015 at 2:39 PM
    #16
    ramonortiz55

    ramonortiz55 [OP] Not A Well-Known Member

    Joined:
    Nov 28, 2012
    Member:
    #92013
    Messages:
    34,679
    Gender:
    Male
    First Name:
    Ramon
    Texas
    Vehicle:
    2015 DCSB Offroad 4x4
    stock
    Yes that switch plate comes in handy :)

    My build is about 60 percent overlanding and 40 percent mild to moderate rock climbing.. if that makes sense.. haha

    Just ordered me a set of lockers for my rear axle :)
     
  17. Jun 1, 2015 at 2:49 PM
    #17
    UssMoGn

    UssMoGn That Vegas dude

    Joined:
    Oct 24, 2013
    Member:
    #115139
    Messages:
    836
    Gender:
    Male
    First Name:
    James
    Las Vegas NV
    Vehicle:
    05&04 Tacoma SR5
    Home Built Front Bumper HID Headlights LED Cab lights 2013 Radio swap MOLLE DC Insert Traffic Cam F&R 6'' Procomp lift Custom Grillie
    Oh yeah i know what your talking about. Mine looks like a baja truck but ive done more rock crawling in than anything.
    Did you order the factory E locker or go with aftermarket? FTW you will love the real locker. Just when you think your stuck, pop that lock in and you walk out like it was nothing. Ive pulled full size tundras out of deep mud and sand. These trucks have a ton of power for being just little guys. My only limitation on pull larger trucks is I lack the weight to get traction.

    If you dont go Perforamce coil overs, I run just extended coils($400) front and rear with procomp shocks. Ive never had a problem. I just added a winch to the front and I noticed my front sitting a little lower, I might go with a harder coil in the front soon.
     
  18. Jun 1, 2015 at 2:53 PM
    #18
    ramonortiz55

    ramonortiz55 [OP] Not A Well-Known Member

    Joined:
    Nov 28, 2012
    Member:
    #92013
    Messages:
    34,679
    Gender:
    Male
    First Name:
    Ramon
    Texas
    Vehicle:
    2015 DCSB Offroad 4x4
    stock

    Aftermarket. ARB. Jumped on the deal were you get the free compressor if you get the locker. Should be in the mail by tomorrow. Ill post pics! Everyone is saying the afermarket locker is stronger than the ARB.

    Suspensionwise, I am looking into the boss suspension with the superflex coils.
     
  19. Jun 1, 2015 at 2:53 PM
    #19
    ODNAREM

    ODNAREM MEMBER Of The Church Of @ODNAREM

    Joined:
    Feb 28, 2015
    Member:
    #149762
    Messages:
    41,292
    Gender:
    Male
    First Name:
    Ron
    Huntington Beach,CA.
    Vehicle:
    2012 TRD Sport Prerunner
    TRD catback exhaust,FJ Cruiser trail team wheels,BFG All Terrain K02 tires,Grillcraft front grill,Pelfreybilt IFS/Mid skids,sliders,standard rear bumper,Total Chaos bed stiffeners.TRD Pro Bilstein front/rear suspension.
    Super clean 4Runner!Good luck with your build!Off to a good start OP!
     
  20. Jun 1, 2015 at 2:55 PM
    #20
    ramonortiz55

    ramonortiz55 [OP] Not A Well-Known Member

    Joined:
    Nov 28, 2012
    Member:
    #92013
    Messages:
    34,679
    Gender:
    Male
    First Name:
    Ramon
    Texas
    Vehicle:
    2015 DCSB Offroad 4x4
    stock
    Thanks bud!
     

Products Discussed in

To Top