

-
Welcome to Tacoma World!
You are currently viewing as a guest! To get full-access, you need to register for a FREE account.
As a registered member, you’ll be able to:- Participate in all Tacoma discussion topics
- Communicate privately with other Tacoma owners from around the world
- Post your own photos in our Members Gallery
- Access all special features of the site
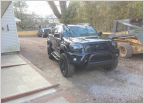 My Build So Far (Supercharger ICON 3" Lift)..Black is the new Black
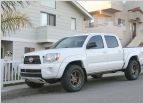 Tom's 2008 Super White DCSB TRD OR - Project OEM+
 Hinmo24t build, 2015 TRD OR, blue ribbon metallic
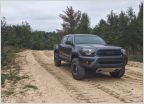 ThatguyJZ's Build Thread
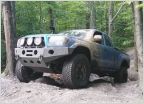 50cal's Build
 Bruce988jl's first and last build thread
The Getaway...Crom's build and adventures
Discussion in '2nd Gen. Builds (2005-2015)' started by Crom, Feb 11, 2015.
Page 36 of 228
Page 36 of 228
Products Discussed in


