1. Welcome to Tacoma World!

    You are currently viewing as a guest! To get full-access, you need to register for a FREE account.

    As a registered member, you’ll be able to:
    • Participate in all Tacoma discussion topics
    • Communicate privately with other Tacoma owners from around the world
    • Post your own photos in our Members Gallery
    • Access all special features of the site

The Some Day Build... And Trip Log

Discussion in '3rd Gen. Builds (2016-2023)' started by Pyrotech, Mar 17, 2019.

  1. Aug 17, 2019 at 8:03 PM
    #61
    Pyrotech

    Pyrotech [OP] Well-Known Member

    Joined:
    Nov 25, 2018
    Member:
    #273741
    Messages:
    2,965
    Gender:
    Male
    RoadTrippin 8/2019
    Highways and Byways​


    Not much to talk about for the first leg of the trip, all highway, and we was trying to drive as much as possible each day so we could spent as much time with my brother and nieces as possible. it has been way to long since I seen most of them, and the two youngest, I have never met.

    A nice little storm brewing in Kansas on the 7th of August


    However I did Avoided a trip to see the wizard...

    Once we arrived at my brother place in Iowa, and got mobbed by the nieces, the youngest two decided they wanted to play "get thrown in the pool" after I got tired from that, I decided that they needed to earn some extra loose change by fishing it off the bottom of the pool. So the @MESO customs Change holder that was full, became pool toys for the girls. once it was all recovered, if they had guessed closer to the amount they recovered, they got to keep it, I had the closer guess... the change got tossed back into the pool. this happen about 3 times before they guessed closer than I did.

    Thursday, after my brother got home from work, he decided that taking his boat out onto the Mississippi was more important than sleep. so we headed out, and spent the day on the river trolling around, caught a few fish. nothing that met the keeper guidelines.

    While in Iowa, we where only 90 minutes from one of the best Deep Fried Chicken places in the area. RIPS tavern in Ladd Illinois, they have been in business since 1936. While on the way we passed through Princeton Illinois, the home of the Red Covered Bridge. With all my old pictures of the bridge taken with an much older digital camera, they where not the best quality.

    So while in the area...


    I decided it was time to get some better quality pictures.


    Something about Timber frame construction. LOVE it.


    Not Madison County, but still a nice little bridge that is still in service...

    Part 2 - "The Duke"​

    Speaking of Madison County, a quick side trip once we hit Madison County. The original idea was to see some of the covered bridges. But again you know what they say about plans, this time My wife noticed some place she wanted to stop and get some pictures for her dad who is a big John Wayne fan...


    Part 3 - "Backwoods Therapy"​

    The Slight change in schedule had us change up plans so ended going to an area closer to home, and one a lot more familiar with, as I have spend many nights camping here with some old friends.


    First order of business was Water... From Previous trips to the area I knew that there was several spots to get Potable water. Cedar lake has a tap for domestic water at there RV dump station. Or the one that we always use... Pipe Spring


    The pipe spring dates back to the 1920's and was first "developed" by rail workers building a new spur. When We stopped at the ranger station on the way end they where uncertain if the spring was flowing since it had been a bit dry, but it still at a flow rate of just about 1GPM


    After filling the Scepter MWCs it was time to head south to the campsite.


    This camp site area, is much bigger than it first looks, this spot was the community area for our group when we had our semi-annual campouts.


    The Fire pit was full of ash and needed a quick clean out.


    While in the sun in the morning, it will be shade during the heat of the day. so I also took advantage of that and set up the Goalzero panels.


    Two of the Nomad20's, they are a fordable 20w panel, daisy chained to create a 40w array. I was able to go from 5% to 50% charge before the area became to shaded to be used for solar.
    Now that camp is set up, it is time for breakfast.


    Bacon, egg and cheese breakfast tacos. heavy on the Bacon...

    earlier when we had stopped at the ranger station, I picked copies of the MVUM (Motor Vehicle Use Map) and I noticed a nearby road that was open to all vehicles.


    Le Flore 6023, a 15 mile trail that if you start off the highway 63 side, is pretty tame for several miles. before it turns into a bit more of challenge


    The road conditions are starting to turn..


    It was this spot that had me stop and walk down and check to see how deep the washouts where. I had to be a a bit careful through here.


    The washouts cut from side to side of the road There was a couple of nice mud holes at the top.


    Small rock ledges on the way back down


    Nothing to bad, but I was still happy to have the sliders just in case.


    This spot was a tight squeeze, steep drop to the left, then the rotted shell of an oak tree, and a fallen tree to the right along with a steep hill. Missed the rotted tree with my left rear tire by about 1/4"


    The last water crossing, still had a deep(ish) spot, but if the there has been a recent rainfall, this would be impassable for most. Something to keep in mind, and there is not alot of room to turn around either.


    We ended up on exiting 6023 onto hwy 259 just North of the road to our campsite, other than mud and some very minor pin stripping, no damage was done. the entire trip took about 3 hours to complete

    Back at camp, it was time to start Dinner. and Cheeseburgers where on the menu.. It was to hot yet for a fire so it was time to fire up the stove and get the cast iron hot.


    Colby Jack cheeseburger on a Sesame seed bun topped with A1 sauce and sweet and spicy pickles


    After Dinner the camp shower was set up so it was ready later when it got dark. I want to take a moment an again acknowledge @ProForce for this idea, and yes this is my own version, but I "borrowed" his version of the box and brass QD fitting to make the system I already have more portable. I would highly recommend buying his kit, it is a very fair price compared to DIY.

    The shower head is from the Ecotemp L5 heater, and I had set it up so I could use the sprayer with the just the pump or the pump and heater.

    The water in the water in Scepter MWC, was plenty warm, and 5 gallons was just about right for 2 people for a quick shower.


    Inside the box is one of the 30ah AGM batteries, bit crude since I did not get around to building a proper portable battery system yet.


    A campfire was needed more to keep bugs away...


    Pull up a seat and grab your favorite beverage adult or otherwise... and join us around the campfire.


    Part 4 - "Outlaws and diamonds"​

    After we woke we headed down to the Pashubbe creek trailhead before breakfast.


    Breakfast of Bacon and Pancake was today's menu.


    Before the heat set in we headed off to Robbers Cave State Park. to check it out.


    The Mural at Talihina


    The sign at the entrance of Robbers Cave Nature Trail reads: “Robbers Cave, located on this trail, is a legendary outlaw hideout. No gunfighters or any historic incidents are documented as having occurred at this cave. Yet it is a fact that local travelers during the 1865-90 period were often victimized by bands of robbers. Because of the cave’s secluded location it is thus likely that it served as an outlaw hideout.”


    Previous Visitors leaving there mark for eternity, something we all know is no longer acceptable.


    The entrance to the cave


    Remember No Fires!


    It was a bit cooler back inside the cave


    Pull up a seat and grab your favorite beverage adult or otherwise... and once again join us around the campfire.


    The Next morning we packed up camp and headed off to the Crater of Diamonds in Arkansas. The park has a 37 acre plowed field that used to be part of a volcanic crater. You can mine for diamonds and other gemstones, anything you find you get to keep, you can also take home 5 gallons of sifted gravel for each day you visit the crater, the park rangers say a lot of diamonds are later found in this gravel.

    The park rangers also stated that the majority of the large diamonds are found on the surface after hard rain. by visitors walking by them, and seeing there distinct metallic shine. He also stated that since they hold no static charge, dirt will not stick to them so they are always clean and shiny and very very noticeable when the sun strikes them.


    One of the old ore carts from the days of commercial diamond mining


    The mine was played an important role during World War II.


    No Diamonds where found during our visit, by us or anyone... but here are a sample of diamonds that have been found on site.


    Uncut Yellow Diamonds


    Uncut Brown Diamonds


    Uncut White Diamonds

    Because everyone loves grilled food...Dinner menu for the first night at the crater was Ribeye and baked potato.

    20190814_175853.jpg
     
    Last edited: Aug 17, 2019
    Bigdaddy4760 likes this.
  2. Aug 18, 2019 at 5:43 AM
    #62
    Bigdaddy4760

    Bigdaddy4760 Well traveled Older Than Dirt

    Joined:
    Aug 6, 2017
    Member:
    #226049
    Messages:
    77,337
    Gender:
    Male
    First Name:
    Maner
    Poolville Texas
    Vehicle:
    2017 Tacoma DCLB TRD OR, 2004 DCSB
    Y’all are having a great time. Really like the old places your going to.
     
    Pyrotech[OP] likes this.
  3. Aug 30, 2019 at 1:09 PM
    #63
    Pyrotech

    Pyrotech [OP] Well-Known Member

    Joined:
    Nov 25, 2018
    Member:
    #273741
    Messages:
    2,965
    Gender:
    Male
    Parts are trickling in for a couple of mods on the list.

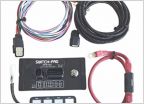
    The 400w anytime PNP power mod plus interior outlet

    20190830_145010.jpg

    The @DSIM tailgate opener Module

    20190830_144921.jpg


    The 2Low PNP harness is also enroute..

    LED Strips for the Bed lights are here, need to order some VHB tape and primer

    also need to work on the second set of rock lights and splitter harness
     
    DSIM and Bigdaddy4760 like this.
  4. Aug 31, 2019 at 12:22 PM
    #64
    Pyrotech

    Pyrotech [OP] Well-Known Member

    Joined:
    Nov 25, 2018
    Member:
    #273741
    Messages:
    2,965
    Gender:
    Male
    Junkyards are so much fun....

    Found these today. 2 sets of ACDF Cadallic horns.

    Just finished bench testing, all are working. And very dusty...


    Now to get them cleaned up, and a harness built . So they can get installed.

    For future reference...

     
    Last edited: Aug 31, 2019
  5. Aug 31, 2019 at 12:33 PM
    #65
    Bigdaddy4760

    Bigdaddy4760 Well traveled Older Than Dirt

    Joined:
    Aug 6, 2017
    Member:
    #226049
    Messages:
    77,337
    Gender:
    Male
    First Name:
    Maner
    Poolville Texas
    Vehicle:
    2017 Tacoma DCLB TRD OR, 2004 DCSB
  6. Aug 31, 2019 at 12:57 PM
    #66
    Pyrotech

    Pyrotech [OP] Well-Known Member

    Joined:
    Nov 25, 2018
    Member:
    #273741
    Messages:
    2,965
    Gender:
    Male
  7. Aug 31, 2019 at 12:59 PM
    #67
    Pyrotech

    Pyrotech [OP] Well-Known Member

    Joined:
    Nov 25, 2018
    Member:
    #273741
    Messages:
    2,965
    Gender:
    Male
    For future reference...

     
  8. Sep 2, 2019 at 4:26 PM
    #68
    Pyrotech

    Pyrotech [OP] Well-Known Member

    Joined:
    Nov 25, 2018
    Member:
    #273741
    Messages:
    2,965
    Gender:
    Male
    A few days ago, I had someone who was on there phone not paying attention nearly hit me. The stock horn failed to get there attention, So I started checking the inventory of local Junkyards for old Cadillac's. Luck was with me and I found a place that had several old 80's era Cadillac's listed. It turned out it was worth the trip, not only did they have the horns but I found two that had the much coveted ACDF combination.

    Just finished bench testing, all are working. And very dusty...


    The way I finally decided to mount them required a bit of grinding to make work. First I had to remove the threaded portion, seen below


    20190902_101115.jpg

    20190902_101224.jpg

    I then ran a 5/16" drill bit through the hole to enlarge it slightly. next flip the horn over and and grind the locating tab off

    20190902_101250.jpg

    After I finished the slight modification to the brackets, it was time to wash the dirt and grime off, primer and a couple coats of satin black was sprayed on.

    20190902_133009.jpg

    The Grill was removed, to make room, and the original horns removed, the bolts where put back in place just in case I ever needed them for something( Hint: you will see this again the future)

    20190902_095642.jpg

    The horns where mounted two to the left of the center support, and two to the right. they where attached directly to existing holes in the lower header panel.


    20190902_141457.jpg
    Right side

    20190902_141451.jpg
    Left side


    Now that the horns are mounted it was time to make the wiring harness, the original pigtails where used, and wire was soldered on and covered with heat shrink then a braided wire cover was added. The four horns run off a 30 amp Relay, The original horn connector is used as the trigger for the relay.

    The black wire is the ground and is mounted behind the relay, the white wire is the trigger, and plugs into the OEM horn connector and secured in place. the Red wire is +12v and run to the battery the 4 connectors are for each of the horns.

    20190902_162351.jpg


    The relay is mounted in the same location as the OEM horn. The wire is routed to hide and keep neat, and secured with zip ties after a quick test to make sure everything is working as it should be.

    20190902_164737.jpg

    The grill gets reinstalled along with hooking the front camera back up, everything is tested again including the front camera, to ensure it is working as it should be..

     
    Last edited: Sep 2, 2019
    MQQSE, KENNY, Kanyon71 and 3 others like this.
  9. Sep 2, 2019 at 4:28 PM
    #69
    Bigdaddy4760

    Bigdaddy4760 Well traveled Older Than Dirt

    Joined:
    Aug 6, 2017
    Member:
    #226049
    Messages:
    77,337
    Gender:
    Male
    First Name:
    Maner
    Poolville Texas
    Vehicle:
    2017 Tacoma DCLB TRD OR, 2004 DCSB
    :thumbsup:
     
    RobP62 likes this.
  10. Sep 2, 2019 at 5:03 PM
    #70
    RobP62

    RobP62 NVR20LD

    Joined:
    Jun 4, 2017
    Member:
    #220718
    Messages:
    41,519
    Gender:
    Male
    First Name:
    Rob
    Street, Md.
    Vehicle:
    TTC Member #0125
    Great freaking job Chris! Very thorough install post :thumbsup:

    Now where TF is my video?! :D
     
    Bigdaddy4760 likes this.
  11. Sep 2, 2019 at 5:12 PM
    #71
    Pyrotech

    Pyrotech [OP] Well-Known Member

    Joined:
    Nov 25, 2018
    Member:
    #273741
    Messages:
    2,965
    Gender:
    Male
    video??? I worked radio... not the fancy moving picture box... geeze.... youngsters LOL

    I will try to get one , once I verify all 4 horns are in fact in getting a good ground, just to make sure they are all working and LOUD
     
    RobP62[QUOTED] and Bigdaddy4760 like this.
  12. Sep 2, 2019 at 5:27 PM
    #72
    RobP62

    RobP62 NVR20LD

    Joined:
    Jun 4, 2017
    Member:
    #220718
    Messages:
    41,519
    Gender:
    Male
    First Name:
    Rob
    Street, Md.
    Vehicle:
    TTC Member #0125
    Youngster at heart you mean. I might be older than you. If you want to add a video I can provide a link for you to copy the file to, post it on my YouTube channel then give you a link to the file so you can add it to your thread.

    :thumbsup:
     
  13. Sep 2, 2019 at 5:39 PM
    #73
    Pyrotech

    Pyrotech [OP] Well-Known Member

    Joined:
    Nov 25, 2018
    Member:
    #273741
    Messages:
    2,965
    Gender:
    Male
    short video clip.. trying to not disturb the neighbors, so it is a quick blast

     
    RobP62[QUOTED] and Bigdaddy4760 like this.
  14. Sep 4, 2019 at 12:48 PM
    #74
    Pyrotech

    Pyrotech [OP] Well-Known Member

    Joined:
    Nov 25, 2018
    Member:
    #273741
    Messages:
    2,965
    Gender:
    Male
    Today the 2low modification was done, Some background reading is in order to give an idea of why, I would suggest you read the original thread by @BigWhiteTRD

    https://www.tacomaworld.com/threads/lock-stock-and-2wheel-low-3rd-gen-diy-mod.536677/

    Along with the thread for the Plug and Play version by @lapoltba

    https://www.tacomaworld.com/threads/2lo-plug-play-harness-discussion.592035/

    https://www.tacomaworld.com/threads...-for-the-3rd-gen-tacoma.614743/#post-20866428

    Lots of material in there, and its worth the read.

    One of the things I noticed about the harness was it was not wrapped when it arrived. not really a big deal, since I am sure it saved on the final cost.

    20190904_110601.jpg

    But I wanted it all neat and wrapped. Since I can not find the roll of harness tape I have, I ended up going with a a bit more of a less desirable solution, Black tape...

    20190904_111535.jpg

    I Wanted to make sure when everything went back together and a wire did not get pinch or caught by a trim piece.

    First step, before starting work, Disconnect the battery...going to be working near one of the airbags.

    20190904_112147.jpg

    Next we need to remove this cover by carefully prying the edge up and popping it free from the clips.

    20190904_112235.jpg

    There is a lip on the cover that is tucked up behind the door weatherstrip, a firm pull will free it from the edge.

    20190904_112325.jpg

    Next remove the passenger side sill cover, it is just clipped in place and firm tug will free it

    20190904_112428.jpg
    Remove the plastic nut near the firewall that helps hold the kick panel in place.

    20190904_112357.jpg
    Then remove the kick panel by pull from the top. After reoval check to make sure the plastic trim clips are not still attached to the body. if so, remove them and put back on the trim panel to help the reassembly go smoother

    20190904_112401.jpg

    You can see the lower trim clip (round white dot with the tab pointed to the firewall) still on the body, in the lower right corner above the harness
    20190904_112508.jpg

    Remove the glove box side trim, by pulling straight back.

    20190904_112515.jpg 20190904_112610.jpg

    Next up is to remove the three 10mm bolts holding the lower airbag in place you can see two of them above with the blue marker. the other one is on the lower right side next to the console.

    20190904_112720.jpg

    There are two plastic tabs that need to be watched out for. one on the left side, and one on the right.

    20190904_112727.jpg 20190904_113055.jpg


    After removing the airbag, carefully lay it aside, I ended up standing it on one end, and tied it off to keep it from falling over.

    20190904_120333.jpg

    Next up, is the glove box, there are five Phillips head screws. two along the top inside the door, once behind the glove box trim previously removed. and two under the glove box.

    20190904_113323.jpg
    20190904_113326.jpg


    20190904_113332.jpg

    20190904_113408.jpg

    carefully pop the glove box free. the top edge of it is tucked up behind the dash pad. But I did learn after the fact that the pad can be removed.

    The inside is now looking a bit different...

    20190904_114051.jpg

    It is time for the actual install of the Plug in play harness. in the picture above you can see the bundle of wires on the right side in the middle is the 4wd ECU, the black box.

    20190904_114613.jpg

    Remove the black 40 pin connector and the smaller white 10 pin connector from the 4wd ECU.

    20190904_114711.jpg

    Plug both male 40 pin and 10 pin connectors from the Plug and play harness into the ECU, next plug the male harness ends that was previously, plugged into the 4wd ECU into the plug and play harness Female side

    20190904_114909.jpg

    Route the cable and relay so it is out of the way and secured from bouncing.


    The switch harness was routed to the right side of the steering wheel, this involved removing the radio, for better access and dropping the trim panel under the steering wheel.

    20190904_120324.jpg 20190904_120337.jpg 20190904_115742.jpg

    Reassembly is the reverse, of disassembly. Take your time to make sure all the tabs line up with there matching slots, so you don't break one off

    20190904_133011.jpg 20190904_122637.jpg


    After reconnecting the battery you can test, and verify the 2low mod is working

    If everything is working you should see the 4low light come on, and there will be no binding from the from the front axle while trying to steer

    20190904_113408.jpg
    20190904_120337.jpg
    20190904_120337.jpg
    20190904_122630.jpg
    20190904_120324.jpg
    20190904_120337.jpg
     
  15. Sep 4, 2019 at 12:53 PM
    #75
    RobP62

    RobP62 NVR20LD

    Joined:
    Jun 4, 2017
    Member:
    #220718
    Messages:
    41,519
    Gender:
    Male
    First Name:
    Rob
    Street, Md.
    Vehicle:
    TTC Member #0125
    Exactly how I remember caddy horns sounding! Very nice Chris! Very nice indeed!!!!!
     
  16. Sep 4, 2019 at 12:54 PM
    #76
    Bigdaddy4760

    Bigdaddy4760 Well traveled Older Than Dirt

    Joined:
    Aug 6, 2017
    Member:
    #226049
    Messages:
    77,337
    Gender:
    Male
    First Name:
    Maner
    Poolville Texas
    Vehicle:
    2017 Tacoma DCLB TRD OR, 2004 DCSB
    Super great write up Chris
     
    RobP62 and Pyrotech[QUOTED][OP] like this.
  17. Sep 4, 2019 at 12:57 PM
    #77
    lapoltba

    lapoltba Full Bridge Rectifier

    Joined:
    Aug 28, 2014
    Member:
    #137089
    Messages:
    3,344
    Gender:
    Male
    CT - 06076
    Vehicle:
    '17 Sport, ACLB, V6,MT, 04B14 OV-Tuned

    Nice pictures and nice writeup... Thanks!

    I didn't like leaving the wires loose, but I also didn't want to wrap the resistor up close to the wires. I think I will see about getting it wrapped on the next batch and leave the one wire with the in-line resistor out.

    Mind if I use your pictures for the PDF instructions?
     
  18. Sep 4, 2019 at 1:04 PM
    #78
    Pyrotech

    Pyrotech [OP] Well-Known Member

    Joined:
    Nov 25, 2018
    Member:
    #273741
    Messages:
    2,965
    Gender:
    Male
    sure thing go for it..

    I left the wires behind the resistor unwrapped and used one of the zip ties to secure it to the mounting hole on the resistor. heat was a concern, but i recalled @BigWhiteTRD mentioning that he used the bigger power resistor so it had a the ability to handle the heat better. So hopefully it will be ok.
     
    Last edited: Sep 4, 2019
  19. Sep 4, 2019 at 5:40 PM
    #79
    Pyrotech

    Pyrotech [OP] Well-Known Member

    Joined:
    Nov 25, 2018
    Member:
    #273741
    Messages:
    2,965
    Gender:
    Male
    Its time for a small batch of beef jerky...

    It has been a few months since I made the last batch, usually goes pretty quick, days to a week or so. So no idea how long it will last.
    I usually just wing it, making the marinade by eye. But I am working on trying to get something a bit easier to duplicate.


    20190904_191038.jpg 20190904_191028.jpg


    Beef Jerky Recipe

    Dry Seasoning
    • Black pepper 4 Tbls
    • Onion Powder 3 Tbls
    • Garlic Powder 2 Tbls
    • Sea Salt 1 Tbls
    • Mustard Powder 2 ts
    • Celery seed 1 s
    Mix this well so it completely blended, and continue to blend for several minutes after it is well mix

    Wet Seasoning
    • Worcestershire sauce 10 oz
    • Soy Sauce 5 oz
    • Hickory Liquid Smoke 2 oz
    Mix wet and dry seasoning well.

    Trim 3 lbs of beef roast of your choice, about 1/8" thick and cut into 1/2" wide strips. pour the marinade over the beef and mix well so the meat is coated in the marinade. The meat will take on the appearance of the marinade, a brownish tint. continue to mix my hand making sure any red portion of the beef is covered and soaked in the marinade. the meat will soak up nearly all of this mix with maybe a 1/4 to 1/2 cup left over.

    place in your dehydrator leaving space around the meat for air to circulate.

    I dry mine at 160F for roughly 10 hours, until dry and snaps when bending. if you prefer a less dry texture, start checking at about 6 to 7 hour mark. remember it will pick up moisture from the air and get a bit softer as it cools and if it sits long enough.

    let cool and then place in your preferred storage container .

    20190905_041226.jpg
     
    Last edited: Sep 5, 2019
    Noch, lapoltba and Bigdaddy4760 like this.
  20. Sep 4, 2019 at 6:10 PM
    #80
    lapoltba

    lapoltba Full Bridge Rectifier

    Joined:
    Aug 28, 2014
    Member:
    #137089
    Messages:
    3,344
    Gender:
    Male
    CT - 06076
    Vehicle:
    '17 Sport, ACLB, V6,MT, 04B14 OV-Tuned
    Love it. I make my own too, very similar "winged it" recipe. The other one I do is a "Mexican" dry rub. It's chili powder, hot paprika, cayenne, garlic powder, oregano, basil, cumin, coriander, seasoned salt, and black pepper. No liquid. Sprinkle it on and let it sit in the fridge for a couple days before smoking/dehydrating. I can dig out the exact recipe, but I almost never follow it.
     
    Bigdaddy4760 likes this.

Products Discussed in

To Top