1. Welcome to Tacoma World!

    You are currently viewing as a guest! To get full-access, you need to register for a FREE account.

    As a registered member, you’ll be able to:
    • Participate in all Tacoma discussion topics
    • Communicate privately with other Tacoma owners from around the world
    • Post your own photos in our Members Gallery
    • Access all special features of the site

Suspension Help

Discussion in 'Suspension' started by SilverStreakTaco, Jun 18, 2013.

  1. Jun 18, 2013 at 8:08 AM
    #1
    SilverStreakTaco

    SilverStreakTaco [OP] Active Member

    Joined:
    May 1, 2013
    Member:
    #103252
    Messages:
    43
    Gender:
    Male
    First Name:
    bob
    western mass
    Vehicle:
    10 TACOMA SR5
    Access Tonneau Cover N Fab Nerf Bars Top Car Athens Seat Cover Lo-Jack Pioneer deh-80 prs Hybrid Audio Legatia L6's LPG 25Nfa Tweeters Rainbow iPaul 4.300 Jl 250/1 Focal 27v1 11" 4 ohm Husky liner front mud flaps Goodyear Dura trac 265/75/16's Bhlm Color matched front grill ssm Plasti dipped emblems Vht tint shade translucent on tailights
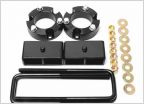
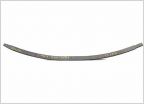
    I'll probably get sh** for not installing my ome lift myself but here goes. I'm purchasing an ome complete lift with front shocks (9000's), front coils (885's), rear shocks (n182's), aal 2" toytec standard, lr uca's, front top plate spacers for a full 3", trim packer, new center bolts and bushings with no diff drop, and considering sway bar removal or relocate. My question has two parts.

    1. Will 885 coils support an all pro bumper or similar if I change in the future or do I have to have the spacers removed and 886's put in for that?

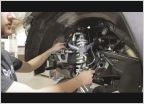
    2. I've gotten some quotes from 700 dollars and it would take the guy a week to a 500 dollar quote and it would take a couple days. I'm waiting on one more quote from a guy I work with. Also fyi I haven't called any auto shops in fear the price for install would be outrageous. Am I being naive in not attempting this myself ? I have 3 ton jacks and all the tools at my disposal minus torque set wrenches and a compression spring tool. Ive heard you can rent them from auto zone for next to nothing. Need advice on the route to take. This is the only thing holding me back from pulling the trigger on the lift purchase.


    Thanks in advance for any advice.
    [​IMG] [​IMG] [​IMG] [​IMG]
     
  2. Jun 18, 2013 at 8:16 AM
    #2
    BulletToothTony

    BulletToothTony You’ll have that on these big jobs.

    Joined:
    Feb 20, 2008
    Member:
    #4833
    Messages:
    16,292
    First Name:
    You can call me Susan if it makes you happy.
    1. the 885's will be ok with just a bumper, now if you go and start adding skids and winch sliders etc you'll need the 886's

    2. All shops are gonna be high are their installation process. If you have all the tools, space, time and a buddy you can knock it out in a day. I'd have them preassembled the fronts. You can have each side done from start to finish in under an hour. The rear is maybe 2-3 hours depending on your skill level.

    Take a look at these links they have step by step pics and directions from other members. If you think you can do it you'll save yourself a nice chunk of change

    front ome
    http://www.tacomaworld.com/forum/su...talls-full-ome-kit-rear-brake-lines-pics.html

    AAL
    http://www.tacomaworld.com/forum/suspension/54186-aal-install-second-gen.html

    uca
    http://www.tacomaworld.com/forum/suspension/14507-total-chaos-uca-how-install.html
     
  3. Jun 18, 2013 at 8:17 AM
    #3
    Justus

    Justus fucks not given

    Joined:
    Jan 4, 2013
    Member:
    #94417
    Messages:
    9,230
    Gender:
    Male
    First Name:
    Nabisco the kid
    In ur toolbox
    Vehicle:
    not so low, not so slow 2006 6 lug
    stockish
    Don't let the ppl who said it would take a week, or couple days touch ur truck.
     
  4. Jun 18, 2013 at 8:22 AM
    #4
    drunktaco

    drunktaco Well-Known Member

    Joined:
    Aug 25, 2012
    Member:
    #85509
    Messages:
    1,787
    Gender:
    Male
    First Name:
    Sage
    Southwest Va
    Icon ext travel C/O's, Total Chaos UCA's, King R/R shocks, All-Pro leaf pack, lights, RCI skid, Brute Force sliders, ect.
    Yes if you have the tools and a basic understanding of what youre doing, then get a friend to help you and you could knock it out in a day. There are a lot of suspension write ups on here along with tons of photos. Just remember you will need an alignment once your done. And like BulletToothTony said, get them to pre assemble the fronts and that will save some time and hassle.
     
  5. Jun 18, 2013 at 8:41 AM
    #5
    scocar

    scocar hypotenoper

    Joined:
    Nov 11, 2009
    Member:
    #25814
    Messages:
    39,416
    What these guys said. I had never done a suspension replacement before but am decent mechanically, and did it myself using write-ups (studied them a lot before attempting). I had the springs compressed at a shop with the proper compressor, that installed the assembled units myself. I didn't trust the compressors I could find locally to rent.

    That said, the LR UCAs will bee the trickiest part mechanically. I have not done this, but have looked into it. Mainly, pressing out the old balljoint and then seating the new adapter for the LR design.

    Check out this video, especially starting at 4 minutes:

    http://spc-tv.com/install/lt-suv/65-25460-toyota-tacoma-upper-control-arms.html
     
  6. Jun 18, 2013 at 8:47 AM
    #6
    cdj1

    cdj1 Well-Known Member

    Joined:
    Apr 16, 2013
    Member:
    #102185
    Messages:
    1,325
    Gender:
    Male
    First Name:
    Clint
    Vidalia, GA
    Vehicle:
    97 Tacoma
    King Extended travel coilovers, 5100 Shocks, Daystar shackles,OME Leaf Springs,255/85/16, front diff drop, RAT skid plates, 4.56 gears, LSD in rear, Aussie locker in the front, Front Range Offroad twin sticks, trail gear/ Bash Fab rear bumper, elite off road front bumper and sliders, warn m8000 winch, in cab winch control
    The lr uca install isn't fun, but get a manual press from auto zone (tool loaner program) and you don't need an air compressor and air hammer like they show in the video. Also another thought is you have rubber LCA bushings. I changed mine to urethane to match the UCA.
     
  7. Jun 18, 2013 at 9:05 AM
    #7
    Sandman614

    Sandman614 Ex-Snarky TWSS elf, Travis #hotsavannahdotcom

    Joined:
    Oct 26, 2010
    Member:
    #45273
    Messages:
    35,561
    Gender:
    Male
    First Name:
    Tim
    Garner, NC/Boone, NC
    Vehicle:
    '06 SR5 Off Road
    ARB Front Bumper, Projector Headlights w/Slimcubby 4300K HID's, Oznium LED's, LED taillights, DIY Washable Cabin Moose Filter, Sockmonkey SR5 Off Road, Aux Audio plug, OME 886x, OME Nitrochargers, Wheelers 3 Leaf Progressive AAL, ImMrYo Rear-View Mirror Lift Bracket, Dodge D-Rings
    OP The LR UCAs are a breeze. Yes airtools make things easier but are by no means necessary. To remove the balljoint just loosen the nut to the end of the balljoint stud and smack the spindle with a hammer, pop, done. To get the "Long Bolt" out you can bend the inner fender, don't worry about it you can't see it, and if your careful it won't chip the paint at all.

    The guys saying about removing the balljoint have 1st gens, and that video is for 1st gens. I assume your Left-side profile are correct in saying you have a 2010. Here is the correct video.
     
    Last edited: Jun 18, 2013
  8. Jun 18, 2013 at 9:27 AM
    #8
    drunktaco

    drunktaco Well-Known Member

    Joined:
    Aug 25, 2012
    Member:
    #85509
    Messages:
    1,787
    Gender:
    Male
    First Name:
    Sage
    Southwest Va
    Icon ext travel C/O's, Total Chaos UCA's, King R/R shocks, All-Pro leaf pack, lights, RCI skid, Brute Force sliders, ect.
    Good catch on the 1st gen/2nd gen balljoint
     
  9. Jun 18, 2013 at 9:51 AM
    #9
    scocar

    scocar hypotenoper

    Joined:
    Nov 11, 2009
    Member:
    #25814
    Messages:
    39,416
    Oh shit, you guys don't have an adapter slug for the top of the spindle? Nice. Sorry about the vid. I figured they were essentially the same (they are), but that one detail makes a difference.

    So OP, you should now know what you are in for.
     
  10. Jun 18, 2013 at 9:55 AM
    #10
    Sandman614

    Sandman614 Ex-Snarky TWSS elf, Travis #hotsavannahdotcom

    Joined:
    Oct 26, 2010
    Member:
    #45273
    Messages:
    35,561
    Gender:
    Male
    First Name:
    Tim
    Garner, NC/Boone, NC
    Vehicle:
    '06 SR5 Off Road
    ARB Front Bumper, Projector Headlights w/Slimcubby 4300K HID's, Oznium LED's, LED taillights, DIY Washable Cabin Moose Filter, Sockmonkey SR5 Off Road, Aux Audio plug, OME 886x, OME Nitrochargers, Wheelers 3 Leaf Progressive AAL, ImMrYo Rear-View Mirror Lift Bracket, Dodge D-Rings
    Yep, just a few little differences.

    OP if have the time, tools and a friend, save the money. Spend the extra to get the front shocks and coils assembled.
     
  11. Jun 18, 2013 at 10:10 AM
    #11
    kmok

    kmok Plastidipped ma Hootus!

    Joined:
    Jul 18, 2008
    Member:
    #8007
    Messages:
    2,340
    Gender:
    Male
    First Name:
    Kyle
    Columbus, Ohio
    Vehicle:
    2005 Subaru Outback XT 5MT
    The coilover should be pretty easy to do if you get it assembled somewhere. The LR uca install isn't too bad once you get the old ucas out. Rear shocks should only be like two bolts to take out the old ones and should be pretty easy. The aal install shouldn't be terrible either. Make sure you coat the all the bolts in pb blaster or something for a few days before doing the install.

    All the issues that happened when I was installing my suspension involved rusted on bolts otherwise it went pretty smoothly. The upper ball joint on the driver's side for me didn't press out so I ended up cutting it off. My truck is a 2003 so I feel like you won't experience these issues with your 2010 so much.
     
  12. Jun 18, 2013 at 10:15 AM
    #12
    Sandman614

    Sandman614 Ex-Snarky TWSS elf, Travis #hotsavannahdotcom

    Joined:
    Oct 26, 2010
    Member:
    #45273
    Messages:
    35,561
    Gender:
    Male
    First Name:
    Tim
    Garner, NC/Boone, NC
    Vehicle:
    '06 SR5 Off Road
    ARB Front Bumper, Projector Headlights w/Slimcubby 4300K HID's, Oznium LED's, LED taillights, DIY Washable Cabin Moose Filter, Sockmonkey SR5 Off Road, Aux Audio plug, OME 886x, OME Nitrochargers, Wheelers 3 Leaf Progressive AAL, ImMrYo Rear-View Mirror Lift Bracket, Dodge D-Rings
    :thumbsup: Everything except what's in red is spot of for your(OP) 2nd gen.
     
  13. Jun 18, 2013 at 10:29 AM
    #13
    kmok

    kmok Plastidipped ma Hootus!

    Joined:
    Jul 18, 2008
    Member:
    #8007
    Messages:
    2,340
    Gender:
    Male
    First Name:
    Kyle
    Columbus, Ohio
    Vehicle:
    2005 Subaru Outback XT 5MT
    Does the stock uca ball joint just unbolt? That's what it looks like in another thread.


    OP, Here are some good stickys in the suspension section for installations:

    UCA It's for TC UCAs but it should be similar and shows you removal of the stock uca.

    OME install

    AAL install
     
  14. Jun 18, 2013 at 10:33 AM
    #14
    Sandman614

    Sandman614 Ex-Snarky TWSS elf, Travis #hotsavannahdotcom

    Joined:
    Oct 26, 2010
    Member:
    #45273
    Messages:
    35,561
    Gender:
    Male
    First Name:
    Tim
    Garner, NC/Boone, NC
    Vehicle:
    '06 SR5 Off Road
    ARB Front Bumper, Projector Headlights w/Slimcubby 4300K HID's, Oznium LED's, LED taillights, DIY Washable Cabin Moose Filter, Sockmonkey SR5 Off Road, Aux Audio plug, OME 886x, OME Nitrochargers, Wheelers 3 Leaf Progressive AAL, ImMrYo Rear-View Mirror Lift Bracket, Dodge D-Rings
    It's upside down from your truck. The Balljoint is pressed into the UCA, and bolted to the spindle.
     
  15. Jun 18, 2013 at 10:36 AM
    #15
    kmok

    kmok Plastidipped ma Hootus!

    Joined:
    Jul 18, 2008
    Member:
    #8007
    Messages:
    2,340
    Gender:
    Male
    First Name:
    Kyle
    Columbus, Ohio
    Vehicle:
    2005 Subaru Outback XT 5MT
    Oh, got it. That sounds much easier than the way 1st gens ucas are setup if you're replacing the entire uca. Man that job was a PITA :frusty:
     
  16. Jun 18, 2013 at 10:49 AM
    #16
    SilverStreakTaco

    SilverStreakTaco [OP] Active Member

    Joined:
    May 1, 2013
    Member:
    #103252
    Messages:
    43
    Gender:
    Male
    First Name:
    bob
    western mass
    Vehicle:
    10 TACOMA SR5
    Access Tonneau Cover N Fab Nerf Bars Top Car Athens Seat Cover Lo-Jack Pioneer deh-80 prs Hybrid Audio Legatia L6's LPG 25Nfa Tweeters Rainbow iPaul 4.300 Jl 250/1 Focal 27v1 11" 4 ohm Husky liner front mud flaps Goodyear Dura trac 265/75/16's Bhlm Color matched front grill ssm Plasti dipped emblems Vht tint shade translucent on tailights
    thanks for all the great info. You guys are awesome help . I am mechanically inclined I'd like to think. I do a lot of carpentry work which I know is different but takes problem solving to accomplish a nice end result. A pic of the truck as it sits right now.

    001.jpg


    If I pay the 100 bucks to have everything assembled bushings and front shock/coil. I wouldn't need the compression tool and I'm guessing the only tool I don't have is a torque wrench. That being said what is best for torquing these bolts a dial(beam) wrench, or audible(click) torque wrench just curious to what others have had success with.
     
  17. Jun 18, 2013 at 10:55 AM
    #17
    Sandman614

    Sandman614 Ex-Snarky TWSS elf, Travis #hotsavannahdotcom

    Joined:
    Oct 26, 2010
    Member:
    #45273
    Messages:
    35,561
    Gender:
    Male
    First Name:
    Tim
    Garner, NC/Boone, NC
    Vehicle:
    '06 SR5 Off Road
    ARB Front Bumper, Projector Headlights w/Slimcubby 4300K HID's, Oznium LED's, LED taillights, DIY Washable Cabin Moose Filter, Sockmonkey SR5 Off Road, Aux Audio plug, OME 886x, OME Nitrochargers, Wheelers 3 Leaf Progressive AAL, ImMrYo Rear-View Mirror Lift Bracket, Dodge D-Rings
    Truck looks good. You got it! I've got the 3/8" click from Harbor Freight.
     
  18. Jun 18, 2013 at 11:08 AM
    #18
    totmacher

    totmacher automotive hypochondriac

    Joined:
    Sep 7, 2009
    Member:
    #22430
    Messages:
    4,661
    Gender:
    Male
    First Name:
    Daniel
    TN (memphis-ish)
    Vehicle:
    4Runner, Tundra
    Cut & broke off some stuff.
    I use a 1/2 inch drive click style. If I remember correctly from my install in Jan, you'll need 1-1/4 inch socket for the LR UCA and it torques to 150 ftlb. That's for top nut that holds balljoint in the slot. Did my install in a day by myself.
     
  19. Jun 18, 2013 at 11:15 AM
    #19
    Sandman614

    Sandman614 Ex-Snarky TWSS elf, Travis #hotsavannahdotcom

    Joined:
    Oct 26, 2010
    Member:
    #45273
    Messages:
    35,561
    Gender:
    Male
    First Name:
    Tim
    Garner, NC/Boone, NC
    Vehicle:
    '06 SR5 Off Road
    ARB Front Bumper, Projector Headlights w/Slimcubby 4300K HID's, Oznium LED's, LED taillights, DIY Washable Cabin Moose Filter, Sockmonkey SR5 Off Road, Aux Audio plug, OME 886x, OME Nitrochargers, Wheelers 3 Leaf Progressive AAL, ImMrYo Rear-View Mirror Lift Bracket, Dodge D-Rings
    Yea that sucker is huge, I believe that size is right.
     
  20. Jun 18, 2013 at 11:26 AM
    #20
    scocar

    scocar hypotenoper

    Joined:
    Nov 11, 2009
    Member:
    #25814
    Messages:
    39,416
    Yeah I have an old SnapOn 200-lb 1/2 inch clicker I bought used and then had recalibrated by SnapOn. Good as new.

    Keep in mind that torque wrenches are best used short of their limits for the sake of accuracy and not damaging the tool. For example, you should not use a torque wrench with a 100 f/p max capacity on a 100 f/p fastener. I think 80% of capacity is the guideline (IIRC), so you want to use a 100 f/p wrench on an 80 f/p fastener, for examaple.

    Bottom line, figure out the highest torque setting you need in advance before you rent or purchase the torque wrench. Equally important, check clearances and access to actually get the damn thing on the nuts/bolts! I bought a couple of adapter extensions for mine. Front spring hanger bolt was right next to the gas tank.
     

Products Discussed in

To Top