

-
Welcome to Tacoma World!
You are currently viewing as a guest! To get full-access, you need to register for a FREE account.
As a registered member, you’ll be able to:- Participate in all Tacoma discussion topics
- Communicate privately with other Tacoma owners from around the world
- Post your own photos in our Members Gallery
- Access all special features of the site
 Grill fog light dilema???
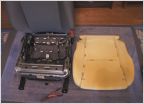 How much does is cost to replace the driver's side seat cushion?
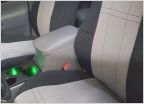 Coverking Neosupreme Seat Covers? Reviews? Thoughts?
 Best portable air compressor under $100?
 Plastic running boards? Seriously???
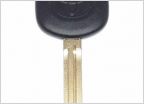 Is it possible to change my . Key to a g key?
Selecting a mild lift (TRD Baja TX Pro + Icon AAL)
Discussion in '2nd Gen. Tacomas (2005-2015)' started by crashnburn80, Aug 3, 2015.
Page 1 of 21
Page 1 of 21


