1. Welcome to Tacoma World!

    You are currently viewing as a guest! To get full-access, you need to register for a FREE account.

    As a registered member, you’ll be able to:
    • Participate in all Tacoma discussion topics
    • Communicate privately with other Tacoma owners from around the world
    • Post your own photos in our Members Gallery
    • Access all special features of the site

Sachou's 3RZ 4x4 Build

Discussion in '1st Gen. Builds (1995-2004)' started by sachou, Nov 24, 2009.

  1. Nov 24, 2009 at 2:59 PM
    #1
    sachou

    sachou [OP] Well-Known Member

    Joined:
    Sep 30, 2009
    Member:
    #23554
    Messages:
    696
    Gender:
    Male
    First Name:
    Sam
    Richland, Washington
    Vehicle:
    2006 TRD Sport Acc Cab 4x4 V6 6spd
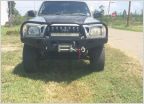
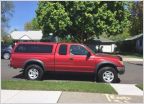
    Alright, I know I already bought the truck pretty much built, but as a modder at heart, I still have thousands of things I want to do to it. So here she is:

    How it sits today, September 2014:
    [​IMG]

    The thread detailing the crash: http://www.tacomaworld.com/forum/1st-gen-tacomas/342522-death-my-1999-tacoma.html

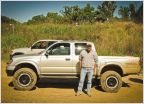
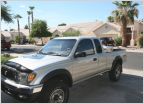
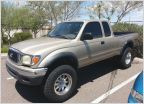
    And now some more recent pictures of it alive and kicking:
    [​IMG]

    [​IMG]

    [​IMG]

    [​IMG]
    Offroading with my buddy's badass 4WD Tercel. If you haven't watched my video on our escapades, please do: http://www.tacomaworld.com/forum/tacoma-videos/318325-can-1984-4wd-tercel-play-tacoma.html

    [​IMG]
    ALIENS

    [​IMG]

    [​IMG]


    The day I bought my Taco, 136k miles, October 2009.
    [​IMG]


    Mod List, as of 09/20/14:
    -Engine:

    • Doug Thorley Ceramic Tri-Y Headers
    • Bosal 295-173 Muffler
    -Suspension

    • Old Man Emu Dakar Leaf Springs (2.25" rear lift)
    • Procomp Explorer Rear shocks (I think)
    • Sway-away Racerunner 2.5" Coilovers with 13" 650lb spring (1" front lift)
    -Wheels/Tires

    • 15" Procomp Series 52 Black Steel Wheels
    • 31x10.5x15 BFGoodrich All Terrain Tires
    • Warn Manual Hubs
    -Body

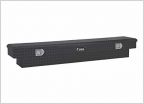
    • No-name Diamondplate toolbox
    • Allpro Front Bumper
    • Badlands Rear Bumper
    • Warn M8000 Winch
    -Interior

    • Pioneer AVIC-D2 7" touchscreen navigation Headunit
    • JL Audio 300/4 Amp
    • Alpine SPS-610C with 4-Runner tweeter pods in front
    • Alpine SPS-610 in rear
    -Miscellaneous

    • Blue Sea Systems Aux Fuse Block BLU-5029
    • Intelligent Battery Systems 12V, 200A Relay
    • 140 Amp eBay Remanufactured Alternator
    • Dual Battery system
     
    Last edited: Sep 21, 2014
    This site contains affiliate links for which the site may be compensated.
    #1
  2. Nov 24, 2009 at 7:58 PM
    #2
    Jason'sLawnCare

    Jason'sLawnCare Prepared for Bambi

    Joined:
    Apr 12, 2009
    Member:
    #15878
    Messages:
    12,352
    Gender:
    Male
    First Name:
    Jason
    Jacksonville Florida
    Vehicle:
    08 4x4 Double Cab TRD Rugged Trail
    CBI Moab 2.0, CBI Trail Rider 2.0, CBI sliders w/kickout, Superwinch EPi9.0S, OME sport shocks w/886 coils, OME n182, 1.5" aal, JasonBuilt 3/16th full belly skid, BuiltRight uca, Body Mount Chop, 285/75/16 km2's, Rear cat delete, exhaust crossover rerouted, Fog light anytime, Locker mod, Rear leaf tsb, Debadged, Uws Tool Box, Electric Exhaust Cutout, AFE Pro Dry S, Kiwi Wifi, Diff Breather Relocated, Grom Ipod Adapter, Dual Diehard platinum batteries isolated by BlueSea marine switch
    Nice list of mods you got there. Definetly ready for some serious wheeling.
     
  3. Jan 9, 2010 at 1:41 PM
    #3
    sachou

    sachou [OP] Well-Known Member

    Joined:
    Sep 30, 2009
    Member:
    #23554
    Messages:
    696
    Gender:
    Male
    First Name:
    Sam
    Richland, Washington
    Vehicle:
    2006 TRD Sport Acc Cab 4x4 V6 6spd
    Alright, first update to my build thread. It's been 3 months of owning my baby and I LOVE IT. I wish it could have been a little cleaner on the inside, and a little more rust-free, but hey, it's a truck, what do you expect.

    Mods to the front end so far:

    -Relocated front blinkers from the crappy stock ones mounted by 1 screw each on my tube bumper to the dual filament 1156 bulbs retrofitted to my corner lights. Would not do again...I would rather just take the existing bulbs and shove them in the corners. No pics, sorry.

    -Painted Chrome Grill Surround Krylon Satin Black.

    -Relocated Warn Winch Control Box:
    Used a piece of aluminum I used from a stolen road sign (I know, I'm bad, but it adds character to the truck ^_^), drilled a few holes and mounted it to the right of the winch at an angle.
    [​IMG]

    -Painted the Knockoff KC driving lights black and temporarily mounted them using hose clamps and the aforementioned stolen road sign. Also used some steel tube used to ship my pit bike. I know, I'm a professional fabber using pro materials. This is just temporary until I get a good welder.
    [​IMG]

    -Mounted the cheapo Wal-Mart fog lights under them using zip ties.

    -Added 15A round, blue lit switches to the dash. 6 total...but I want at least 3 more to finish my lighting dreams :D.
    [​IMG]

    Ran Wires through the door trim. I don't like drilling holes in my firewall.
    [​IMG]

    Works out very well. A much more noninvasive way to run wires.
    [​IMG]

    So here's the front end before:
    [​IMG]

    And here it is after:
    [​IMG]
    (note, the wires are still hanging out because I haven't had time to wire up the fogs and loom them up)


    Engine Mods:

    -Installed Doug Thorley Tri-Y Ceramic Headers:

    Old vs. New
    [​IMG]

    Close-up of the crack
    [​IMG]

    And this is the reason why I replaced the manifold. The crack damn near halved the manifold.
    [​IMG]

    Installed
    [​IMG]


    -My existing PCV Breather block-off on the intake manifold side fell off while driving, so instead of letting my crankcase junk goop up my engine bay through the breather, I fabricated a PCV inline oil catch using a Husky Air compressor filter from Home Depot. The whole job cost less than $20 and should keep my throttle body clean without having to pollute the environment in the process. For some reason, The manifold side of the pcv was WAY bigger than the engine side of the pcv system (5/16" hose vs. 5/8" hose), so I had to use heater hose and a custom adapter system.
    [​IMG]


    Other stuff:

    -Added reverse lights. I picked these crappy "driving lights" from Harbor Freight for $8. They're so dim that I can't even consider them driving lights. They are, however, great reverse lights, and fit perfectly on my badlands rear bumper. I removed the crappy bolt-on mounting system and drilled 4 holes in the back of them and zip-tied them to the ugly holes in the bed that you see when you remove the stock rear bumper. It really cleaned up that area, without having to grind off the sheet metal. The zip ties hold them in pretty securely, and aim isn't too much of an issue for reversing. They don't decrease my angle of departure, and don't get in the way of my tailgate.

    Before:
    [​IMG]

    After:
    [​IMG]


    That's all for now...I still have so many things I want to do...but not enough time, and not enough good weather. No garage and no spare daily driver doesn't help, either.

    Tell me what you think, TW!
     
  4. Jan 9, 2010 at 1:50 PM
    #4
    ColtsTRD

    ColtsTRD Well-Known Member

    Joined:
    May 13, 2009
    Member:
    #17177
    Messages:
    17,884
    Gender:
    Male
    First Name:
    Scott
    AZ
    Vehicle:
    2005
    Lookin good bud!
     
  5. Jan 9, 2010 at 4:53 PM
    #5
    Incognito

    Incognito No better friend, no worse enemy

    Joined:
    May 25, 2009
    Member:
    #17626
    Messages:
    13,752
    Gender:
    Male
    VA
    Vehicle:
    2012 Pyrite AC TRD OR
    Spacer lift, bumper stickers, ejector seat, etc.
  6. Jan 11, 2010 at 1:45 PM
    #6
    silver07taco

    silver07taco Well-Known Member

    Joined:
    Apr 27, 2008
    Member:
    #6241
    Messages:
    4,541
    Gender:
    Male
    First Name:
    COIL
    Maryland
    Vehicle:
    13 Tundra RCSB 5.7 4x4,07 Tacoma AC 4.0 4x4
    2013 Tundra RCSB 5.7 4x4, 2007 Tacoma AC 4.0 4x4
    Nice work!
     
  7. Apr 6, 2010 at 4:12 AM
    #7
    Kelson

    Kelson Well-Known Member

    Joined:
    May 13, 2008
    Member:
    #6597
    Messages:
    4,433
    Gender:
    Male
    First Name:
    Kelson
    Honolulu, Hawaii
    Vehicle:
    08 5-Lug Reg. Cab SR5
    SR5 Exterior/Interior (Color matched Front Bumper, Chrome Grille Surround and Chrome Rear Bumper/Silver Scoshe Dash Kit, A/C Bezel, A/C Vent Surround) LED license plate and white interior lights, Wet Okole Seat Covers, iPad in-Dash, JL CL-RLC, JL 13TW5 sub, JL 500/1 Slash V1 amp, JL XR 6.5 Components, Rockford Fosgate 6X9s in Boxes Front XRunner Coils, DJM Control Arms and Rear 4X4 Leafs, Custom 2" Angled Streetacos.com Blocks Front XR Bilstien Struts and Rear XR Bilstien Shocks, CravenSpeen Antennae, RX-8 Rims w/ Fronts:235/40-R18 Sumitomo HTR Rears:245/40-R18 Goodyear Eagle GT, 35% Tint front windows, OEM Sliding Privacy Glass w/ 5% Ceramic Tint, Flowmaster Super 44 dumped before the axle, URD Short Throw Shifter, Door Sill Protectors, Door Edge Guards, OEM Sport Pedals,The Retrofit Source Morimoto Mini D2S Stage III 35W 5K HID Headlights, OEM Fog Lights w/ piss yellow bulbs, OEM Cruise Control, Porsche 944 Bucket Seats, BeefedTaco Skid Plate, Whale
    bumper looks good man!

    rolla in the backrgound is pretty boss haha
     
  8. Jan 21, 2016 at 6:02 AM
    #8
    clickws

    clickws Well-Known Member

    Joined:
    Dec 24, 2015
    Member:
    #173014
    Messages:
    366
    Gender:
    Male
    South Carolina
    Vehicle:
    1999 Toyota Tacoma Xtra Cab 4x4 2.7L 5-Speed All Manual
    Stock Alloys w/ 31.5x10.5x15 (Previously Black Pacers w/ BFG KM2 32xx11.5)
    Any Updates on this old truck?
     
  9. Jan 29, 2016 at 11:19 PM
    #9
    sachou

    sachou [OP] Well-Known Member

    Joined:
    Sep 30, 2009
    Member:
    #23554
    Messages:
    696
    Gender:
    Male
    First Name:
    Sam
    Richland, Washington
    Vehicle:
    2006 TRD Sport Acc Cab 4x4 V6 6spd
    As a matter of fact, yes. Thanks for the reminder that I still need to post up all the pictures of the work I did back when this truck was my pride and joy.

    I really meant to update this build thread as I went along, but was kind of lazy. Now the rest of the thread is going to be somewhat of a memorial, since this truck will probably never see the road again :(.

    First off, I'd like to say that modding this truck was an incredible learning experience for me, and I especially appreciate the knowledge that you TWers have shared with me.

    On the same token, I'd like to say that most of my early mods were pretty cheesy and ghetto; but that was all part of the learning experience.

    Among other mods, I have since completely re-wired my aftermarket electrical system to something more respectable. I now know that running wire through the weather stripping without a grommet is a huge no-no, and I have installed a legitimate fuse block instead of shoving fuses in-line using spade connectors.

    So, on to...

    Electrical Upgrades and Dual Battery Setup

    I had aspirations to build this truck into an expedition rig. Being electrically inclined, I felt it would be fun to start by installing a dual battery setup so I could run my lights, inverter, and sound system for extended periods with the engine off. My requirements were as follows:

    • Cheap. No pre-made kits, or automatic/intelligent switching
    • Standard Group 24 Marine Deep Cycle (common, and cheap)
    • High Output Alternator
    • 600W Inverter
    • 4 Channel amplifier for speakers
    • Manually switching between starting and deep cycle batteries
    • Isolating Winch to run only off starting battery and alternator
    • Deep cycle battery and inverter should be easily removable to create a crude "portable power pack" in an emergency situation

    I did an analysis of a few different scenarios for electrical loads so I could size wiring and fuses to the second battery appropriately.

    I started with the OEM engine idle load and total power output using wild-ass unmeasured guesses based on the fuse amperages:
    Engine ON
    Estimated nominal loads: AM1 (20A), AM2 (15A), EFI (7.5A), ALTERNATOR (-70A)
    Estimated power to battery: 27.5A * 14.5V = 400 Watts

    So I can assume the OEM charging system puts out 400 Watts to any acccessory. About 100W of that can be accounted for the OEM headlights, and after you add a sound system and some lights, it adds up quickly and you run out of capacity. Time for a High Output Alternator.


    I then created the worst case load, or the maximum draw from the second battery:
    Deep Cycle Battery Selected
    Engine Off
    Nominal Loads: Dome (2A), Headlights (10A), Tails (10A), Driving Lights (30A), Fog Lights (10A), Reverse (10A), Inverter (50A), Power Outlet (15A)
    Total Nominal Load: 162A

    If I have everything turned on and running at full draw directly from the second battery, it will pull 162 Amps. At the wire run distance I need, I'm within the ampacity of a 2AWG wire. Since those are hard to find, I went ahead and used a 0AWG wire to connect the second battery.

    I scrawled together the 3rd version of the wiring for my aftermarket electrical system:


    With this configuration, the "secondary", deep cycle battery is wired directly to the electrical loads, as well as the alternator, and the starting battery can be disconnected electrically through a switch in the cab when the engine is off. Ideally, I would also disjoin the batteries whenever starting the engine, or winching, to isolate the large in-rush current that the deep cycle is not designed to handle.

    To join and disjoin the batteries, I used an Intelligent Battery Systems 200A battery relay that is normally included with their $380 dual battery system. That price was way too steep for this project, so a simple switch would suffice for my needs.

    But first, time to fix my awful, early attempt at wiring.

    Here's how I mounted the Blue Sea Systems BLU-5029 Fuse Block:

    [​IMG]
    [​IMG]
    I scanned the fuse diagram and printed it out on the inside of the OEM fuse box cover, and used mounting tape to mount the aux block on it.

    [​IMG]
    I sent all wiring through the firewall using a Daystar Firewall Boot. I highly recommend this product, because if you're like me, you're always adding something. Instead of drilling more holes and adding more grommets, just drill a big hole the first time. Adding more wires is as easy as cutting the boot down and throwing another zip tie on.


    Wiring. You can see the Blue Sea fuse block mounted on the lid of the OEM block, and the amount of clearance the combo has for the hood.


    My alternator died of old age, so I was pressed to find a replacement. I decided to order a "High Output, 140A" direct bolt-on unit from eBay (Ace Alternators). It was $135, so the price was right. Whether or not it produced 140A is questionable, but I figured I'd try it out. I had meant to buy a DC Ammeter to test it, but I never ended up doing so.

    Here is the size comparison from the OEM Alternator:
    [​IMG]
    It's moderately larger, though not significantly. It's also a Nippondenso Remanufactured unit, so I think I can trust it. I ordered a larger, 110A fuse to replace the OEM 80A fuse. Undersized, but it's the largest of that style of fuse that they make, and I doubted whether the eBay alternator would actually put out its 140A nameplate capacity.I upgraded both the feed wire and the engine block ground wire to 4AWG to accommodate the extra amperage.


    OEM battery to fusebox wire vs 4AWG wire

    On to the interior


    Rear and passenger speakers wiring


    I opened up the OEM wiring loom and integrated the 4AWG amp/inverter wire, drivers speaker wire, and line-outs from the head unit into one compact unit. I was very proud of how well the end product looked, and how it tucked under the door sill, BUT I learned the very valuable and common lessen that running the power wire parallel to the audio wire introduces a LOT of interference. Crazy alternator buzz fo' days!


    Nice and clean. Both the amp, and the interior itself. I'm an OCD detailer, so I took this opportunity to thoroughly deep clean the carpet like it never has before. I shook it violently for over 10 minutes straight, and I swear over 3 pounds of beach sand must have come out; and that's after vacuuming thoroughly with it in the truck. I took a pressure washer to it, applied liberal amounts of Folex (the best fabric cleaning spray, btw), and shampooed it. I think it was definitely worth the effort. Fresh and like new.


    I wanted to mount the 600W Inverter so that I could easily remove if I needed to, so I used Hard Drive magnets to keep it attached to the carpet. It worked pretty well - stayed put offroad, and didn't budge during the collision.


    Hanging out nicely below the passenger seat. Shares the same 4AWG feed wire as the amp, utilizing a distribution block.

    I used a standard Computer ATX Power Supply Molex connector for a quick connect for the driving lights:
    [​IMG]


    I still wasn't finished wiring everything, so I don't have any more pictures, unfortunately.


    I relocated the cruise control module to accommodate the second battery by drilling 2 holes further back and setting 2 nuts behind them. I wish I had known about Nutserts.

    [​IMG]
    I then cut a hole in the passenger side wheel well, and welded in a custom bracket for a second Group 24 battery. I'm really surprised I never took a picture of the battery tray. Probably for the best - it was one of my first welding attempts, and it looks horrible. The battery is being held in by a nylon tie-down strap, and the whole thing help up much better than the OEM hold-down in the collision, which shifted significantly.

    Just a warning - I wouldn't recommend shoving a group 24 battery in this location like I did if you ever wanted to do long travel, run enormous tires, or otherwise needed to trim your fenders or run fiberglass fenders. This battery hangs down into the wheel well a good 1.5", and would rub the tire in these situations.

    SO, the big question is: Would I do this dual battery setup again?

    No. It was a great learning experience, and I'm confident in building another system even better, but this effort really wasn't worth it, especially considering I went through all this work just to have the truck smashed, and I didn't even get to really utilize it. This all took a very long time to do. Still, if anyone has any questions on my methods, feel free to ask.
     
    This site contains affiliate links for which the site may be compensated.
    #9

Products Discussed in

To Top