1. Welcome to Tacoma World!

    You are currently viewing as a guest! To get full-access, you need to register for a FREE account.

    As a registered member, you’ll be able to:
    • Participate in all Tacoma discussion topics
    • Communicate privately with other Tacoma owners from around the world
    • Post your own photos in our Members Gallery
    • Access all special features of the site

Diet Taco... trying to keep things light

Discussion in '2nd Gen. Builds (2005-2015)' started by DVexile, Jan 7, 2016.

  1. Feb 19, 2017 at 6:15 PM
    #561
    sawbladeduller

    sawbladeduller semi-realist

    Joined:
    Oct 3, 2014
    Member:
    #139583
    Messages:
    1,140
    Gender:
    Male
    North Cal
    Vehicle:
    '15 DCSB '98 2.7L
    fully zip tied
    I've had good luck with the plastic water bottle catch under the oil filter, guess I'll be more aware next time. Changed out the engine oil and filter, and gear oil for the front diff and transfer case, yesterday, Saturday, a day without rain. 28725 mile, been changing oil before 5k miles. Hardest part yesterday was removing three skids to get to five plugs, and the stiff wind played havoc with oil drainage. Did the rear diff and spark plugs last Monday. Have not thought about oil analysis.
     
    Crom, ChadsPride and DVexile[OP] like this.
  2. Feb 20, 2017 at 7:37 AM
    #562
    DVexile

    DVexile [OP] Exiled to the East

    Joined:
    Dec 17, 2014
    Member:
    #144469
    Messages:
    2,661
    Gender:
    Male
    First Name:
    Ken
    Vehicle:
    2015 DCSB V6 TRD OR 4X4
    Not sure what I did different this time. I thought I had it wedged under there good but once I removed the filter and it filled with just a bit of oil it slipped on its own down into the fan cowling. What was already in the bottle stayed in the bottle but a fair bit continued to drain from the filter all over the hoses and what not below :(

    Going to be a number of years before I get to 30k and do the diffs and plugs! Glad you had a dry day to sneak the work in under.

    I mainly did it because I was trying to figure out a sane oil change interval at low mileage. Doing it every 6 months would be ridiculous but then the question becomes how long if not 6 months. I doubt I'll do an analysis every change going forward. I know some folks on a more normal change schedule do it every other or every third. Nice to have a baseline analysis in the 20-30k range when you know everything is working fine and the engine is done with break in. Analysis is a good way to see unexpected bearing wear or a head gasket issue early.
     
  3. Feb 20, 2017 at 9:59 AM
    #563
    DVexile

    DVexile [OP] Exiled to the East

    Joined:
    Dec 17, 2014
    Member:
    #144469
    Messages:
    2,661
    Gender:
    Male
    First Name:
    Ken
    Vehicle:
    2015 DCSB V6 TRD OR 4X4
    LCA Alignment Cam Anti-seize
    February 2017

    Applying anti-seize to the alignment cams has been on the to-do list for awhile. These are notorious for seizing in the bushings and thus making alignment impossible. It is expensive and a pain to resolve if that happens and it seems it really isn't a question of if it happens but rather when. Also a number of folks have indicated that bent cam adjustment tabs seem correlated with seized cams though I've yet to figure out exactly how that might work. I suppose if you take a hard hit and the cams aren't seized then the cams will rotate to relieve the stress but if they are seized they will just bend the tabs instead.

    I didn't do this work on my first rotation around 6k, nor did I do it at the suspension install. Finally now around 13k on my second rotation I got around to doing it.

    As a side note for this batch of maintenance I went to Sin City Do It Yourself Auto Repair so that I could work using a lift. Not strictly necessary but figured good to try the place out for any future work. They charge $30/hr to use a lift in their shop and provide tools. The tools provided are decent but nothing to write home about, I'd actually prefer to work with the tools I have in my truck. They did have a nice Snap-On click-type torque wrench which was nicer to use in awkward spots than my arm-type ones. They also have air tools and so of course that made much quicker work removing all the lugs for the tire rotation. I refuse to put lugs on with an impact wrench though.

    It was nice working with a lift, everything went a bit faster - which for me means a bit less glacially slow than usual. With a lifted truck this is not necessary at all for fluid changes or lube. But for a tire rotation it makes things quite a bit quicker. Working on the LCAs at shoulder height was quite nice as well.

    The actual LCA work is quite simple. With the weight of the wheel off the hub you can safely remove one cam at a time with the LCA being supported only by the other cam. The front and rear cam designs are slightly different with the front cam having an extra nesting surface requiring anti-seize (see figure below).

    [​IMG]
    Procedure is simple:
    • Carefully note current cam positions or add witness marks
    • Remove bolt and front and rear cams
    • Apply anti-seize to the entire surface of the bolt
    • For the front cam also apply anti-seize to the outside of the front cam sleeve that passes through the bushing
    • Reassemble and position to original alignment settings but do not torque to spec yet
    • Repeat for each of the cams (two positions per LCA)
    • Lower truck back onto ground so suspension is fully load
    • Cycle suspension by rocking the truck (jump on hood or fender)
    • Check alignment settings still correct and then torque bolts to spec (turn wheels for best access to bolt)
    Being an idiot it took me a few minutes and struggling when torquing the first bolt to realize I could turn the steering wheel to provide better access to the bolt.

    So in my case after less than two years and 13k miles in southern California during a drought and travels through the desert southwest the front driver side was already in the process of seizing:

    [​IMG]
    It still rotated and did come out with a bit of fuss. Some of the corrosion got hung up on the LCA when extracting because the LCA was under more load than I expected. You can see a little abrasion from working it out. The other three bolts looked fine. With anti-seize applied this one went back in just fine.

    Probably should have done this preventative maintenance earlier but honestly didn't expect to see corrosion after so little time in a benign environment. Glad I finally got to it!
     
    Last edited: Jun 2, 2017
    Crom, Bentrodder, samiam and 5 others like this.
  4. Feb 20, 2017 at 7:19 PM
    #564
    dman100

    dman100 Well-Known Member

    Joined:
    Mar 2, 2016
    Member:
    #180009
    Messages:
    2,217
    Central Coast, California
    Vehicle:
    2016 TRD OR DCSB
    ^^ Wow! I've heard about this problem but didn't think it would need to be done so soon. We're a bit damper up here (well more than a bit this winter) plus coastal salt air, so maybe. I need to do this to my 3rd gen soon. And I am surprised that there are any lift-equipped rental bays available ... there was one in my home town 40+ years ago, that I used, but I thought the mythical insurance demon put them all out of business. Maybe I need to take a trip to Sin City.
     
    Crom and ChadsPride like this.
  5. Feb 22, 2017 at 1:00 PM
    #565
    DVexile

    DVexile [OP] Exiled to the East

    Joined:
    Dec 17, 2014
    Member:
    #144469
    Messages:
    2,661
    Gender:
    Male
    First Name:
    Ken
    Vehicle:
    2015 DCSB V6 TRD OR 4X4
    They seem to come and go. The Sin City one is setup where they are a regular shop doing their own work and then you can schedule some time to use one of the lifts and they shuffle their work around it. They have a couple tool boxes on wheels for DIY so you don't screw up their usual working tools but they will lend you any special tool they have.

    I never visited it but there was DIY shop with lifts in the LA area I think around where the 10 and 605 meet.
     
    Crom and ChadsPride like this.
  6. Feb 22, 2017 at 1:14 PM
    #566
    DVexile

    DVexile [OP] Exiled to the East

    Joined:
    Dec 17, 2014
    Member:
    #144469
    Messages:
    2,661
    Gender:
    Male
    First Name:
    Ken
    Vehicle:
    2015 DCSB V6 TRD OR 4X4
    Tire Rotation/Alignment Problems
    aka Holy Camber Wear Batman!!!

    Tread measurements from first rotation at 6300 had shown nice even wear of just about 2/32 everywhere. Lift went on right after this as well as an alignment which gave nice 3/0/0 alignment numbers. Now somewhere midway along the way one alignment cam got knocked a bit, namely the driver's side rear cam. Being a dope I didn't check wear at that point nor did I immediately correct the cam position. So I expected a little uneven wear on the driver's side.

    Measuring this time at 13300 the rear tires wore 2/32 to 3/32 fairly evenly. The surprise was that both front wheels (including the one with unmolested cam positions) showed pretty severe camber wear (both inner edges severely worn). They lost 3/32 off the outside edge, 6/32 at the middle and 8/32 at the inner edge. Ouch!

    I don't understand enough about alignments to explain but I can imagine that an issue on one side can in some way mirror to the other and perhaps that is what is happening. I tried to use the service manual description of the cam settings to see if the moved cam would be expected to produce wear of this type but the sign and direction conventions were too ambiguous for me to decide for sure. Regardless, high on the list is another visit to an alignment shop next time I'm with the truck! I do have a lifetime alignment with Firestone.

    The two worn wheels have 5/32 on their inner edge (one third original tread depth). I do a five tire rotation so at the moment one is the spare and the other is on the driver's rear. The current front tires have plenty of tread and relatively even wear (about 10/32 tread depth remaining on average). These tires will need to be replaced due to age in just about 4 years anyway. At my current mileage pace I might not even need to rotate before then. Worst case I rotate one more time and will alter the rotation pattern so the worn tire on the rear goes to spare and the worn tire currently the spare will go to a rear position.

    Anyway, lesson learned - watch those cams and measure tread wear in between rotations!

    UPDATE: Indeed the alignment was crap and likely this was because of a bad alignment by Firestone way back when. The wear was due to excessive negative tow (which wears like bad camber). Details here.
     
    Last edited: Jun 2, 2017
    ChadsPride likes this.
  7. Feb 24, 2017 at 8:38 AM
    #567
    Crom

    Crom Super-Deluxe Member

    Joined:
    Jun 22, 2009
    Member:
    #18782
    Messages:
    9,618
    Gender:
    Male
    First Name:
    Nick
    San Diego, CA
    Vehicle:
    2009 4x4 DCSB Camp Supreme
    Millions
    Ken, There is so much goodness in your thread!

    On the corroded cams, I'm glad you got them taken care of! I speculate that your previous Afton water crossing provided lots of electrolyte to accelerate the rust cancer. :D Just a thought! :D

    I appreciate your comments about lighting and photography. Your snippets of knowledge are valued by me. Thanks.

    I love that section of DV. How awesome was it that you got to meet Shane doing his work out there, and awesome you got a quality conversation with him. Wish I could have been there! lol

    Wingate pass is quite fascinating to me. After I'm done building my time machine, I'm going to jump back 20K years to when Lake Manly was filling through the pass. 90 miles long, 6-11 miles wide and 600' deep. What a sight to behold. :) Lots of history surrounding that pass. I'm down for a hike / backpack out there one of these days. Still want to go to Epsom salt works ruins and see the monorail or what's left of it. Need more time. :ballchain:
     
  8. Feb 24, 2017 at 6:50 PM
    #568
    DVexile

    DVexile [OP] Exiled to the East

    Joined:
    Dec 17, 2014
    Member:
    #144469
    Messages:
    2,661
    Gender:
    Male
    First Name:
    Ken
    Vehicle:
    2015 DCSB V6 TRD OR 4X4
    Yeah, it was interesting it was just one of the cams that got it as the other three looked almost new. Afton is fortunately way less saline than the Amargosa that did a fast number on your truck! I wonder if at some point some water got in between the bolt and the sleeve on that cam and got stuck there for awhile.

    It is always hard to process the various time scales in the DV area. Much of the geology is based on events 10s to 100s of millions of years in the past - especially the petrology. Climatically though the area is incredibly young with a totally different climate, flora and fauna 10K years ago. Various lake and flood stages in the area are actually part of the oral history of some Native American tribes!

    My lazy ass needs to get back in shape before tackling it. I've got some more intermediate desert backpacks to do first!
     
    Crom[QUOTED] and ChadsPride like this.
  9. Feb 24, 2017 at 6:55 PM
    #569
    Drainbung

    Drainbung Somedays you are the show....

    Joined:
    Sep 2, 2010
    Member:
    #42629
    Messages:
    9,114
    Gender:
    Male
    First Name:
    Bob
    Fallabama, NV
    Vehicle:
    10 DCLB
    TRD Fleshlight
    Since you're back east for a bit take the time to check out the Dollysods area of WV in the Monongahela National Forest. Lots of good hiking and camping in that area.
     
  10. Feb 24, 2017 at 7:07 PM
    #570
    DVexile

    DVexile [OP] Exiled to the East

    Joined:
    Dec 17, 2014
    Member:
    #144469
    Messages:
    2,661
    Gender:
    Male
    First Name:
    Ken
    Vehicle:
    2015 DCSB V6 TRD OR 4X4
    A-Pillar RAM Mount
    February 2017

    Have been meaning to do this mod for quite sometime and finally got it done this past trip. I spent part of my first morning camped getting this installed. After just a few days of use this is now one of my favorite mods on the truck.

    You can see a lot of different variations of the installation and various balls, arms and holders in this thread where I first saw the idea.

    I have a smaller phone (SE) and always prefer it in portrait orientation when navigating so I used the smallest length arm. This kept everything close and tight to the dash with plenty of room around the steering wheel. The location is just perfect, it doesn't obstruct any view nor the vents and it is right in the corner of your vision for easy checking of the display while still "heads-up".

    For the ball I had a M6x50mm bolt and that proved shorter than I planned as it wouldn't work with the nylon spacer I had. Instead I used one standard nut and two washers as a spacer and that actually worked great. There is a lot of space behind the factory nut so if buying a bolt go longer than needed. Also the factory bolt is self tapping so you may find the threads in the factory nut a bit tight. I had to alternately run my bolt and then the factory self tapping bolt into the nut about three times before the new bolt ran in smoothly.

    I'm using the RAM-HOL-PD3U holder for my phone and love it. The upper catch is spring loaded so the phone just slides in our out super easy and didn't budge in fifty miles of fairly high speed rough dirt road. Really easy to both get it in and out. Sturdy and stiff enough to push buttons and tap various places single handed without needing to support the phone or holder.

    I ran a lightening connector through the A pillar (being careful to keep wiring away from the air bag). The lightening connector was small enough that I could just slightly widen one of the existing holes where the handle bar clips in with a flat head screwdriver and slip it through. Right now just connects to the factory USB port below the radio and A/C controls but I'll probably add a dedicated USB power connection under the dash for it later.

    Parts list for my install was:


    [​IMG]

    [​IMG]
    [​IMG]
     
    Last edited: Jun 2, 2017
    Jack0928, Jim Bob, Crom and 8 others like this.
  11. Feb 25, 2017 at 10:28 AM
    #571
    ETAV8R

    ETAV8R Out DERP'n

    Joined:
    Feb 20, 2008
    Member:
    #4832
    Messages:
    4,675
    Gender:
    Male
    Republik of Commiefornia
    Vehicle:
    MGM 09 AC 4WD V6 TRD-OR w/ Tradesman Shell
    Just the basics
    You and Nick have convinced me that I need to venture into the Owlshead area. Since I am not familiar with that portion of DV what is the best way of travel ? Was there any significant water damage on the roads?

    Must have been great to meet the AAA guy. How cool of a job is that? I don't use my AAA DV map much.

    Wonderful photography. There are those moments when we doubt mother nature and it is always best to stay put until darkness fully takes over the environment. For your B&W photos do you stay in color mode on your camera or use monochrome settings? I've read that switching to monochrome changes the algorithms to produce better images. If shooting in monochrome do you use a colored filter or only make changes in post processing?
     
    Last edited: Feb 25, 2017
    DVexile[OP] and ChadsPride like this.
  12. Feb 25, 2017 at 1:19 PM
    #572
    DVexile

    DVexile [OP] Exiled to the East

    Joined:
    Dec 17, 2014
    Member:
    #144469
    Messages:
    2,661
    Gender:
    Male
    First Name:
    Ken
    Vehicle:
    2015 DCSB V6 TRD OR 4X4
    The part of the Owlsheads I was in is along Owl Hole Springs Road which branches off of Harry Wade Road just a bit west of where there is the turn off to Saratoga Springs. Fastest access from pavement is off the 127 so coming from So. Cal. take I-15 to Baker and then turn north on 127. From Vegas you can also go to Baker and then up the 127 or you can take a more direct route on paved back roads leaving the 160 a bit south of Pahrump and joining the 127 at Tecopa Hot Springs just a bit north of the turn off for Saratoga Springs/Harry Wade Rode. From the North best access is to come through Death Valley itself down Badwater Road and take Harry Wade Road from its northern junction.

    You can also access some apparently really neat canyons on the east edge of the Owlsheads from Harry Wade Road itself north of the junction with Owl Hole Springs Road but these hikes have long approaches up a bajada and fans before getting to the canyons themselves.

    Seriously, he said he was starting to think about retiring but his wife couldn't understand why he would do that since if he retired he'd still do practically the same thing but not get paid for it.

    There is no single "right" way to do B&W in digital. The best starting point is always a RAW file though and for these it doesn't matter what the camera was set to. Some people set the camera to monochrome just to make it easier to visualize what the scene looks like in B&W even if they are shooting RAW and will do the monochrome conversion in post. Many people who really like the B&W modes in their camera might shoot RAW+JPEG so that if the image works out great with the in camera JPEG then they are done but if it needs more work they still have a color RAW file to work with.

    Why is RAW the best starting point? Mainly because oftentimes B&W conversions are actually the most severe test of camera image quality. Often contrast is greatly increased making noise and artifacts more visible than in a color shot. In a color shot you are usually limited a bit in how much you boost contrast because eventually a large enough contrast boost makes colors go crazy. In B&W you can really hammer on the contrast without "breaking" the image.

    Besides the contrast boost you also usually end up converting chrominance information and noise into luminance information and noise. Camera sensors as constructed for color output to be viewed by humans and thus they are designed from the start to have the most resolution and lowest noise in luminance because our eyes have about twice the resolving power in luminance compared to chrominance. Well in many B&W conversions the final monochrome image may have much of its luminance derived from the color image's chrominance with the end result being again more visible noise and artifacts than you'd expect from a color image.

    JPEG goes one step further in the luminance/chrominance trade off. The camera sensor's color filter arrangement (called an Bayer array) does indirectly produce more luminance than chrominance information but JPEG is very specifically optimized for human viewing and its lossy compression throws out a lot more chrominance information than luminance. So if you try to do a B&W conversion from a color JPEG using various filtering tricks again you are converting chrominance to luminance and starting from a JPEG makes it even worse!

    Again, you can completely dodge the JPEG chrominance problem if your in camera B&W conversion looks fine to you. The chrominance to luminance conversion has happened before the JPEG compression was applied. It also usually means the really punchy contrast curve has been applied before compression as well. So this jives with the advice you've heard - if shooting B&W you probably get better image quality in the JPEG if you switch the camera to monochrome. The very best results though usually come from shooting RAW (assuming your camera supports RAW) and doing the conversion in post.

    TL;DR - If you like your camera's monochrome output by all means use it. If you want to do your own conversions in post processing from a color file it is better to start with a RAW file rather than a color JPEG.

    I always do the conversion in post. There is very, very little advantage to using a physical color filter on a digital camera. In theory a very narrow band filter will produce slightly different results (like a deep red filter) but practically they don't. The one big difference of course is if you are using filters or a converted camera to shoot IR. That's a whole different ball game and the various filter choices have fairly significant impacts on the image which can not be reproduced in post. Many of my B&W images in this thread are IR shots from a converted camera.

    Also keep in mind some cameras with a B&W mode actually have modes that mimic what color filters do. Again these don't actually do anything to a RAW file, but if you like using JPEG then again that's a way to get more processing and the look you are trying to achieve done in camera before JPEG compression happens.

    Wow, that was long winded and maybe confusing. Feel free to ask clarifying questions if I didn't make much sense.
     
  13. Feb 27, 2017 at 9:08 AM
    #573
    DVexile

    DVexile [OP] Exiled to the East

    Joined:
    Dec 17, 2014
    Member:
    #144469
    Messages:
    2,661
    Gender:
    Male
    First Name:
    Ken
    Vehicle:
    2015 DCSB V6 TRD OR 4X4
    Mouse in the House!
    And other to-dos...

    Mostly a summary for myself to not forget some future maintenance items, but could be useful to others.

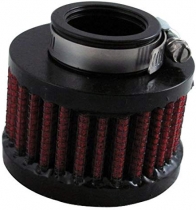
    I replaced my engine air filter a bit early because I do so much dirt road driving and discovered that at some point there was a mouse living in there. Didn't look like it was for very long, just a little bit of the filter chewed up. Have no idea as to when in the past two years the little bugger was in there. Need to add some sort of screen to the intake in the wheel well to prevent this in the future. While I'm at it probably good idea to do the same for the cabin air intake. Know I've seen some threads around here about both.

    Want to re-torque the leaf spring bolts to be sure the bushings aren't binding. Similarly need to check the U-bolts as those can stretch over time.

    Of course the radiator bushings are still to be done, now stored in the truck. Same for the A/C drain hose extension.

    Truck obviously needs an alignment too...

    New simple mod to be done as well:

    [​IMG]
    Huh? Spacers? What are you smoking Ken?

    They are spacers, but not to be used as spacers. These will be installed above the factory coil buckets to reinforce them. Brilliant idea from @EDDO shown here. The Icon top-hats are a funky design that some consider not strong enough in certain failure modes so the spacers will make everything extra beefy.

    Not much will happen on my next trip as I'm solo with my daughter and a few things I'll probably leave until my annual leisurely week at the springs in Saline Valley around December. For the moment my to-do list is:
    • Screen engine and cabin air intakes for rodent control
    • Re-torque leaf spring bolts
    • Re-torque U-bolts
    • A/C drain extension
    • Radiator bushings
    • Alignment
    • Top hat reinforcement
    Longer term I'm still looking at whether or not to do sliders. I will also reinforce the cam tabs at some point either with the TC solution or just backing them with a welded bead but I won't do either of those things until I decide on the sliders since I can have the cams done at the same time as the sliders if I go that route.
     
    Crom, IronPeak, Whitecloud and 3 others like this.
  14. Feb 27, 2017 at 2:52 PM
    #574
    dman100

    dman100 Well-Known Member

    Joined:
    Mar 2, 2016
    Member:
    #180009
    Messages:
    2,217
    Central Coast, California
    Vehicle:
    2016 TRD OR DCSB
    It was so much easier back in the day; if you wanted B&W you just had to choose between PanX, PlusX or TriX.
     
  15. Feb 27, 2017 at 9:20 PM
    #575
    sawbladeduller

    sawbladeduller semi-realist

    Joined:
    Oct 3, 2014
    Member:
    #139583
    Messages:
    1,140
    Gender:
    Male
    North Cal
    Vehicle:
    '15 DCSB '98 2.7L
    fully zip tied
    ...so now we can choose between TriX
     
    DVexile[OP] and ChadsPride like this.
  16. Mar 7, 2017 at 9:05 PM
    #576
    DVexile

    DVexile [OP] Exiled to the East

    Joined:
    Dec 17, 2014
    Member:
    #144469
    Messages:
    2,661
    Gender:
    Male
    First Name:
    Ken
    Vehicle:
    2015 DCSB V6 TRD OR 4X4
    How heavy is too heavy?
    The premiss behind Diet Taco is that it is important to control the weight of your rig. That naturally leads to the question of how much weight is too much. The trivial answer is that the GVWR is the maximum weight. Clearly though being ten pounds over the GVWR isn’t going to break the truck or make it unsafe. Is 10% over acceptable? How would anyone make an educated decision?

    The question of what is the “actual” safe limit, what modifications could be made to increase that limit and what compromises are made when you exceed any given limit comes up rather frequently in expedition and camping forums. The answers range all over from those who claim going one pound over will result in your body being picked clean of all its flesh by ravening packs of lawyers waiting to sue negligent drivers who are over GVWR to others who brag about being 1500 lbs over GVWR while towing a trailer an additional 2000 lbs over the vehicle’s tow capacity and who disable all the stability control systems on their vehicle because they are a better driver than the computer. The discussion typically devolves into to shrill shouting matches devoid of any actual references or calculations with Godwin’s Law being fulfilled in less than thirty posts.

    Having now wasted far too much of my limited time on this planet researching this topic I thought it would be worthwhile to make a few posts here in a build thread dedicated to keeping things light about just what trade offs are involved in getting heavy.

    Looking Good

    In this first post I’ll simply cover what the various specifications and ratings are for the Tacoma (focused on my configuration of a DCSB 4WD V6 w/tow package). In a later post I’ll describe where these ratings might come from and what if any regulatory consequences there are for exceeding them. For now it is worth noting that the GAWR and GVWR are determined by the manufacturer (Toyota) and are effectively impossible for an end user to change from a regulatory stand point.
    • Front Gross Axle Weight Rating (FGAWR) - 2775 lbs (pg 571 2015 User’s Manual)
    • Rear Gross Axle Weight Rating (RGAWR) - 3110 lbs (pg 571 2015 User’s Manual)
    • FGAWR + RGAWR - 5885 lbs
    • Gross Vehicle Weight Rating (GVWR) - 5500 lbs (pg 572 2015 User’s Manual)
    Note the GVWR is less than the sum of the two GAWRs by 385 lbs. Why? People posit various theories online but no one seems to know. The most often offered theory is the brakes but as we will discuss later that is very unlikely the case.
    • Curb Weight w/o Tow Package - 4220 lbs (2015 Tacoma Brochure)
    • Estimated Tow Package Weight - 100 lbs (Payload reduction stickers sent to owners in 2009)
    • Expected DCSB V6 Tow Package Curb Weight - 4320 lbs (sum of above)
    • GVWR - Curb Weight - 1180 lbs
    • Rated payload - 1040 lbs - (pg 569 2015 User’s Manual)
    Why is the door sticker payload a full 140 lbs less than what the regulatory definition of payload is? Again, no one seems to know. Maybe the curb weights reported in the brochures are wrong? Let's check:
    • Measured Diet Taco Stock Front Axle Weight - 2400 lbs (CAT Scale, accuracy +/- 20 lbs)
    • Measured Diet Taco Stock Rear Axle Weight - 1900 lbs (CAT Scale, accuracy +/- 20 lbs)
    • Measured Diet Taco Stock Curb Weight - 4300 lbs (sum of above)
    Nope, seems spot on to within the accuracy of the scales.

    Back in 2009 there was a hullabaloo over various trucks having yellow payload reduction stickers on their doors knocking 290 lbs off of the rated payload. This was due to Toyota botching their attempt to meet new regulatory labeling requirements, followed by a recall, followed by new stickers being sent to owners that didn't make much sense either. Lastly note from the 1st to the 2nd to the 3rd gen the trucks kept getting heavier but the GVWR kept going up in perfect lockstep to match the increases in curb weight. The 3rd gen gained 100 lbs of curb weight and those crafty Toyota engineers managed to optimize their design to perfectly increase the GVWR by the same 100 lbs. Hmmm.... Doesn't inspire confidence that the GVWR or payload are directly based on engineering data.

    Last let's collect the tow ratings since those are relevant to some future discussions:
    • Unbraked tow rating - 1000 lbs (pg 220 2015 User’s Manual)
    • Braked tow rating (TWR) - 6500 lbs (pg 219 2015 User’s Manual)
    • Gross Combined Weight Rating (GCWR) 11180 lbs (pg 218 2015 User’s Manual)
    The GVWR, GAWR and payload are also on the door stickers of the truck. The curb weight is not on any sticker or provided in the manual, only in the brochure without any specifics about options packages. A yellow payload modification sticker may be present indicating the reduction in payload due to the added weight of factory or dealer added options. As noted above the door sticker payloads are pretty worthless, you are better off taking your truck to a scale to measure its actual curb weight and determine its payload by subtracting your configuration curb weight from the GVWR.

    Powertrain Limits
    Before ending this post we can get one easy limitation (or lack thereof) out of the way quickly. At least for those of us with a V6 and tow package it is ridiculous to think that excess vehicle weight impacts the powertrain negatively in any significant way. With a GCWR of 11,180 lbs it is safe to say tires will explode, axles shatter and the frame crush before we load our truck to five and half ton limit of the powertrain. Certainly excess weight makes the truck accelerate slower and puts a greater load on the powertrain but even if we loaded 1,000 lbs beyond the GVWR we would still be at only 60% of the weight the powertrain can safely and reliably haul based on the GCWR.

    Coming soon…
    Still to be discussed in later posts are the effects of excess weight on braking, handling and reliability as well as the legal and liability ramifications of running above the GVWR. Along the way we can look for hints as to how a manufacturer actually comes up with a GVWR. Stay tuned!
     
  17. Mar 8, 2017 at 9:19 AM
    #577
    scocar

    scocar hypotenoper

    Joined:
    Nov 11, 2009
    Member:
    #25814
    Messages:
    39,431
    I am going to read all this is detail. Eventually. From a clean, well-lit corner in Bay 3.

    Oh, wait, I haven't formally designated bay numbers yet. I'd be interested in your perspective on the several possible methodologies one might employ to assign numeric identifiers in this paradigm.
     
  18. Mar 8, 2017 at 9:19 AM
    #578
    ChadsPride

    ChadsPride Tacoma Owner & Enthusiast

    Joined:
    Nov 26, 2014
    Member:
    #143119
    Messages:
    127,315
    Vehicle:
    Sponsored by TacomaWorld.com
    I would letter them tbh....
     
    DVexile[OP] likes this.
  19. Mar 8, 2017 at 9:23 AM
    #579
    scocar

    scocar hypotenoper

    Joined:
    Nov 11, 2009
    Member:
    #25814
    Messages:
    39,431
    NEIN!

    My inspiration:


    Oh yeah, I 'll need some lights and klaxons too.

    OK, sorry Ken. I'll stop ruining your thread now.
     
  20. Mar 8, 2017 at 9:27 AM
    #580
    IronPeak

    IronPeak PermaLurker

    Joined:
    Mar 9, 2016
    Member:
    #180799
    Messages:
    3,232
    Gender:
    Male
    First Name:
    AuggieX
    Back to Back
    Vehicle:
    2007 sr5 4x4 DCLB/2015 TRD sport 4x4 DCLB sold
    Bigger Taller Slower
    Good read. I think we can agree that the weight ratings, perhaps not the towing rating, are approximations/guidelines to go by, not unlike the expiration date on milk. Clearly the truck is not going to explode if you have a couple of fat passengers in the back seat and that is what pushes you over the weight limit. Things like aftermarket suspension make a truck more capable of carrying a heavier load, if not on paper. I suppose there could be some issue with insurance in case of a wreck if one was over one of the numbers listed above.
     

Products Discussed in

To Top