

-
Welcome to Tacoma World!
You are currently viewing as a guest! To get full-access, you need to register for a FREE account.
As a registered member, you’ll be able to:- Participate in all Tacoma discussion topics
- Communicate privately with other Tacoma owners from around the world
- Post your own photos in our Members Gallery
- Access all special features of the site
 What's the best way to upgrade stereo?
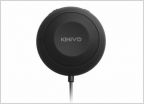 Factory or aftermarket Bluetooth?
 Clarus or Genuine Subaru for Tweeters?
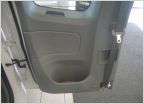 2011 Tacoma Access Cab Door Speakers
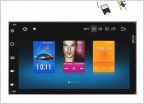 Trying to figure out the best Android head unit
 Old Kappas, no crossover...would these work? Help please
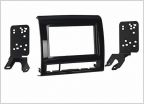
How to: Install 2009+ JBL Head Unit w/ Bluetooth in 2005 Tacoma
Discussion in 'Audio & Video' started by fbconvert, Aug 18, 2011.


