1. Welcome to Tacoma World!

    You are currently viewing as a guest! To get full-access, you need to register for a FREE account.

    As a registered member, you’ll be able to:
    • Participate in all Tacoma discussion topics
    • Communicate privately with other Tacoma owners from around the world
    • Post your own photos in our Members Gallery
    • Access all special features of the site

Mech_Eng’s Build

Discussion in '2nd Gen. Builds (2005-2015)' started by Mech_Eng, Aug 11, 2019.

  1. Aug 11, 2019 at 4:15 PM
    #1
    Mech_Eng

    Mech_Eng [OP] Well-Known Member

    Joined:
    Nov 2, 2018
    Member:
    #271418
    Messages:
    209
    Gender:
    Male
    First Name:
    Jason
    Birmingham, AL
    Vehicle:
    2009 TRD 4x4 DCSB
    See Build Page
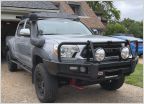
    2009 Toyota Tacoma TRD
    Automatic Transmission, 4.0 V6

    001 - 20201230_120722.jpg


    20200510_220908.jpg

    20200510_221002.jpg

    20190811_145951.jpg

    20190811_150306.jpg

    2009 Toyota Tacoma TRD
    Automatic Transmission, 4.0 V6


    Front Suspension
    King 2.5 Extended Travel Front Coil overs with Compression Adjusters P/N: 25001-119A
    Delta Joint Tubular Upper Control Arm Kit P/N: 58450DJ
    MOOG Ball Joint P/N: K808274
    Whiteline Front Control Arm Bushing P/N: W53312
    Crown Performance Brake Line Kits P/N: TOYO33FR03

    Rear Suspension
    King 2.5 x 12" 2 Tube Bypass Shocks with Clicker Adjusters PR2512BP
    Icon Multi Rate RTX Leaf Spring Kit with U-Bolts P/N: 51101
    Archive Garage Rear Shock Mounts, Relocation P/N: ARG-SHCKRELO
    Archive Garage Rear Spring Hangers with Shackles: P/N: ARG-SHCKHAMMER-49

    Tires, Wheels, Hubs
    Goodyear Wrangler MT/R with Kevlar LT305/70R17
    SCS Ray10 Brushed Copper 17 X 8.5,
    Removed - Centennial Dirt Commander MT LT285/75R16
    Removed - 3rd Gen Wheels, Size: 16x7, Offset: 4.5”, Backspacing: +25mm, Pattern: 6x5.5 (6x139.7)
    Spidertrax Toyota 6 on 5-1/2" x 1-1/4" Thick Black Wheel Spacer Kit
    Hub Assembly Wheel Bear/Hub Assembly CARQUEST 950-001B
    Crown Performance Brake Line Kits P/N: TOYO33FR03

    Engine, Drivetrain
    HPTuner MPVI2
    Shiftkit RatioTek P/N: RT-A750E-HD
    Driveshaft Support Carrier Bearing IEDLS 211590-1XS
    Driveshaft Support Carrier Custom Mount
    Spicer Universal Joint Front P/N: 5-213X
    Removed - Prime Line Center Support Bearing P/N: 72-1801
    *Engine Purchased for Build Project

    Front Gears and Locker
    4.56 Nitro with ECGS solid sleeve T8S-456RT-NG
    ARB Air Locker RD121

    Rear Gears and Locker
    4.56 Nitro with ECGS solid sleeve YK T100 14113
    PowerTrax No-Slip 9220803002

    Front Bumper
    Pelfreybilt Off-Road High Clearance
    C4 Fabrication bumper to frame brackets
    Removed - US Off-road Low Profile (≈75 lbs.) P/N: TACO-05

    Rear Bumper
    BAMF High Clearance, Modular Dual Swing-out

    Winch
    Warn Zeon 8-S 8,000 lb. winch with synthetic rope (≈100lbs) P/N: 89305
    Remote Control Socket Assembly P/N: 100154
    Custom Solenoid Relocate

    Air Compressor
    ARB Compact CKSA12

    Electronics
    Amp: 2000W Pioneer GM-DX975
    Subwoofers: Two JL Audio 10" 4 Ohm
    Speakers: Four Polk DB+ DB6502 6-1/2" Component System
    Tweeters: Four Polk DB+ 3/4" silk dome tweeter
    CB: Ronald President 10 Meter / 12 Meter Amateur Ham Radio
    Antenna: Firestik Firefly CB Antenna
    DashCam: Cobra DASH2316D - 1080p Full HD Front Cam and 720p HD Rear Cam
    Removed - Scan Tool: BlueDriver LSB2 Bluetooth Pro OBDII (Replaced w/ HPTuners)

    Electrical
    BlueSEA HD-Series Heavy Duty On-Off Battery Switch P/N:3002
    60 Position Non Bussed RTMR
    Mini Fuse & Micro Relay RTMR
    200A Marine Circuit Breaker
    See electrical writeup. All from Waytek.

    Lighting
    Retrofit Source Lighting Upgrade
    50w / D2S: Morimoto XB Ballast
    Bi-xenon Relay: MotoControl (H4/9003)
    Bi-Xenon: Morimoto Mini D2S 5.0: (Round Lens/LHD)
    D2S: XB50 5800K (50W)
    Apollo 3.0
    Demon Eye: Profile OneColor (Red)
    Demon Eye: Profile MultiplEYE Reflector
    Demon Eye Bracket: Mini D2S 4.0 (w/ FGL)
    Butyl: RetroRubber (Black)
    Pro Comp 2x2 Round LED Spot Lights 76412P
    Rigid Bumper Light Bar and Pods

    Miscellaneous
    WeatherTech Floor Liners 1st and 2nd Row
    Gear Tech Customs PROTEC 2nd Gen Tacoma Splash Guards (05-15) P/N: 2GSG
    Prinsu Design Systems Cab Rack

    Future Project
    AEM 30-4900 Wideband Failsafe Gauge
    URD Spec-U LT Headers
    Fuel Pump AEM 320LPH 50-1200
    Supercharger with Meth or Water Injection
    Apex Fabworks Rock SlidersSkids, DOM 1.75" tubing (Cali Raised)
    Camburg Long Travel Kit

    Timbren Active Off-Road Bumpstops with Ubolt Flip Kit P/N: ABSTRFK
    Archive Garage Cross Tube

    And… TacomaWorld.com Sticker


    Additional Upgrades and Pictures to Come


    Project Start Page

    US Off-road Low Profile (≈75 lbs.) P/N: TACO-05
    C4 Fabrication Bumper To Frame Brackets

    This was one of my first project. Unpacking, painting, installing.
    One of the main items that concerned me was the bumper to frame connection. Notice the only thing holding the bumper to the frame is a small 3/16 piece of metal. I could imagine my entire bumper being ripped off during my first time using the winch. I decided on installing some bumper to frame tiebacks. However, this did become an issue with my King remote reservoir bracket.

    20190131_203954.jpg

    20190201_192828.jpg

    20190205_191004 - Modified.jpg

    20190212_212356.jpg

    Welding brackets for my winch remote connection, jumper cable quick connect, and wish I would have welded one for my air compressor coupling. I also insulated the hole the winch battery leads goes through and installed a battery disconnect to prevent having power on the cables unless needed. I would hate to have a short to ground with these leads

    20190215_213817.jpg

    20190216_131112.jpg

    20190211_182720.jpg

    20190216_145521.jpg

    20190823_034447 - Modified.jpg

    Warn Zeon 8-S 8,000 lb. winch with synthetic rope (≈100lbs) P/N: 89305
    Remote Control Socket Assembly P/N: 100154

    Contents of 8-S winch

    20190201_202457.jpg

    20190207_180325.jpg

    4.56 Nitro with ECGS solid sleeve YK T100 14113
    PowerTrax No-Slip 9220803002

    This is one of the easiest lockers I have ever installed.

    20190309_234742.jpg

    20190310_211044.jpg

    20190310_232722.jpg

    20190313_234434.jpg

    20190314_225024.jpg

    20190315_015612.jpg

    Getting a little help.

    20190315_015639.jpg

    4.56 Nitro with ECGS solid sleeve T8S-456RT-NG
    ARB Air Locker RD121


    The front clamshell was fun to remove and install. You need to be a PT monster or have two people to remove and install. The ARB requires drilling a hole in the clamshell. Yeah, that was kind of spooky. Measure, mark, measure, mark, measure, mark, beer, drill. Requires tap to thread hole, Tap 1/4"-18Npt tap, URL: https://www.amazon.com/Hanson-1903ZR-18Npt-Taper-Extraction/dp/B00B7421BEyou

    Also, you will need a special tool check the backlash.
    How to URL: https://www.tacomaworld.com/threads/regearing-my-ifs-clamshell-got-some-questions.213737/
    Purchase URL: https://www.dialindicator.com/indicator-accessories/angle-and-hole-attachments

    20190629_194319.jpg


    20190629_215103.jpg

    20190629_215123(0).jpg
    20190630_205406.jpg

    20190701_211454.jpg

    New ARB Carrier. Looks really good.

    20190704_131055.jpg

    20190708_202827.jpg

    Drilling and tapping for air fittings

    20190715_175919.jpg

    20190716_200322.jpg

    Air compressor and manifold installed

    20190611_230618.jpg

    Bench testing the air locker before installation. Don’t want to do this twice.

    20190726_204850.jpg

    Front Suspension
    King 2.5 Extended Travel Front Coil overs with Compression Adjusters P/N: 25001-119A
    Delta Joint Tubular Upper Control Arm Kit P/N: 58450DJ
    MOOG Ball Joint P/N: K808274
    Whiteline Front Control Arm Bushing P/N: W53312
    Crown Performance Brake Line Kits P/N: TOYO33FR03
    Gear Tech Customs PROTEC 2nd Gen Tacoma Splash Guards (05-15) P/N: 2GSG

    Finally, my front suspension has arrived. You need to have patience when ordering Kings. It took about 6 to 8 weeks to arrive.

    20191028_203935.jpg

    Bushings and brake lines also

    20191006_190734.jpg

    20191101_234045.jpg

    Suspension installed and Gear Tech customs splash guards

    20191126_191330.jpg

    20191114_202353.jpg

    Roof Rack
    Prinsu Design Systems Cab Rack

    20200101_210241.jpg

    20200103_071733.jpg

    Wheel Spacers
    Spidertrax Toyota 6 on 5-1/2" x 1-1/4" Thick Black Wheel Spacer Kit

    So I have been waiting on SCS to release the Ray10 brushed gold wheel again. I broke down and purchased some wheel spacers to give it a similar stance. Once I wear my 285/75/16 out I am going to have to purchase wheels and tires. I am trying to hold out. Anyway I installed 1.25” Spidertrax spacers in black.

    20191212_221017.jpg

    I got tired of alignment shops removing my rear drums and me having to adjust the rear brakes again. Guess this was a hint to not remove them.

    20191212_203419.jpg

    I used blue loctite on spacer lugs, torqued them, and marked them for ease of mind when removing the wheels.

    20191212_221025.jpg

    20191212_221043.jpg
     

    Attached Files:

    Last edited: Jan 16, 2022
  2. Mar 12, 2020 at 7:53 PM
    #2
    JBTacoma

    JBTacoma Well-Known Member

    Joined:
    Feb 16, 2015
    Member:
    #148844
    Messages:
    11,093
    Gender:
    Male
    First Name:
    Jeff
    Cullman Alabama
    Vehicle:
    2000 SR5, 2003 Double Cab and a Suzuki Samurai
    Awesome truck :thumbsup:
     
    JKU3000 likes this.
  3. Mar 12, 2020 at 8:24 PM
    #3
    Mech_Eng

    Mech_Eng [OP] Well-Known Member

    Joined:
    Nov 2, 2018
    Member:
    #271418
    Messages:
    209
    Gender:
    Male
    First Name:
    Jason
    Birmingham, AL
    Vehicle:
    2009 TRD 4x4 DCSB
    See Build Page
    Thanks man.
     
    JKU3000 likes this.
  4. Mar 14, 2020 at 9:13 PM
    #4
    Mech_Eng

    Mech_Eng [OP] Well-Known Member

    Joined:
    Nov 2, 2018
    Member:
    #271418
    Messages:
    209
    Gender:
    Male
    First Name:
    Jason
    Birmingham, AL
    Vehicle:
    2009 TRD 4x4 DCSB
    See Build Page
    Cab Mount Chop (CMC) and Pinchweld BMF Mod

    In preparation for bigger and better things, I went ahead and started beating and cutting. I also trimmed the fender near the CM a little. Not going to do the entire fender until I have evidence of my future 35” tires hammering the fenders. I imagine it’s a sure thing, but I want to be conservative about trimming.

    20200222_221917.jpg

    If you do this, make sure to use seam sealer.

    20200222_223500.jpg

    20200111_154427.jpg

    I never get to use my Hypertherm plasma cutter.

    20200111_154445.jpg

    20200111_182118.jpg

    I use my welder much more, but wanting to show it off anyway.

    20200111_185701.jpg

    20200117_223856.jpg

    More chop, chop

    20200225_191345.jpg

    20200225_191355.jpg

    I probably should have purchased the kit that totally relocates the mount. Anyway, it turned out looking ok.

    20200225_203552.jpg

    I am very lucky to have good help!

    20181103_221532.jpg
     
    Last edited: Mar 14, 2020
    Cred92, JKU3000 and JBTacoma like this.
  5. May 16, 2020 at 9:45 PM
    #5
    Mech_Eng

    Mech_Eng [OP] Well-Known Member

    Joined:
    Nov 2, 2018
    Member:
    #271418
    Messages:
    209
    Gender:
    Male
    First Name:
    Jason
    Birmingham, AL
    Vehicle:
    2009 TRD 4x4 DCSB
    See Build Page
    Rear Suspension
    King 2.5 x 12" 2 Tube Bypass Shocks with Clicker Adjusters PR2512BP
    Icon Multi Rate RTX Leaf Spring Kit with U-Bolts P/N: 51101
    Archive Garage Rear Shock Mounts, Relocation P/N: ARG-SHCKRELO
    Archive Garage Rear Spring Hangers with Shackles: P/N: ARG-SHCKHAMMER-49

    The springs arrived first. I ordered these because of the multiple stages which in theory will make them adjustable. I am not a fan of when the truck has a rake or bro lean. Anyway, I started to order them from Icon, but the shipping was nearly $300. I ordered them from 4WP, free shipping to my local store.

    I installed these I had one inch spacers with stock leaf springs. The measurements with the spacers were 8.5” frame to axle at rest and 12.5" frame to axle unloaded. After removing the spacer and installing Icons (Stage 1) I was nearly 10.5” frame to axle at rest. Higher than I had anticipated.

    20200214_181802.jpg

    20200214_184735.jpg

    20200214_200049.jpg

    20200214_200055.jpg

    20200215_201653.jpg


    On to the hammer hangers. I have heard how much fun it is removing the stock hanger rivets. I used my plasma cutter on one side to knock the head off. The other side I used a grinder. Honestly, the grinder, new drill bits, and an air hammer are easier to use. I barely scratched the existing hangers removing them. It wasn’t fun, but I have struggled more with less before.

    20200313_193611.jpg

    20200313_210842.jpg

    20200313_210923.jpg

    20200314_140527.jpg

    20200314_153611.jpg

    20200327_223204.jpg

    20200327_222932.jpg

    One thing I noticed really quick was the thickness of these hangers and these things are heavy. However, the frame these are going on is not nearly as thick. I did install plates behind the frame in an attempt to beef them up a little. I didn’t order it, but I will probably be getting the cross brace for these. It’s obvious the frame will be bending before these hangers do.
     
    Last edited: May 23, 2020
    Oreo Cat, EisenWill and MetaComa like this.
  6. May 20, 2020 at 10:55 AM
    #6
    MetaComa

    MetaComa Well-Known Member

    Joined:
    Jan 9, 2020
    Member:
    #315589
    Messages:
    54
    Gender:
    Male
    Vancouver, Canada
    Vehicle:
    2016 Tacoma TRD Sport
    Great build. Good on you for doing most of your stuff. I don't have a garage nor tools to do my basic jobs.
     
  7. Jul 4, 2020 at 8:22 AM
    #7
    Mech_Eng

    Mech_Eng [OP] Well-Known Member

    Joined:
    Nov 2, 2018
    Member:
    #271418
    Messages:
    209
    Gender:
    Male
    First Name:
    Jason
    Birmingham, AL
    Vehicle:
    2009 TRD 4x4 DCSB
    See Build Page
    Rear Suspension
    King 2.5 x 12" 2 Tube Bypass Shocks with Clicker Adjusters PR2512BP
    Archive Garage Rear Shock Mounts, Relocation P/N: ARG-SHCKRELO

    Finally, received my King rear shocks. This is the first time I have ever cut the suspension off a vehicle and it doesn’t feel natural. After reading about it for months, I started. Cut, grind, chop, align, measure, weld… nothing to it.

    20200425_104455.jpg

    20200425_105502.jpg

    20200425_105520.jpg

    Never fails. Flares always break. No matter how careful you are. Frustration starts early.

    20200426_174734.jpg

    Safety First. Using a plasma, grinding, and welding an inch away from the fuel tank made me a little nervous. Not the way I would like to go out.

    20200425_135632.jpg

    First cut.

    20200425_141853.jpg

    20200426_184231.jpg

    20200426_183826.jpg

    20200427_212016.jpg

    20200425_231002.jpg

    20200426_014935.jpg

    20200426_014847.jpg

    20200426_160155.jpg

    20200426_161015.jpg

    20200429_210102.jpg

    20200426_164247.jpg

    20200503_110756.jpg

    20200509_204645.jpg

    20200509_204724.jpg

    I had King send me some new stickers so these are corrected now. Hey... they were "free" stickers too.

    20200510_175014.jpg

    20200509_204627.jpg

    20200508_073229.jpg
     
    Last edited: Jul 4, 2020
  8. Jul 4, 2020 at 8:36 AM
    #8
    420taco

    420taco Well-Known Member

    Joined:
    Sep 17, 2018
    Member:
    #266514
    Messages:
    417
    Gender:
    Male
    First Name:
    Justin
    PA
    What paint/coating are you using on the frame?
     
  9. Jul 4, 2020 at 8:46 AM
    #9
    Mech_Eng

    Mech_Eng [OP] Well-Known Member

    Joined:
    Nov 2, 2018
    Member:
    #271418
    Messages:
    209
    Gender:
    Male
    First Name:
    Jason
    Birmingham, AL
    Vehicle:
    2009 TRD 4x4 DCSB
    See Build Page
  10. Sep 18, 2020 at 2:06 PM
    #10
    Mech_Eng

    Mech_Eng [OP] Well-Known Member

    Joined:
    Nov 2, 2018
    Member:
    #271418
    Messages:
    209
    Gender:
    Male
    First Name:
    Jason
    Birmingham, AL
    Vehicle:
    2009 TRD 4x4 DCSB
    See Build Page
    Shiftkit RatioTek P/N: RT-A750E-HD

    After reading about this kit, speaking with several people who installed it, reading a great writeup, and seeing how inexpensive the kit was I decided to do it.

    The link below is to a writeup which details the installation much better than I will be doing.
    https://www.tacomaworld.com/threads/ratiotek-transmission-upgrade-how-to.528378/#post-16878478

    More information on the transmission.
    https://www.tacomaworld.com/threads/transmission-5-speed-automatic-write-up-with-pics-for-second-gen-4-liter-trucks.289913/page-7

    This is a training video on the transmission.
    https://youtu.be/eMMTlQPZmqs

    IPT Performance Transmissions A750E/F Valve Body Installation
    https://www.youtube.com/watch?v=P1XdzmjdsPo

    This kit is very impressive. I would say it is in the top five items I have purchased and installed in my Tacoma. The vehicle seems to pull much better, feels more solid, shifts like it should have been designed to shift. Keep in mind, I have modified the shift parameters with HPTuner. The before and after of this kit is substantial.

    As for the installation, it is more intimidating than difficult. I was a little uneasy about drilling holes in the upper body plate, but hell I drilled a large hole in my front diff for my ARB air locker. I will attach the installation instructions for those who are interested. They are straightforward.

    The three most noteworthy items of the installation are the transmission cooler fluid check valve spring, checking the fluid three times after drive cycles, and keeping the valve body clean.

    Spring – I literally spent three hours on the floor looking for this spring, went through the trash twice, and finally ended up believing my dachshunds walked off with it. They did not seem to be concerned about missing a major part which was preventing me from installing the valve body. A $0.74 part kept me from putting it back together for three days.

    Fluid – When doing this nearly all the fluid will drain out of the transmission. I started it cycled through the gears slowly several times, checked it, filled it, then repeated again. Made sure the trans was around 95F. Everything checked out. Drove the vehicle to work. Decided the next morning I should probably check it again. Nearly two quarts low. I freaked out. Thank God I checked it the next morning. This could have been bad.

    Clean – The tolerances for the valve body are so tight, I was very nervous about being super clean. I used microfiber to wipe it down and lots of air to blow each piece off before installing. I also used Mr. Tranny Lube, green, to install all moving parts. Just a little. Honestly, I would not even get close to the valve body with a paper towel. I think you would be asking for trouble by doing this.

    Here are some images from the installation. Keep in mind, I removed all the valves and solenoids to clean and inspect. Only a few of these are required to be removed for installation of the kit.

    20200822_150712.jpg

    20200822_151531.jpg

    20200822_165509.jpg

    20200822_165639.jpg

    20200822_180514.jpg

    20200823_152940.jpg

    20200823_152957.jpg

    20200823_162737.jpg

    20200823_163141.jpg

    20200823_163147.jpg

    20200823_171033.jpg

    20200823_185252.jpg

    20200823_212312(0).jpg

    20200825_191534.jpg

    20200826_201056.jpg

    Check  Valve Spring Location - 1866_2361_1010-a750f-rebuild.jpg
     

    Attached Files:

  11. Sep 18, 2020 at 5:11 PM
    #11
    Mech_Eng

    Mech_Eng [OP] Well-Known Member

    Joined:
    Nov 2, 2018
    Member:
    #271418
    Messages:
    209
    Gender:
    Male
    First Name:
    Jason
    Birmingham, AL
    Vehicle:
    2009 TRD 4x4 DCSB
    See Build Page
  12. Sep 18, 2020 at 5:11 PM
    #12
    Mech_Eng

    Mech_Eng [OP] Well-Known Member

    Joined:
    Nov 2, 2018
    Member:
    #271418
    Messages:
    209
    Gender:
    Male
    First Name:
    Jason
    Birmingham, AL
    Vehicle:
    2009 TRD 4x4 DCSB
    See Build Page
  13. Sep 18, 2020 at 5:11 PM
    #13
    Mech_Eng

    Mech_Eng [OP] Well-Known Member

    Joined:
    Nov 2, 2018
    Member:
    #271418
    Messages:
    209
    Gender:
    Male
    First Name:
    Jason
    Birmingham, AL
    Vehicle:
    2009 TRD 4x4 DCSB
    See Build Page
  14. Mar 7, 2021 at 10:01 AM
    #14
    Cred92

    Cred92 PAID4MOD

    Joined:
    Aug 29, 2015
    Member:
    #162952
    Messages:
    2,627
    Gender:
    Male
    First Name:
    Caleb
    Jasper Al
    Vehicle:
    Indigo Ink Sport DCLB/White RC I4 5MT
    BLACK AND BLUE STUFF
    Any updates on this badass?
     
  15. Apr 13, 2021 at 8:47 PM
    #15
    Mech_Eng

    Mech_Eng [OP] Well-Known Member

    Joined:
    Nov 2, 2018
    Member:
    #271418
    Messages:
    209
    Gender:
    Male
    First Name:
    Jason
    Birmingham, AL
    Vehicle:
    2009 TRD 4x4 DCSB
    See Build Page
    MP90 Magnuson, Supercharger


    I purchased a MP90 positive displacement supercharger without the URD engine management, URD Spec-U LT Headers, URD Mark 2 Competition Y-Pipe, AEM E85 320 LPH Pump, Filter “Green Top”, URD Quick Change Supercharger Pulley w/Hub, 2.8”, HPTuner MPVI2, AEM 30-0334 X-Series OBDII Wideband Gauge, and a AEM 30-4900 Wideband Failsafe Gauge. Instead of the URD engine management kit, I installed, with the sourcing help of a TW members, a new SC engine control module. The exhaust and supercharger were installed at year end. The kit was relatively easy to install, but I had to modify the intercooler and hose routes to accommodate my winch and auxiliary fuse block. I am mainly going to dump some photos in here and hopefully come back later for the narrative.


    Some very useful Tacomaworld links are listed below.
    https://www.tacomaworld.com/threads/trd-magnuson-4-0-supercharger-tips-tricks-and-mods.518932/
    https://www.tacomaworld.com/threads/how-to-1gr-fe-supercharger-installation.101770/
    https://www.tacomaworld.com/threads/hp-tuners-for-2005-2015.600793/
    https://www.tacomaworld.com/threads/hptuners-the-tacoma-faq.705981/


    001 - 20201229_143151.jpg

    001 - 20201226_135047.jpg

    001 - 20201230_120722.jpg

    20201129_110049.jpg

    20201130_191012.jpg

    20201130_191244 v2.jpg

    20201130_191254.jpg

    20201130_192713.jpg

    20201213_173238.jpg

    20201217_204426.jpg

    20201225_140402.jpg

    20201226_135046.jpg

    20201228_214215.jpg

    20201228_214244.jpg

    20201228_214253.jpg

    20201229_162454.jpg

    20201230_120306.jpg

    20201230_122750.jpg

    20201230_122944.jpg

    20201230_122953.jpg

    20201230_123031.jpg

    20201230_123058.jpg

    20201230_123109.jpg

    20201230_153408.jpg

    20201230_153414.jpg

    20201231_152337.jpg

    20201231_203923.jpg

    20210102_143038.jpg

    20210109_183834.jpg

    20210111_171902.jpg

    20210111_185529.jpg

    20210111_185129.jpg

    20210111_185248.jpg
     
    Cred92 and Flare side Taco Lover like this.
  16. Apr 13, 2021 at 8:47 PM
    #16
    Mech_Eng

    Mech_Eng [OP] Well-Known Member

    Joined:
    Nov 2, 2018
    Member:
    #271418
    Messages:
    209
    Gender:
    Male
    First Name:
    Jason
    Birmingham, AL
    Vehicle:
    2009 TRD 4x4 DCSB
    See Build Page
  17. Apr 15, 2021 at 3:06 AM
    #17
    420taco

    420taco Well-Known Member

    Joined:
    Sep 17, 2018
    Member:
    #266514
    Messages:
    417
    Gender:
    Male
    First Name:
    Justin
    PA
    Nice flow meter. You work in HVAC?
     
  18. Apr 24, 2021 at 2:25 PM
    #18
    Mech_Eng

    Mech_Eng [OP] Well-Known Member

    Joined:
    Nov 2, 2018
    Member:
    #271418
    Messages:
    209
    Gender:
    Male
    First Name:
    Jason
    Birmingham, AL
    Vehicle:
    2009 TRD 4x4 DCSB
    See Build Page
    Thanks.
    Yes... well building commissioning. We commission HVAC, lighting, plumbing, electrical, building automation systems in new and existing buildings. We have some really cool tools I get to "practice" with at home.
     
  19. Jun 9, 2023 at 10:08 PM
    #19
    rolot2

    rolot2 Well-Known Member

    Joined:
    Nov 9, 2019
    Member:
    #310297
    Messages:
    338
    Gender:
    Male
    First Name:
    Rolando
    Denver, CO
    Vehicle:
    2015 TRD OR DCSB
    Front: Extended Travel 2.5” King coilovers with/adjusters (Set at 3” lift) Rear: 2.0” King shocks with adjusters Icon RXT (Option 2) Pack Toyota TRD Cat-back exhaust AnytimeBackup Camera Anytime Front/Rear Camera RCI Sliders KB Voodoo Bed Rack Center Console Ram Mount
    Can you elaborate on the steps you took to modify the king reservoir brackets to work with the C4 bumper reinforcement brackets?
     

Products Discussed in

To Top