1. Welcome to Tacoma World!

    You are currently viewing as a guest! To get full-access, you need to register for a FREE account.

    As a registered member, you’ll be able to:
    • Participate in all Tacoma discussion topics
    • Communicate privately with other Tacoma owners from around the world
    • Post your own photos in our Members Gallery
    • Access all special features of the site

How to: Lower intermediate steering shaft fix

Discussion in '2nd Gen. Tacomas (2005-2015)' started by 12TRDTacoma, Nov 15, 2019.

  1. Nov 15, 2019 at 4:04 PM
    #1
    12TRDTacoma

    12TRDTacoma [OP] Powered by Ford, GM, VW, and Mercedes

    Joined:
    Aug 20, 2012
    Member:
    #85133
    Messages:
    16,545
    Gender:
    Male
    First Name:
    Rob
    Concordia
    Vehicle:
    12 TRD Sport DCLB 4x4 Supercharged
    Boosted
    Let's talk. We need to have a serious conversation here about this, and do something about this once and for all, because these trucks have been around since 2005 and nothing has been done both on Toyota and our part as the end consumer to create and/ or document a long term solution for the inherent issues which have plagued the lower intermediate shaft due to exposure of elements over time. The inside one is a story of it's own.

    If you are anything like me, you live in an area where moisture is not really a factor, now if you live in the salt belt, you just burn through these outside shafts once a year I'm going to assume.

    Being that I personally live in an area where rust, seizing, and all of that nasty stuff that places where moisture is inherent is not a factor for me, I have still been plagued with long time issues of not only a very hard to turn steering wheel at idle, but an insane amount of clunkiness going over rough roads all contributed by this half baked design of a shaft that ultimately ties the power steering rack to the steering wheel.

    This post addresses and creates a long term solution to the fallacies and shortcomings for the outside intermediate steering shaft on all 2nd gen 2005-2015 trucks.

    - First, you'll want to address the elephant in the engine bay. Head on over to Amazon and pick up the intermediate shaft for pennies on the dollar in comparison to dealer pricing off Amazon. It usually arrives in 1-2 days if you are a prime member.

    Lower Intermediate Steering Shaft...

    - Next, once your shaft arrives in the mail you will want to prepare this beauty before installation because in this instance, prep work is everything. You will want to head to your local parts store and pick up Dorman PN: 614-020

    You can also pick it up on Amazon as well if you would rather just have it delivered with the shaft.

    20191115_133326.jpg

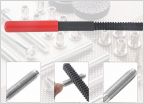
    Dorman 614-020 Universal Steering Boot Kit

    - Now the fun begins. Unbox everything and get started. The boot is a very tight fit over the shaft but you will want to install it with the larger part going from the U joint side of the shaft first. You can use the plastic supplied cone which comes with the rubber boot if you want to do a dry install. The small part of the boot will require you slice the cone-like part of it in order to fit on the shaft. If you skip this step, the boot WILL NOT slide over the initial opening as it is a very small opening and you may potentially tear the boot by over stretching it.

    20191115_122018.jpg

    You are welcome to use a little lubricant to help everything slide over the larger ends a little easier if installing without the supplied install cone like I did. Don't go heavy on the lubricant as a little goes a long way and it is just for install purposes. You can see between the above photo and the one below how the boots cone portion has been sliced off with a razor blade.

    20191115_122632.jpg

    - After everything has been slipped over and you are close to finished, go ahead and zip tie the lower portion of the boot close to where the bolt mounting ears are (this side is where the shaft mounts to the rack). Pull the zip tie as tight as you can with some pliers.

    - Leave the top area of the boot open and bring it down once the bottom has been zip tied and secured down to where the U joint is. Now take some Moly grease (brand of your choosing) and begin packing it in until you feel it is good. Don't go loading the boot down but don't go cheap on it either. After you have filled it to your desired amount of grease, try to clean off the top lip of the boot as much as possible and secure it to where the ribs begin. This will apply a small amount of tension on the boot, make sure you sinch down your zip tie as tight as possible with some pliers to ensure the boot does not slide down which would expose the grease. Example of where to sinch the top of the boot down in the photo below.

    20191115_131731.jpg

    Finished up and ready to install!

    - Now you can begin to dismantle your lower steering shaft which is on the truck. There are several how to's which address the assembly and disassembly of the lower intermediate shaft so I won't bore you with the steps on how to do so, but here is a how to if you need a detailed instructional:

    https://www.tacomaworld.com/threads...steering-shaft-replacement-and-review.544954/

    20191115_132531.jpg

    - All done! The boot will not strike the frame at any point as that was first intially my fear upon visual mock up, but there is plenty of clearance there as the above and below photos will highlight.

    20191115_132604.jpg

    Pro tips: Make sure you lock your steering wheel and mark your old shaft to the rack somehow before you tear everything apart as once you have done the replacement the wheel may move or you may lose your center on your rack which will end up requiring an alignment.

    Also make sure you WD-40 the upper and lower mounting portions of the shaft to the rack and the sleeve as needed so you are not fighting this thing all day long just to remove it.

    Enjoy a new clunk free and a now much easier to turn at idle truck. For all you salt belt folks, enjoy some peace of mind at last knowing your joint is no longer exposed to the road salt and crazy moisture which makes these things fail so quickly!

    Footnotes: If you would like to eliminate slop in the steering wheel it is my suggestion you remove your interior intermediate shaft and have several spot welds placed on the rag joint where the soft rubber bushing is supposed to go. This topic has been discussed like crazy so I won't bore you with those details, but here are some final pictures of my interior shaft. The steering on this truck is insanely tight, (in a good way) slop free, and feels much more direct now.

    20190705_134230.jpg

    20190705_134158.jpg

    20190705_134139.jpg
     
    Last edited: Nov 15, 2019
  2. Nov 15, 2019 at 4:25 PM
    #2
    Fullboogie

    Fullboogie Well-Known Member

    Joined:
    May 8, 2017
    Member:
    #218539
    Messages:
    1,124
    Gender:
    Male
    First Name:
    Dave
    Houston
    Vehicle:
    2007 Prerunner & 2008 4Runner
    Hell of a post OP.
     
    12TRDTacoma[OP] likes this.
  3. Nov 15, 2019 at 5:04 PM
    #3
    TheDevilYouLove

    TheDevilYouLove You can’t polish a turd, but you can polish a TRD

    Joined:
    May 26, 2016
    Member:
    #187953
    Messages:
    2,657
    Gender:
    Male
    First Name:
    Steve
    Marylandistan
    Vehicle:
    2010 Tacoma TRD Sport Access cab 4x4 silver streak
    This site contains affiliate links for which the site may be compensated.
    #3
  4. Nov 15, 2019 at 5:32 PM
    #4
    12TRDTacoma

    12TRDTacoma [OP] Powered by Ford, GM, VW, and Mercedes

    Joined:
    Aug 20, 2012
    Member:
    #85133
    Messages:
    16,545
    Gender:
    Male
    First Name:
    Rob
    Concordia
    Vehicle:
    12 TRD Sport DCLB 4x4 Supercharged
    Boosted
    You can go that way, and I have seen that mod, but that mod means nothing if it is exposed to the elements. As mother nature always wins the battle against exposed mechanical items over time if it is not covered and lubricated internally within said cover.

    The boot can be removed but it functions as a dust cover/ grease retainer. There would be no point in greasing the joint because it is already surrounded in grease assuming you packed the inside of the boot with grease prior to install.

    If you have clunks, noises, and the wheel is hard to turn, inspection of the joint alone is not enough to condemn and/ or pass the shaft off as "known good." Upon multiple inspections of my joint it was not rusted, did not have any visual play when turning the wheel left and right, and appeared to be visually in excellent condition even upon today's disassembly and replacement of the new unit I bought. Yet it still clunked over hard bumps all the way up to the steering wheel and made the steering wheel incredibly hard to turn. Despite it's "known good" appearance.

    Servicing of the boot, or anything inside of the shaft (ie the u joint itself) will require you to disassemble the shaft off of the vehicle in order to have the space necessary to mess around in there. You will have to cut the zip ties and remove the boot or buy a new boot if it is damaged.
     
    Last edited: Nov 15, 2019
    This site contains affiliate links for which the site may be compensated.
    #4
  5. Nov 16, 2019 at 9:49 PM
    #5
    12TRDTacoma

    12TRDTacoma [OP] Powered by Ford, GM, VW, and Mercedes

    Joined:
    Aug 20, 2012
    Member:
    #85133
    Messages:
    16,545
    Gender:
    Male
    First Name:
    Rob
    Concordia
    Vehicle:
    12 TRD Sport DCLB 4x4 Supercharged
    Boosted
    Just giving this thread a bump for more viewability.
     
  6. Nov 17, 2019 at 1:09 PM
    #6
    badger

    badger Well-Known Member

    Joined:
    Jan 6, 2012
    Member:
    #70102
    Messages:
    2,128
    Gender:
    Male
    Vehicle:
    07 SR5
    Nice write up OP! The only suggestion I might add is to use a stainless zip tie, at least on the bottom, to make sure it stays sealed. The nylon ties can break over time.
     
    Kolter45 and 12TRDTacoma[OP] like this.

Products Discussed in

To Top