1. Welcome to Tacoma World!

    You are currently viewing as a guest! To get full-access, you need to register for a FREE account.

    As a registered member, you’ll be able to:
    • Participate in all Tacoma discussion topics
    • Communicate privately with other Tacoma owners from around the world
    • Post your own photos in our Members Gallery
    • Access all special features of the site

JDUB's 2019 OffRoad Access Cab DIY or DIE Build

Discussion in '3rd Gen. Builds (2016-2023)' started by JDUB-Fabrication, Apr 19, 2020.

  1. Apr 19, 2020 at 5:11 PM
    #1
    JDUB-Fabrication

    JDUB-Fabrication [OP] Well-Known Member

    Joined:
    Aug 11, 2019
    Member:
    #301850
    Messages:
    652
    Newburgh NY
    Vehicle:
    2010 Lexus GX460
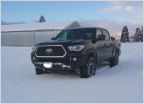
    Starting this thread to organize and keep track of all the things I do to my rig over time and the Adventures I take it on.

    2019 TRD off-road, access cab

    Updated: 02/12/21

    Interior:
    Covercraft Carhart seat covers
    Husky Floor Mats

    12 Volt Solutions-Remote Start
    Access cab rear seat and headrest removal
    Expedition Essentials TTM mount
    @MESO Custom Switch Panel
    Access cab storage platform

    Exterior:
    Tailgate Letter Inserts
    KTJO tailgate bolt n lock
    Off-Road wheel vinyl decals by @SimplyMuggle
    ARE MX Cap
    Custom Cap Rack
    Bed Sleeping Platform

    Armor:
    Custom DIY IFS Skid

    Rubber:
    Stock Goodyear Adventure Kevlar removed at 22k.
    265/75/16 Dick Cepek Trail Country EXP


    Misc:

    Purchased August 2019 with 1500 miles. Still under the brand new warranty and the additional certified pre-owned warranty!!

    E3A3D748-42B6-428A-988F-CE4B0A61C882.jpg
     
    Last edited: Feb 14, 2021
  2. Apr 30, 2020 at 4:01 PM
    #2
    bizjettech

    bizjettech Well-Known Member

    Joined:
    Dec 4, 2010
    Member:
    #47165
    Messages:
    891
    Gender:
    Male
    Sunny Florida
    Any pics of the rear seat removal ??
     
  3. Apr 30, 2020 at 4:19 PM
    #3
    JDUB-Fabrication

    JDUB-Fabrication [OP] Well-Known Member

    Joined:
    Aug 11, 2019
    Member:
    #301850
    Messages:
    652
    Newburgh NY
    Vehicle:
    2010 Lexus GX460
  4. May 8, 2020 at 11:15 AM
    #4
    JDUB-Fabrication

    JDUB-Fabrication [OP] Well-Known Member

    Joined:
    Aug 11, 2019
    Member:
    #301850
    Messages:
    652
    Newburgh NY
    Vehicle:
    2010 Lexus GX460
    Starting to learn how to handle the rig at my local watering hole. 5/7/20
    859EB38E-C963-4401-85A3-A6DFBF34E242.jpg
    635DF4EC-66EF-4905-9E4A-A48E87E3416A.jpg
    A9BA0221-E28C-49CE-9C3D-81C9700208EC.jpg
     
  5. Jun 12, 2020 at 9:37 AM
    #5
    JDUB-Fabrication

    JDUB-Fabrication [OP] Well-Known Member

    Joined:
    Aug 11, 2019
    Member:
    #301850
    Messages:
    652
    Newburgh NY
    Vehicle:
    2010 Lexus GX460
  6. Aug 31, 2020 at 2:31 PM
    #6
    JDUB-Fabrication

    JDUB-Fabrication [OP] Well-Known Member

    Joined:
    Aug 11, 2019
    Member:
    #301850
    Messages:
    652
    Newburgh NY
    Vehicle:
    2010 Lexus GX460
  7. Dec 23, 2020 at 8:43 AM
    #7
    JDUB-Fabrication

    JDUB-Fabrication [OP] Well-Known Member

    Joined:
    Aug 11, 2019
    Member:
    #301850
    Messages:
    652
    Newburgh NY
    Vehicle:
    2010 Lexus GX460
    Haven’t updated the build thread in a while. Got a cap! Built a bed frame and access cab platform. Lots of travel in the next month!

    December 2020
    ARE MX: Windoors, carpeted head liner and roof rack tracks.
    2D7FA9BA-551A-45FB-BF1F-EF2ED69E9B92.jpg
     
  8. Dec 28, 2020 at 6:10 AM
    #8
    JDUB-Fabrication

    JDUB-Fabrication [OP] Well-Known Member

    Joined:
    Aug 11, 2019
    Member:
    #301850
    Messages:
    652
    Newburgh NY
    Vehicle:
    2010 Lexus GX460
    Access cab seat platform: will eventually build drawers with slides for underneath.
    Put this together with mostly scrap I had around the shop. Down the road I plan to remove the back rest and put in an MDF panel as well.

    I needed to increase storage behind the seats, was hoping the cooler would fit, but it does not. :annoyed: So now it’s just general storage. Wanted to keep the OEM cubbies functional, eventually might pull those and build my own covers, we shall see.

    Materials:
    3/4” Light weight MDF
    1/4” MDF
    Wood glue
    Brad nails
    Indoor/outdoor carpet
    Spray adhesive

    Built a cardboard template of the location (old seat belt mounts), transferred design to MDF.

    C514D6FA-DF2A-4B66-A1D8-36811B84D8D6.jpg

    Cut out and beginning to start the fit up process. A bit of back and forth here, set it in, mark it up, trim and repeat.
    6F0B965B-2471-4A38-B8FA-06E3A9BC482A.jpg
    Made a couple measurement errors but adapted! Had to add a little sliver of MDF behind the passenger seat to match the driver. Both seats can go alll the way back.
    Next step was the verticals support.
    0ADB328D-B503-44C0-9ED5-920618E43A5D.jpg
    Cut out over the bump in the floor. Decided I needed additional support so I created these wedges, they will also serve to support the drawer slide later on.
    D8B0C595-9670-47D1-8F57-DEEF2C92EA44.jpg

    Now it’s time to finish joining it all together with the brad nailer and glue.
    0D48B239-B91E-40A1-B54F-D312B72CFF6F.jpg
    the triangles ended up causing miss alignment once installed so I had to cut the spot that touched the cubbies down slightly. Did not affect the drawer area space.

    Made some pieces to cover the cubby doors, same 3/4 MDF and hole saw cut out spots for the cubby latch. Will use Velcro to keep them in place, easy to pop out if I need full access to the gear. As it stands I can reach in and grab the stuff without removing the wood.
    54061484-7A4A-4A3D-876A-DEB878688E9C.jpg
    Already added bigger Velcro pieces lol, those little tabs did not hold up one weekend.

    Added 1/4” MDF to the back side for later drawer slide install location.
    3F3ADC5A-03EA-4585-8A3C-11B5C3855161.jpg

    Installed it as is and went on a weekend camp trip. Good test run.
    47936FFA-96A8-4144-9E87-8039CC5676B5.jpg
    Don’t mind the dry wall patch on the leg, got a little adventurous with the nailer.

    Pulled it all out to lay some carpet. Indoor/outdoor carpet from the HD.
    0C808D7A-2D67-4F5A-9DF9-C8ED01465E21.jpg
    Never done carpet before was fun!


    All installed and operational. Really nice to be able to slide stuff back on the platform. Already utilizing the storage underneath. Super happy with how this functions and looks.
    Can’t wait to install drawer slides, should be the final touch.
    B2BF70DC-251C-4373-BCFF-575E270CAB2D.jpg

    can still access the cubby with the wood on top!
    C79CABEF-F8B4-44D9-9554-EF93B6C1AF91.jpg
     
    Last edited: Dec 28, 2020
  9. Dec 28, 2020 at 9:30 AM
    #9
    JDUB-Fabrication

    JDUB-Fabrication [OP] Well-Known Member

    Joined:
    Aug 11, 2019
    Member:
    #301850
    Messages:
    652
    Newburgh NY
    Vehicle:
    2010 Lexus GX460
    Bed platform:
    I have been building bed platforms in my trucks and vehicles for years. This has been on the list from before I purchased the truck! My partner and I do a lot of camping with the rig, so this was a must.
    In the past I have overbuilt these systems. My goal for this build was to try and go as minimum as possible within reason. I’m sure it’s overbuilt in some way, can’t help myself.
    I had a few pieces of lightweight MDF sitting around so I started with that as a base point.
    Most time consuming part was marine grade sealing the MDF.
    Future plans are for a drawer system under the bed frame.

    Materials:
    3/4” Lightweight MDF
    2x4s ripped in half
    Oil based primer
    Spar-urethane (better to handle temp changes than poly)
    Wood screws

    Frame: ripped 2x4s in half. Tried to build a structure that would hold the weight of two people with the least amount of material. I was hoping for zero verticals support but ended up adding one down rigger in the center. I notched the 1x1s at the end where they meat the bed, this will allow the mdf platform to sit on the rails all the way around flush.
    52F607DF-DC51-4C2A-8F17-0BA37406AF4B.jpg
    basic layout. Added more structure and support in the center.
    BB0C03A6-DE8B-48D1-9C38-C0CC9CA74C72.jpg

    For the platform I used the 3/4” lightweight MDF, needed two full 4x8 sheets to get the correct width.
    I notched out the back corners to fit around the tailgate bump out on either side. Fits almost flush with the tailgate, maybe less than 1/4 of an inch space. Planning on adding some weather stripping to seal it up eventually.
    2AC6D4E0-D4AC-4CC9-B27E-BC160D22F2A6.jpg

    Before finishing I took the platform for a test trip up to Vermont. Worked great! 10 degrees outside overnight but stayed warm under the blankets and sleeping bags.
    F7941873-6392-4E12-8B3E-232ADC4A3C64.jpg

    Now to finish and seal it up. I expect it’s going to get wet here and there. Not only does the cap leak a little but we plan on using it a lot in winter and it the rain. MDF is like a sponge especially the cut edges, so I decided to go overboard and seal the shit out of it. Don’t want to spend all this time only to have to re make it in a year.

    Sealing procedure:
    Coated the edges in 3 coats of PVA glue (Elmers is what I had laying around)
    24F769A2-D81D-43DB-B653-07E06CDDCE97.jpg
    super sealed!

    After the PVA glue I put on a heavy coat of an oil based primer.
    DD96E58A-35DC-45C7-B142-6F0530C74022.jpg
    did the frame as well.

    after the primer dried for a couple of days, I did 3 coats of oil based spar-urethane. I was going to get poly urethane but Home Depot was out of the cheaper stuff so the spar was a better choice. Only after did I learn that spar is probably better anyway, seems to deal with change in temp better than poly. I don’t know if it really matters, all I read was to make sure and use oil based everything.
    4E9B5E9C-27D6-4632-9066-0FCD51A27F81.jpg
    super glawwwsyyy and smooth. I sanded the primer before the first coat and sanded between coats of the urethane.
    Guessing people don’t use this over a white primer, as now the platform has this weird yellow tone to it. Not a big fane of that but I think I’m going to carpet it anyway. Seems super sealed up and durable!

    All finished for now and back in the truck.
    E2C008D2-DFD1-41EC-8798-D561B0695CF0.jpg
     
    deanosaurus and TroutBum like this.
  10. Jan 12, 2021 at 12:53 PM
    #10
    JDUB-Fabrication

    JDUB-Fabrication [OP] Well-Known Member

    Joined:
    Aug 11, 2019
    Member:
    #301850
    Messages:
    652
    Newburgh NY
    Vehicle:
    2010 Lexus GX460
    Fleischwagen likes this.
  11. Mar 17, 2021 at 8:27 AM
    #11
    Nicknaylo

    Nicknaylo Active Member

    Joined:
    Mar 5, 2021
    Member:
    #358342
    Messages:
    40
    Gender:
    Male
    First Name:
    Mike
    Vehicle:
    2015 Base
    None
    Wonderful build! Inspiring! Brought home a 2015 Access Cab and the big dog (60 lbs) kept trying to stand on the cubby covers, he used to having the whole back of the station wagon (now junked) to himself.

    Gonna rough out some thin ply for templates (lot of thin ply scrap here) with your specific build as the guideline.

    Thanks!

    MS


  12. Aug 9, 2021 at 6:59 AM
    #12
    gwiz

    gwiz Well-Known Member

    Joined:
    Jul 18, 2021
    Member:
    #371607
    Messages:
    198
    Gender:
    Male
    Indiana
    Vehicle:
    2020 Tacoma SR5 4x4 V6
    GFC v2
    This is a very cool access cab seat delete. I’ve been kind of thinking of doing something similar. Are you still planning to do the drawers?

    For the moment I’ve got a cantilevered dog platform that I made from a piece of plywood, carpet padding and auto-marine carpet. I used part of a couple cheap window sash locks to make hooks that connect to the car seat mounts in the fold down jump seats.

    DC3673C7-C6C7-4845-916C-C031EE869850.jpg
     
  13. Aug 9, 2021 at 7:56 AM
    #13
    JDUB-Fabrication

    JDUB-Fabrication [OP] Well-Known Member

    Joined:
    Aug 11, 2019
    Member:
    #301850
    Messages:
    652
    Newburgh NY
    Vehicle:
    2010 Lexus GX460
    Looks great! I am probably parting out the truck to sell. Don’t know where your located but the platform may be up for grabs
     

Products Discussed in

To Top