1. Welcome to Tacoma World!

    You are currently viewing as a guest! To get full-access, you need to register for a FREE account.

    As a registered member, you’ll be able to:
    • Participate in all Tacoma discussion topics
    • Communicate privately with other Tacoma owners from around the world
    • Post your own photos in our Members Gallery
    • Access all special features of the site

The Ugly Blue Truck - Now With Feeble Attempts at Remapping Volume/Seek Buttons!

Discussion in '3rd Gen. Builds (2016-2023)' started by BudFriendguy, May 24, 2021.

  1. May 24, 2021 at 12:30 PM
    #1
    BudFriendguy

    BudFriendguy [OP] TRD BRGLR

    Joined:
    Feb 5, 2021
    Member:
    #355148
    Messages:
    3,390
    Gender:
    Male
    First Name:
    Zak
    Portland, Oregon >> Cleveland, Ohio
    Vehicle:
    2021 TRD Sport ACLB 4WD 6MT V6 Voodoo Blue
    This thread covers purchases/modifications related to my 2021 TRD Sport Tacoma. Any modifications made which are documented will be posted as a reply to this thread, and linked within this first post.

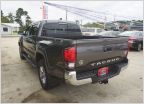
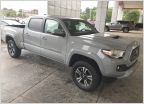
    IMG_2428.jpg

    Pictured above: Bone stock, as it came straight from the stealership - $38k sticker price

    • Voodoo Blue exterior
    • Black/Cement cloth interior

    PURCHASED/INSTALLED:

    AUDIO

    • Tweeter Kit
      • MAKE: Kicker
      • MODEL: H631SFJ101
      • PRICE: $96.00
      • ADDED: NOT YET

    BED/CAP

    • ❌ Toyota Modular Bed Mounting System - Cab
      • MAKE: Rough Country
      • MODEL: 73101
      • COST: $109.95
      • ADDED: NOT YET
    • ❌ Toyota Modular Bed Mounting System - Passenger
      • MAKE: Rough Country
      • PART: 73103
      • COST: $69.95
      • ADDED: NOT YET
    • ✅ 16+ Tacoma SmartCap Evo Sport
      • MAKE: SmartCap
      • MODEL: Evo Sport
      • PRICE: $3,750.00
      • ADDED: 2021-09-24
    • ✅ Bumper Plug - Passenger
      • MAKE: Toyota
      • MODEL: 62541-04010
      • PRICE: $28.55
      • ADDED: 2021-07-14
      • INSTALL: Details
    • Bumper Plug - Driver
      • MAKE: Toyota
      • MODEL: 62542-04010
      • PRICE: $28.55
      • ADDED: 2021-07-14
      • INSTALL: Details
    • TODO: ADD BED STIFFENER
    • TODO: ADD OEM ELECTRONIC TAILGATE LOCK

    ELECTRICAL
    • ❌ Complete Auxiliary Power Kit for 3rd Generation Toyota Tacoma
      • MAKE: Overland Equipped
      • MODEL: N/A
      • PRICE: $199.99
      • ADDED: NOT YET
    • TODO: ADD ANYTIME 120V

    EXTERIOR
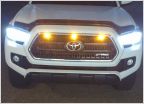
    • ✅ TRD Pro Grill With TSS Garnish Plus LED Raptor Lights - 3rd Gen Tacoma
      • MAKE: MC Auto Parts
      • MODEL: PT228-35170
      • PRICE: $189.24
      • ADDED: 2021-05-23
      • INSTALL: Details
    • ❌ Tailgate Lettering Inserts for Tacoma
      • MAKE: MC Auto Parts
      • MODEL: N/A
      • PRICE: $25.58
      • ADDED: NOT YET
    • 2016-2021 Toyota Tacoma / 2014-2021 Toyota 4Runner - Driver
      • MAKE: Spotter Mirror
      • MODEL: N/A
      • PRICE: $79.90
      • ADDED: 2021-06-07
      • INSTALL: Details
    • 2016-2021 Toyota Tacoma / 2014-2021 Toyota 4Runner - Passenger
      • MAKE: Spotter Mirror
      • MODEL: N/A
      • PRICE: $79.90
      • ADDED: 2021-06-07
      • INSTALL: Details

    INTERIOR
    • ❌ Access Cab Rear Cabin Molle Panel
      • MAKE: Made by @docloco
      • MODEL: N/A
      • PRICE: $420.00
      • ADDED: NOT YET
    • ✅ Interior Chrome Delete Kit - Full Kit; Black
      • MAKE: Meso Customs
      • MODEL: N/A
      • PRICE: $50.00
      • ADDED: 2021-07-08
    • ✅ Handle Sub-assembly - Front Door Inside; Driver
      • MAKE: Toyota
      • MODEL: 69206-0R030-C2
      • PRICE: $32.52
      • ADDED: 2021-07-14
    • ✅ Handle Sub-assembly - Front Door Inside; Passenger
      • MAKE: Toyota
      • MODEL: 69205-0R030-C2
      • PRICE: $32.52
      • ADDED: 2021-07-24
    • Vanity Mirror Screw Replacement Chrome Delete
      • MAKE: Provided by @Afilao
      • MODEL: N/A
      • PRICE: $5.00
      • ADDED: NOT YET
    • ❌ Screen Protection Set
      • MAKE: Screen ProTech
      • MODEL: 2020-2021 Tacoma With Entune/JBL-Small Button Offset Knobs
      • PRICE: $55.85
      • ADDED: NOT YET
    LIGHTING
    • CABIN
      • V2 Dual Color Map Lights (3rd Gen) - Pair
        • MAKE: Meso Customs
        • MODEL: N/A
        • PRICE: $50.00
        • ADDED: 2021-09-23
      • V2 Dual Color Ultimate Dome Light - (3rd Gen)
        • MAKE: Meso Customs
        • MODEL: N/A
        • PRICE: $55.00
        • ADDED: 2021-07-14
      • Vanity Light - 5,000K, White - Set of 4
        • MAKE: VLEDS
        • MODEL: N/A
        • PRICE: $20.00
        • ADDED: 2021-06-07
    • HEADLIGHTS
      • Toyota Tacoma XB LED Headlights - Gen2 - Pair
        • MAKE: Morimoto
        • MODEL: LF530.2-ASM
        • PRICE: $1,250.00
        • ADDED: NOT YET
    • FOGS
      • Diode Dynamics SS3 LED Fog Light Kit for 2016-2021 Toyota Tacoma
        • MAKE: Diode Dynamics
        • MODEL: DD6185
        • PRICE: $200.00
        • ADDED: NOY YET
    • TAIL LIGHTS
      • 2020 Tacoma Tail Lamp Assembly - Driver
        • MAKE: Toyota
        • MODEL: 81560-04230
        • PRICE: $137.80
        • ADDED: 2021-06-21
      • 2020 Tacoma Tail Lamp Assembly - Passenger
        • MAKE: Toyota
        • MODEL: 81550-04230
        • PRICE: $137.80
        • ADDED: 2021-06-21
      • Backup LEDs for 2004-2021 Toyota Tacoma - XPR; Cool White - Pair
        • MAKE: Diode Dynamics
        • MODEL: DD0394P
        • PRICE: $90.00
        • ADDED: 2021-06-21
      • Rear Turn Signal LEDs for 2016-2021 Toyota Tacoma - XP80; Red - Pair
        • MAKE: Diode Dynamics
        • MODEL: DD0115P
        • PRICE: $90.00
        • ADDEED: 2021-06-21
      • Tail Light LEDs for 2016-2021 Toyota Tacoma - XP80; Red - Pair
        • MAKE: Diode Dynamics
        • MODEL: DD0115P
        • PRICE: $90.00
        • ADDED: 2021-06-21
      • VLR-3 Resistor + WC DuoTap Harness - Pair
        • MAKE: VLEDS
        • MODEL: VLR_3_DUO_WC
        • PRICE: $35.00
        • ADDED: NOT YET
        • INSTALL: Details
    • MISC. LIGHTING
      • V5 Switchback Mirror Turn Signals
        • MAKE: Meso Customs
        • MODEL: UTS3GTACOSA
        • PRICE: $160.00
        • ADDED: NOT YET
      • License Plate LEDs for 1995-2021 Toyota Tacoma - Pair
        • MAKE: Diode Dynamics
        • MODEL: DD0037P
        • PRICE: $8.00
        • ADDED: NOT YET
      • ✅ License Place Disable-While-In-Reverse Harness
        • MAKE: Made by @daveeasa
        • MODEL: N/A
        • PRICE: $85.00
        • ADDED: 2021-
      • ❌ Plug-n-Play Raptor Light DRL Tap T-Harness
        • MAKE: Made by @Puppypunter
        • MODEL: N/A
        • PRICE: $30.00
        • ADDED: NOT YET

    WHEELS/TIRES
    • ❌ 17in Cast Aluminum Gloss Gunmetal Gray Wheel 2020 4Runner FJ Cruiser - Set of 5
      • MAKE: Toyota
      • MODEL: PTR20-35110-G4
      • PRICE: $1,034.43
      • ADDED: NOT YET
    • ❌ Open Range A/T 265/70R16 - Set of 5
      • MAKE: Mazama
      • MODEL: 715474
      • PRICE: $1,233.45
      • ADDED: NOT YET
    • ✅ Wheel Media Blast + Powder Coat, Polar White, Matte Finish - Set of 5
      • MAKE: Work completed by Wheel Doctor PDX
      • MODEL: N/A
      • PRICE: I overpaid...
      • ADDED: NOT YET

    ENGINE BAY
    • ❌ 2016+ Toyota Tacoma (Max Lift Edition) Hood QuickLIFT PLUS Struts
      • MAKE: Redline Tuning
      • MODEL: 21-27016-02
      • PRICE: $99.95
      • ADDED: NOT YET

    MISC. MODS
    PREVIOUS EQUIPMENT:

    AUDIO

    • Halo9 Multimedia Receiver
      • MAKE: Alpine
      • MODEL: iLX-F309
    LIGHTING
    • CABIN
      • Map Light - 5,500K 360° High Power 14 LED, Pure White - Pair
        • MAKE: VLEDS
        • MODEL: N/A
        • PRICE: $24.00
        • ADDED: 2021-06-07
      • Dome Light - High Output 360° 24 LED 30MM, Red
        • MAKE: VLEDS
        • MODEL: N/A
        • PRICE: $14.00
        • ADDED: 2021-06-07
    • MISC. LIGHTING
      • Ultimate Turn Signals
        • MAKE: Meso Customs
        • MODEL: UTS3GTACO
        • PRICE: $100.00
        • ADDED: 2021-06-07
        • INSTALL: Details

    WANTLIST:

    ENGINE BAY


    BED/CAP/RACKS


    BUMPER
    • Low profile front bumper w/ tow points (aluminum) - :notsure: SUGGESTIONS PLEASE
      • Considering Southern Style Off-Road Slimline Full Plate Bumper (more info)
    • Bolt-on [NO-CUT!] rear bumper w/ tow points (aluminum) - :notsure: SUGGESTIONS PLEASE
      • Considering Apogee Off-Road Rear Bumper Dual Swing (more info)

    INTERIOR

    LIGHTING

    MISCELLANEOUS
    • Carista ODB2 BTLE
     
    Last edited: Nov 9, 2021
  2. May 24, 2021 at 12:52 PM
    #2
    daveeasa

    daveeasa FBC Harness Solutions Vendor

    Joined:
    May 14, 2020
    Member:
    #328079
    Messages:
    6,848
    Gender:
    Male
    First Name:
    David
    PNW
    Vehicle:
    2016 Tacoma OR DCSB 6MT, 2005 RC 5MT PreRunner, 2002 Tundra SR5 RCLB 4x4
    Start with OEM bed lights, they are so quick and easy to install, then consider additional if you want more?
     
    bulldog23 and BudFriendguy[OP] like this.
  3. May 24, 2021 at 1:36 PM
    #3
    TacoDozer22

    TacoDozer22 Well-Known Member

    Joined:
    Apr 21, 2021
    Member:
    #363389
    Messages:
    189
    Gender:
    Male
    First Name:
    Greg
    Colorado
    Vehicle:
    2018 DCSB OR
    Excited to see progress photos!
     
    BudFriendguy[OP] likes this.
  4. May 24, 2021 at 3:03 PM
    #4
    BudFriendguy

    BudFriendguy [OP] TRD BRGLR

    Joined:
    Feb 5, 2021
    Member:
    #355148
    Messages:
    3,390
    Gender:
    Male
    First Name:
    Zak
    Portland, Oregon >> Cleveland, Ohio
    Vehicle:
    2021 TRD Sport ACLB 4WD 6MT V6 Voodoo Blue
    INSTALLING MC AUTO PARTS TRD FAUX GRILLE

    STEP 0 - Suggested Parts & Tools
    Parts

    • MC Auto Parts Faux Pro grille
    • (2x) zip tie
    Tools
    • 10mm socket or wrench
    • Phillips head screwdriver
    • Flat head screwdriver
    • Scissors and/or utility knife
    • Diagonal pliers (if installing raptor lights)
    IMG_2596.jpg

    STEP 1 - Remove bolts and plug clips

    Start by removing the (2x) plastic plug clips, and (2x) 10mm bolts that secure the grille assembly to the truck.
    • Shown in GREEN - plastic plug clip
    • Shown in PINK - 10mm bolt
    upload_2021-5-24_13-41-54.jpg

    To remove plastic plug clips, use a flat head screwdriver to pry up the inner cap, then pull up on the cap to remove the clip from its housing.

    upload_2021-5-24_13-50-29.jpg

    STEP 2 - Disconnect the TSS wiring harness

    Start by removing the white harness clip from the top of the grille. To remove, pinch the exposed top of the clip to compress, and apply downward force, it should pop right out.

    This will make it easier to un-plug the harness connectors since they take a bit of pressure to release.

    IMG_2530-1.jpg

    Once the white clip is released, you will have easy access to un-plug the connection from the truck.

    IMG_2531-1.jpg IMG_2532-1.jpg

    There is one more wiring harness clip needing removed before the grille can be removed from the truck. It is a small brown clip and is removed with the same method as the previous white clip.

    IMG_2533-1.jpg

    STEP 3 - Remove the grille from the truck

    To remove the grille, apply slight upward pressure on the plastic arms that were unbolted during step 1, and pull toward the front of the truck until they move freely.

    IMG_2534-1.jpg IMG_2535-1.jpg

    Next, choose a side and start giving the ole wiggle-n-pull. This might take a bit of force, but don't go all Hulk on it if there is resistance, we're not here trying to break anything. If this is your first time removing the grille, it may take a bit of force. Just take your time, wiggling and pulling along the top and side until it finally gives.

    IMG_2536-1.jpg IMG_2537-1.jpg

    After one side is removed, the opposite side comes off much easier.

    Bam! Now your grille is off.

    STEP 4 - Remove the TSS sensor from the grille

    Un-plug the wiring harness from the back of the TSS sensor.

    IMG_2548.jpg

    Remove the (2x) phillips head screws and (2x) 10mm bolts holding the sensor in place.
    • Shown in GREEN - phillips head screws
    • Shown in PINK - 10mm bolts
    upload_2021-5-24_14-7-39.jpg

    Remove the TSS sensor retaining nuts from the original grille. These will be transferred to the new grille.

    IMG_2557.jpg

    STEP 5 - Detach the grille and wiring from the surrounding body trim

    Remove the (8x) phillips screws holding the grille onto the surrounding trim. There are other screws on the back side of the assembly, but we are only concerned with the ones shown below.

    upload_2021-5-24_14-17-3.jpg upload_2021-5-24_14-17-54.jpg

    Remove the TSS cover from the grille by releasing the (4x) clips shown below. I've found the best method to be releasing two at a time, while applying pressure to pop them out of their slots, then doing the other side.

    upload_2021-5-24_14-12-3.jpg

    Un-clip the black zip tie clip from the TSS area, accessing it from the front to release. This is easiest if you pinch one side and apply force to wedge it back through the hole, after that the other side should come through with a bit of wiggling.

    upload_2021-5-24_14-20-43.jpg

    There is a second zip tie clip needing removed using the same method as the previous clip.

    upload_2021-5-24_14-23-12.jpg

    Now the grille can be removed without any interference. The last step is to release the million (I counted) little clips along the edge of the grille that connect it to the body trim. There are other clips further toward the outside of the trim piece, we are not concerned with those, only work on the inner set of clips.

    There is no real trick to this, just work your way around and eventually the grill will release.

    upload_2021-5-24_14-28-27.jpg

    STEP 6 - Attach the new grille to the body trim piece

    Line up the new grille with the body trim and push the two pieces together until all clips are securely in place. In my case it took a good *smack* for two of the clips to take hold, and then everything was rock solid.

    upload_2021-5-24_14-49-39.jpg

    STEP 7 - Attach the TSS shroud and TSS sensor

    (Not pictured) the TSS shroud simply snaps into place on the front of the new grille.

    Insert the (2x) retaining nuts from the original grille into the designated slots on the new grille. My image shows the nuts going in upside down (d'oh!), make sure the circular side is facing you while inserting, or the nuts will not fit.

    IMG_2561.jpg IMG_2566.jpg

    Set the TSS sensor in place and ensure everything lines up.

    IMG_2568.jpg

    Secure the TSS sensor using the (1x) phillips head screw and (2x) 10mm bolt.
    • Shown in GREEN - phillips head screw
    • Shown in PINK - 10mm bolts
    upload_2021-5-24_14-36-10.jpg

    Remove the zip tie clips from the TSS sensor wiring harness. After removing the clips, cut the "zip" portion of the clip off the base of the clip, and pull it through to remove; This should leave you with just the base of the clip, which is all we need in order to re-use the clip.

    upload_2021-5-24_14-39-43.jpg

    Run a new zip tie through the now modified zip tie clip.

    IMG_2579.jpg

    Re-attach the white retaining clip at one end of the TSS wiring harness to the grille where it was originally located. Plug the other end of the harness into the TSS sensor. This will give you an idea on how much play there is on the wiring harness, and where you can place the modified zip tie clips to best hide it.

    In my case, only one of the two clip attachment points was viable. Place the clip in whichever location works best for you, then secure the wiring using the newly added zip tie.

    IMG_2582.jpg IMG_2583.jpg

    STEP 8 - Install the grille onto the truck

    Take your newly assembled grille and place it back onto the truck. Be sure to give care to lift the plastic arms just like in step 3 when placing the grille so they clear the white plastic pieces on top. The grille should easily snap back into place at this point.

    Re-install the brown wiring harness clip from step 3.

    IMG_2533-1.jpg

    Plug the TSS wiring harness back in.

    IMG_2588.jpg IMG_2587.jpg

    Reinstall the (2x) plastic plug clips, and (2x) 10mm bolts from step 1.

    upload_2021-5-24_14-57-16.jpg IMG_2527-1.jpg

    STEP 9 - Admire your handiwork :cheers:

    IMG_2593.jpg

    STEP 10 - Don't sweat leftover parts

    None of the (8x) screws recovered when removing the OEM grille are used during the install of this new TRD Faux grille. We also only re-used one of the (2x) phillips head screws recovered while removing the TSS sensor. Lastly, only one of the (2x) zip tie clips were re-used while routing the TSS sensor wiring harness along the new grille.

    IMG_2595.jpg
     
    Last edited: May 25, 2021
  5. May 26, 2021 at 8:17 AM
    #5
    vorkuta775

    vorkuta775 Well-Known Member

    Joined:
    Apr 6, 2020
    Member:
    #323954
    Messages:
    3,465
    Gender:
    Male
    Northern Nevada
    Vehicle:
    tesla truck
    You looking for a carista OBD? I have one I am not using
     
  6. May 26, 2021 at 8:21 AM
    #6
    BudFriendguy

    BudFriendguy [OP] TRD BRGLR

    Joined:
    Feb 5, 2021
    Member:
    #355148
    Messages:
    3,390
    Gender:
    Male
    First Name:
    Zak
    Portland, Oregon >> Cleveland, Ohio
    Vehicle:
    2021 TRD Sport ACLB 4WD 6MT V6 Voodoo Blue
    Yes, interested. I've read that they can be used to tweak all kinds of settings like seatbelt chime and all that. Any specific reason you don't still have it installed, or just no use after getting everything tweaked?
     
  7. May 26, 2021 at 8:24 AM
    #7
    vorkuta775

    vorkuta775 Well-Known Member

    Joined:
    Apr 6, 2020
    Member:
    #323954
    Messages:
    3,465
    Gender:
    Male
    Northern Nevada
    Vehicle:
    tesla truck
    because I use the OBD2 connector that goes to the alpine. it reads everything. I bought it a few months back, 20 bucks , we have to meet up at some point anyways to get you that maestro stuff back.
     
  8. Jun 25, 2021 at 7:10 PM
    #8
    BudFriendguy

    BudFriendguy [OP] TRD BRGLR

    Joined:
    Feb 5, 2021
    Member:
    #355148
    Messages:
    3,390
    Gender:
    Male
    First Name:
    Zak
    Portland, Oregon >> Cleveland, Ohio
    Vehicle:
    2021 TRD Sport ACLB 4WD 6MT V6 Voodoo Blue
    WIRING VLEDS VLR-3 LED RESISTOR

    STEP 0 - Suggested Parts & Tools
    Parts

    • VLEDS VLR-3 resistor + DuoTap harness
    • Dielectric grease
    • Double sided high-adhesion foam tape
    • Shrink tubing
    • Electronic solder
    • Friction tape
    • Flex tubing
    upload_2021-6-25_18-11-55.jpg

    upload_2021-6-25_18-12-52.jpg

    Tools

    • Wire strippers
    • Utility knife
    • Soldering iron
    • Lighter or heat gun
    • Scissors
    upload_2021-6-25_18-14-16.jpg

    STEP 1 - Remove DuoTap from the tap end of the wiring harness

    Start by cutting the shrink tubing off where the wiring meets the tap by slicing lengthwise using a utility knife. This should peel right off once it's been cut, exposing the wiring.

    asdIMG_3297.jpg


    STEP 2 - Prep the harnesses to be soldered

    Cut the tap off the end of the DuoTap harness and strip the exposed wiring.

    upload_2021-6-25_18-28-55.jpg

    Strip the ends of the tap wires from the passthrough t-harness.

    upload_2021-6-25_18-31-58.jpg

    Add the shrink tubing to the wires prior to permanently soldering them. On this project I opted for smaller diameter tubing on each individual wire, with larger diameter tubing to go over the individual wires/tubing for an extra bit of overkill.
    upload_2021-6-25_18-45-34.jpg

    You may want to test the shrinky-ness of the shrink tubing to ensure it'll be the correct size once shrunk. This passed muster.

    upload_2021-6-25_18-49-3.jpg


    STEP 3 - Solder it up

    It doesn't matter which wire on the t-harness is connected to which wire on the DuoTap harness, so just solder everybody together with abandon. Make sure you get a good connection and aren't soldering just one side of the wire together.

    upload_2021-6-25_18-44-55.jpg

    STEP 4 - Shrink Tubing

    Apply the dielectric grease to the soldered connections and slip over the smaller diameter shrink tubing. Heat the tubing with either a lighter or heat gun to shrink it to a tight fit along the wire.

    upload_2021-6-25_18-56-18.jpg

    Move the larger diameter tubing into place and heat it to a tight fit along the wire as well. This should make for a bomb proof weather seal.

    upload_2021-6-25_18-59-6.jpg


    STEP 5 - (Optional) go apeshit with friction tape and flex tubing

    Shrink tubing and dielectric grease aren't enough reassurance for you? Me either...

    upload_2021-6-25_19-5-35.jpg
    STEP 6 - Admire your handiwork :cheers:

    The harness is now ready to install. The rest of the installation goes like any other resistor install, with the exception of using the t-harness rather than a traditional wire tap connection.

    upload_2021-6-25_19-6-20.jpg

    upload_2021-6-25_19-7-16.jpg
     
    Last edited: Jun 25, 2021
    toyotology likes this.
  9. Jul 14, 2021 at 6:22 PM
    #9
    BudFriendguy

    BudFriendguy [OP] TRD BRGLR

    Joined:
    Feb 5, 2021
    Member:
    #355148
    Messages:
    3,390
    Gender:
    Male
    First Name:
    Zak
    Portland, Oregon >> Cleveland, Ohio
    Vehicle:
    2021 TRD Sport ACLB 4WD 6MT V6 Voodoo Blue
    INSTALLING OEM TONNEAU BED GASKETS

    This guide shows how to add OEM bed gaskets from OEM tonneau cover kits to a model that did not come with those options. This is very simple and only involves making a couple small cuts to the bed side cap trim pieces to allow for the gasket.

    STEP 0 - Suggested Parts & Tools
    Parts

    • 62541-04010 - OEM bed gasket (passenger side)
    • 62542-04010 - OEM bed gasket (driver side)
    • Card stock or printer paper

    upload_2021-7-14_17-29-42.jpg

    [​IMG]

    Tools
    • Utility knife or hot knife
    • Scissors
    • Metallic sharpie (or anything visible on black plastic)
    • Pen or pencil
    • Scotch tape

    STEP 1 - Remove the bed side caps

    Start on the front side by pulling up on the inside edge of the black cap trim, it should pop right up without much of a fight. Continue along the length of the cap releasing all the clips until fully removed.


    STEP 2 - Make a cut template by tracing the gasket

    Trace the small face of the gasket (marked in pink below) onto a piece of card stock for the cutting template. Cut the template out.

    The orientation of the gasket once installed is marked in yellow.

    upload_2021-7-14_17-42-5.jpg


    Put a small piece of scotch tape on the cut template to attach it to the bed side cap. The cap has a small notch on the bottom end toward the end, my best results came aligning the template with the un-notched portion of the bottom edge to the template (marked in pink below.)

    Make sure the top edge of the template is parallel with the top edge of the cap trim.

    upload_2021-7-14_17-55-34.jpg

    Once you're happy with how everything's lined up, trace the template onto the cap trim with the metallic Sharpie.

    upload_2021-7-14_17-58-26.jpg


    STEP 3 - Cut out the marked section

    Using the hot knife make slow, even pressure passes along the straight marked lines of the marked cut. Using multiple slow passes all going the same direction should help reduce the amount of slag building up along the edge of the cut, and result in a cleaner cut.

    upload_2021-7-14_18-4-1.jpg

    Test out the gasket fit and make sure everything lines up.

    upload_2021-7-14_18-5-53.jpg

    upload_2021-7-14_18-5-28.jpg


    STEP 4 - Install the gaskets and modified bed side caps

    What worked best in my case was to place the gaskets, then pop the bed cap trim pieces into place over top of the installed gaskets.

    Working the gaskets in while the cap trim was installed was almost impossible, on the truck that had OEM tonneau-compatible bed side caps this was possible.

    upload_2021-7-14_18-10-23.jpg

    With the gaskets installed, re-attach the bed side cap trim starting with the forward end. Snap the trim into place, working along the length until all clips are snapped in.

    There's a small metal overhang on the outside front edge of the gasket. Not being able to recall whether it was tucked on the truck with OEM tonneau, I opted to tuck the gasket under the metal. If you have any info on whether Toyota tucks the gasket, let me know!

    upload_2021-7-14_18-21-50.jpg

    STEP 5 - Admire your handiwork :cheers:

    With everything back in place you'd almost never know anything changed. The bed should be more weather tight once a canopy is installed since the large gap is now filled.

    upload_2021-7-14_18-19-9.jpg
     
    Last edited: Jul 14, 2021
  10. Jul 31, 2021 at 3:51 PM
    #10
    BudFriendguy

    BudFriendguy [OP] TRD BRGLR

    Joined:
    Feb 5, 2021
    Member:
    #355148
    Messages:
    3,390
    Gender:
    Male
    First Name:
    Zak
    Portland, Oregon >> Cleveland, Ohio
    Vehicle:
    2021 TRD Sport ACLB 4WD 6MT V6 Voodoo Blue
    Saw this old school truck in a spotted thread and wondered what its paint job might look like on my truck...

    upload_2021-7-31_20-57-44.jpg

    Edit to add SmartCap option(s).

    upload_2021-8-1_21-30-8.jpg

    upload_2021-8-1_21-32-33.jpg

    upload_2021-8-1_21-33-13.jpg

    upload_2021-8-2_0-11-31.jpg
     
    Last edited: Aug 2, 2021
    doublethebass likes this.
  11. Oct 18, 2021 at 7:36 PM
    #11
    BudFriendguy

    BudFriendguy [OP] TRD BRGLR

    Joined:
    Feb 5, 2021
    Member:
    #355148
    Messages:
    3,390
    Gender:
    Male
    First Name:
    Zak
    Portland, Oregon >> Cleveland, Ohio
    Vehicle:
    2021 TRD Sport ACLB 4WD 6MT V6 Voodoo Blue
    UCA UNBOXING COMPARISON: OLD MAN EMU & TOTAL CHAOS

    This started with ordering a set of OME UCA from 4WP back in early March, which was repeatedly delayed for various reasons. Eventually by mid-October I gave up on ever receiving the OME UCAs and ordered a set from Total Chaos. Literally the next day 4WP called to let me know the OME set would be in the following Monday.

    Rather than cancel the order of one of the UCA, I decided to let both arrive so I could have a hands-on comparison to help choose which to keep and which to resell. So here we are, a post with 1:1 comparison pictures and some other questionably helpful information.


    PART 0 - What's Being Compared?


    This could be apples to oranges for all I know, but we're comparing the Old Man Emu #UCA0005 "UCA Tacoma" and the Total Chaos #96504 "Urethane Pivot UCA".


    PART 1 - Receipts

    OLD MAN EMU
    Purchased locally at 4WheelParts for $568.15

    upload_2021-10-18_18-41-18.jpg


    TOTAL CHAOS
    Purchased at OffRoadWarehouse.com for $792.16

    upload_2021-10-18_18-38-29.jpg


    PART 2 - Unboxing

    Note: The OME set was picked up locally at 4WP and the Total Chaos set was shipped.

    upload_2021-10-18_18-46-21.jpg


    OLD MAN EMU

    upload_2021-10-18_18-48-10.jpg

    upload_2021-10-18_18-54-29.jpg

    TOTAL CHAOS

    upload_2021-10-18_18-51-43.jpg

    upload_2021-10-18_18-53-27.jpg


    PART 3 - Comparison Shots

    upload_2021-10-18_19-5-37.jpg

    upload_2021-10-18_19-5-4.jpg

    upload_2021-10-18_19-12-6.jpg

    upload_2021-10-18_19-20-5.jpg


    PART 4 - Weights and Measures

    These measurements are highly scientific and performed with only the best postal scale money can buy (...at Harbor Freight.)

    Notes:
    • Weights given are for one full UCA and its provided hardware.
    • Measurements given in mm were done using digital calipers.
    • See the diagram below of highly technical terms used in measurements given.

    upload_2021-10-18_19-27-8.jpg

    OLD MAN EMU

    upload_2021-10-18_19-33-48.jpg
    • WEIGHT: 9lb 6.0oz
    • DIAMETER (STRAIGHT SIDE): 32mm
    • DIAMETER (BENT SIDE): 38.5mm
    • DIAMETER (OUTER, KNUCKLE): 62mm
    • WIDTH (KNUCKLE): 45mm

    TOTAL CHAOS

    upload_2021-10-18_19-33-28.jpg
    • WEIGHT: 6lb 1.0oz
    • DIAMETER (STRAIGHT SIDE): 32mm
    • DIAMETER (BENT SIDE): 32mm
    • DIAMETER (OUTER, KNUCKLE): 57.5mm
    • WIDTH (KNUCKLE): 45mm


    PART 5 - Wrap-up

    So here we are at the end and what have we learned? I'm not sure to be honest...

    If you've got a suggestion for which UCA to use, feel free to comment and let me know which and why -- I could really use the help! :thumbsup:
     
  12. Oct 18, 2021 at 8:23 PM
    #12
    daveeasa

    daveeasa FBC Harness Solutions Vendor

    Joined:
    May 14, 2020
    Member:
    #328079
    Messages:
    6,848
    Gender:
    Male
    First Name:
    David
    PNW
    Vehicle:
    2016 Tacoma OR DCSB 6MT, 2005 RC 5MT PreRunner, 2002 Tundra SR5 RCLB 4x4
    I don’t have any yet so I can probably take the set you end up not wanting.

    You might want to ask someone like @memario1214 to chime in on the differences?
     
    BudFriendguy[OP] likes this.
  13. Oct 18, 2021 at 10:57 PM
    #13
    Evan_P

    Evan_P Well-Known Member

    Joined:
    Jan 5, 2020
    Member:
    #315262
    Messages:
    203
    Gender:
    Male
    First Name:
    Evan
    Hillsboro OR
    Vehicle:
    2020 Voodoo Blue TRD Off-Road
    I have the OME arms on my truck. Have no experience with any other arms. I purchased the complete BP-51 setup for my truck that included the arms. What I like about them is the very low maintenance and the sealed ball joint. I spend a fair bit of my time year round either exploring the woods in the mud or out in central/eastern Oregon in the dust. Less to have to worry about in my opinion.

    [​IMG]
     
    BudFriendguy[OP] likes this.
  14. Oct 18, 2021 at 11:45 PM
    #14
    Superdave1.0

    Superdave1.0 Grandma Dave

    Joined:
    Dec 27, 2018
    Member:
    #277158
    Messages:
    5,581
    Gender:
    Male
    SoCal
    Vehicle:
    LX470
    TC UCA more likely to squeak, bushings go out faster, uniball = higher maintenance. Built solid, will last a long time.

    OME are simpler, I'd bet the bushings and ball joint will last longer than the TC bits.

    UCA I'd prefer OME or SPC over TC, and I run TC currently.
     
    BudFriendguy[OP] likes this.
  15. Oct 19, 2021 at 2:18 PM
    #15
    BudFriendguy

    BudFriendguy [OP] TRD BRGLR

    Joined:
    Feb 5, 2021
    Member:
    #355148
    Messages:
    3,390
    Gender:
    Male
    First Name:
    Zak
    Portland, Oregon >> Cleveland, Ohio
    Vehicle:
    2021 TRD Sport ACLB 4WD 6MT V6 Voodoo Blue
    Hey @daveeasa, you've got first dibs on the Total Chaos UCA if desired.

    I've been convinced to opt for OME mainly by laziness of not wanting to put in work maintaining the TC.
     
  16. Oct 19, 2021 at 3:22 PM
    #16
    daveeasa

    daveeasa FBC Harness Solutions Vendor

    Joined:
    May 14, 2020
    Member:
    #328079
    Messages:
    6,848
    Gender:
    Male
    First Name:
    David
    PNW
    Vehicle:
    2016 Tacoma OR DCSB 6MT, 2005 RC 5MT PreRunner, 2002 Tundra SR5 RCLB 4x4
    Good choice.

    Actually, I totally forgot, I'm already in for SPC on UCA, what a bonehead I am. My dibbs have therefore expired. I suck at memory :)
     
  17. Oct 27, 2021 at 4:56 PM
    #17
    BudFriendguy

    BudFriendguy [OP] TRD BRGLR

    Joined:
    Feb 5, 2021
    Member:
    #355148
    Messages:
    3,390
    Gender:
    Male
    First Name:
    Zak
    Portland, Oregon >> Cleveland, Ohio
    Vehicle:
    2021 TRD Sport ACLB 4WD 6MT V6 Voodoo Blue
    17" TRD SEMA WHEELS GONE WHITE

    These wheels are the bane of my existence, and a textbook example of a moron embracing the sunk cost fallacy.


    STEP 0 - Do Your Research

    That was a joke! Who has time for all that? Simply walk into whatever local shop Yelp claims is best and trust they are not taking you for a ride.

    upload_2021-10-27_16-46-46.jpg


    STEP 1 - Greatly Overpay for Basic Powder Coating Services

    This can be as easy or hard as you like, just don't do what I did -- comparison shop!

    [​IMG]


    STEP 2 - Take the Wheels Back to the Shop to be Re-Coated

    Only after loading all the wheels up, hauling them home, and unloading them should you begin to scrutinize the quality of work performed.

    And... surprise of surprises: it looks like absolute trash.

    Now load the wheels back up, haul them back to the shop, unload them, haggle with management about the work quality and then wait another two weeks for (re-)completion.

    20210429_153913.jpg

    20210429_152841.jpg


    STEP 3 - Give Up On the "Professionals"

    Alright so now your wheels are back in-hand and the powder coat is actually, y'know, coating the wheel. But something still looks off... Could it be the center cap that appears to be "color matched" using a can of Rustoleum off-white from Home Depot? Yeah, probably.

    20210512_185503.jpg

    So at this point at least the powder coat is on the wheel and not marred like it's been dragged across a gravel parking lot... Maybe I could try and color match the center caps myself?


    STEP 4 - Find You Some New "Professionals"

    Maybe color matching is hard, so let's go to the pros who do it all day every day! Enter Sherwin Williams Automotive Finishes.

    Go ahead and load up a wheel again, haul that bad boy to Sherwin Williams Automotive Finishes, unload it, and then ask that they mix you up a rattle can of automotive paint to match the wheel.

    This part takes ~10 business days.

    You'll also need to purchase a can of clear coat to protect your fancy new paint. All told, for two cans of custom white paint and two cans of sealer, paint cost was ~$150 -- that's on top of the original ~$2k from the powder coat shop which included color matched center caps.

    20211027_165124.jpg


    STEP 5 - Buy New Center Caps and Paint Them

    More expense! Buy five new center caps, the powder coat shop put about a 2" coat of mismatched white paint and they cannot be salvaged.

    Now go ahead and use whatever method you prefer to paint the new center caps and seal them up. Be sure to follow the directions on the cans for best results.


    STEP 6 - Give Up On Yourself

    After sanding, painting, and sealing the new center caps; let's grab a wheel and check how it matches up.

    20211027_161233.jpg

    Hoo boy, in blueish light the color still looks quite off...

    20211027_161305.jpg

    Lots of orange peeling on the clear coat too...

    20211027_161320.jpg

    Well... shit. The color is ever so slightly closer to matching than it originally was but is still quite noticeably off between the wheel and center caps, and the clear coat sheen is a better match too.

    What's to do? If you ask me? Nothing.

    After all this expense and hassle, it's close enough for now. If it bugs me enough once the wheels are on I'll go buy another set of center caps and even more (likely mismatched) paint to give it another shot.


    STEP 9 - Admire your handiwork :cheers:

    Do not admire anything, this project has been a complete bust!
     
    Last edited: Dec 1, 2021
    indoomitable and vorkuta775 like this.
  18. Oct 27, 2021 at 5:05 PM
    #18
    daveeasa

    daveeasa FBC Harness Solutions Vendor

    Joined:
    May 14, 2020
    Member:
    #328079
    Messages:
    6,848
    Gender:
    Male
    First Name:
    David
    PNW
    Vehicle:
    2016 Tacoma OR DCSB 6MT, 2005 RC 5MT PreRunner, 2002 Tundra SR5 RCLB 4x4
    Wow, impressive self-flagellation.

    This will help keep me from doing the same I think.
     
    BudFriendguy[OP] likes this.
  19. Oct 27, 2021 at 5:20 PM
    #19
    TacoTime55

    TacoTime55 TT57

    Joined:
    Sep 28, 2021
    Member:
    #378314
    Messages:
    6,109
    Gender:
    Male
    First Name:
    Ed
    Delaware
    Vehicle:
    2021 Midnight Black TRD Sport AT/DCSB
    OTT Tune, LED HLs&Fogs,TRDSkid, TalonCAT
    Like all the pics and details...thanks for sharing!

    Ed

    ****
     
    BudFriendguy[OP] likes this.
  20. Nov 1, 2021 at 7:49 PM
    #20
    burrito782

    burrito782 Shit Throwing Ape

    Joined:
    Aug 23, 2014
    Member:
    #136771
    Messages:
    941
    Vehicle:
    08 TRD Off Road
    Agree. Respect to anyone who keeps it real with themselves.

    OP, I remember your wheel powder coating debacle from a while back. The center cap deal is news to me, so I have to ask, did you not call out Wheel Doctor on their paint mismatch there? For that kind of money you spent on them I'd expect perfection. I'm actually genuinely surprised, as typically for common colors most of these wheel specialty places have the color match figured out between the wheel powder coat and center cap paint. Although if I'm not mistaken I believe white is one of the hardest colors to match.

    FWIW, I had a somewhat similar wheel powder coating headache as you last summer. The place that did my TRD rims powder coated them entirely, including the lug nut and hub mating faces (OEMs mask these surfaces keeping them free of any paint or powder coating). I could tell right away that the hub faces in particular might be an issue with the uncontrolled thickness layer of powder coating on them and around its edges. Sure enough I was experiencing excessive feedback/shaking at the steering wheel. The powder coat place tells me it's probably due to an out of balance wheel(s) and to bring them back to them for rebalancing, however, my gut was telling me it was from the hub face no longer being planar and mating flush against the hub (which I did bring to their attention and they were pretty quick to dismiss). Regardless, I decided to first go with their wheel rebalance recommendation and reassess from there if needed. Of course, that didn't fix it and the steering shimmy issue still remained. So this second time around they decide to try a road force balance, which I said fine but either way I want you to strip the powder coat from the rim's hub faces because this is starting to become a PITA (each time I was having to put the truck up on jack stands and take the tire & wheel assemblies to them). Well lo and behold the issue was fixed. Now whether it was from the road force balance or hub face powder coat removal is anyone's guess, but my gut tells me it was the hub face.

    So all that said, I do somewhat feel your pain (although not on the cost front...ouch!) and know the feeling of just plain being "done" with whatever grand-idea-turned-to-shit that one embarks on. :facepalm:...:laugh:
     

Products Discussed in

To Top