

-
Welcome to Tacoma World!
You are currently viewing as a guest! To get full-access, you need to register for a FREE account.
As a registered member, you’ll be able to:- Participate in all Tacoma discussion topics
- Communicate privately with other Tacoma owners from around the world
- Post your own photos in our Members Gallery
- Access all special features of the site
Quick Links: Has anyone installed ARB compressor with AOB switch?
  Experience with Air Armor M240 Air Compressor?
 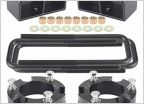 Leveling kit....
 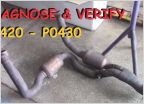 Tacoma 06 p0430 and 420 codes
  Personal observation about the HVAC system and the mildew odor
  4.0 liter 1GR-FE V6 4X4 TRD 6-Speed Manual Transmission 30K Service Checklist
Lower Control Arm Seized?
Discussion in '2nd Gen. Tacomas (2005-2015)' started by spithead051, Apr 24, 2012.
Page 4 of 4
Page 4 of 4

