-
Welcome to Tacoma World!
You are currently viewing as a guest! To get full-access, you need to register for a FREE account.
As a registered member, you’ll be able to:- Participate in all Tacoma discussion topics
- Communicate privately with other Tacoma owners from around the world
- Post your own photos in our Members Gallery
- Access all special features of the site
 Polyurethane bushing grease
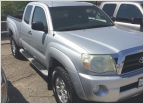 Camerond05's build page. Slow. Boring
 Antennae relocation with 'glass fenders-solutions?
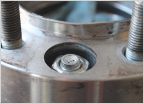 Longer wheel studs
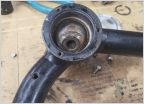 Heim joint degradation?
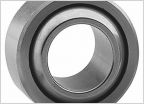 Honest feedback on Stainless Uniballs and road salt
Boxing/Plating your Frame w/ Lots of Pics (2nd Gens)
Discussion in 'Long Travel Suspension' started by TheStevo, Jan 3, 2015.
Page 1 of 2
Page 1 of 2