

-
Welcome to Tacoma World!
You are currently viewing as a guest! To get full-access, you need to register for a FREE account.
As a registered member, you’ll be able to:- Participate in all Tacoma discussion topics
- Communicate privately with other Tacoma owners from around the world
- Post your own photos in our Members Gallery
- Access all special features of the site
 Those who camp w/ DCLB
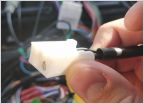 What is the correct adapter to use for Sirius XM>Stock antenna?
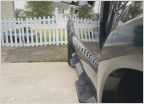 Running boards recommendations
 Problem with Redline Tuning QuickLIFT Plus
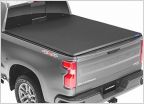 Lund 95086 Genesis Tri-Fold Tonneau Cover
 Dual battery
How to - Installing new Speakers in your 3rd Gen
Discussion in '3rd Gen. Tacomas (2016-2023)' started by SomethingNew71, Jul 4, 2018.
Page 1 of 10
Page 1 of 10
Products Discussed in


