

-
Welcome to Tacoma World!
You are currently viewing as a guest! To get full-access, you need to register for a FREE account.
As a registered member, you’ll be able to:- Participate in all Tacoma discussion topics
- Communicate privately with other Tacoma owners from around the world
- Post your own photos in our Members Gallery
- Access all special features of the site
 Tpp4's No Nonsense Guide to Kicker Key T-Harness (16-19)
 Choosing speakers
 Need speaker advice - 2003 double cab taco
 Sub Wiring Advice
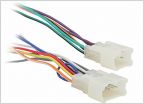 Comment on my final build plans
Kenwood 7140 Install help
Discussion in 'Audio & Video' started by Rhino8541, Feb 26, 2010.
Page 2 of 2
Page 2 of 2


