

-
Welcome to Tacoma World!
You are currently viewing as a guest! To get full-access, you need to register for a FREE account.
As a registered member, you’ll be able to:- Participate in all Tacoma discussion topics
- Communicate privately with other Tacoma owners from around the world
- Post your own photos in our Members Gallery
- Access all special features of the site
 Access Cab 2019
 Best Cargo Bag or carrier to go with OEM roof rack
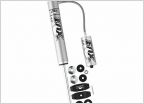 Rear shock length
 Not taking enough oil?
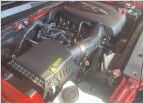 K&N Intake? Which model?
 I want to leave my electronic key with my truck at the put-in, but...
MORE Twin ARB + 1 Gallon Tank Bracket Install Overview and Impressions
Discussion in '3rd Gen. Tacomas (2016-2023)' started by tacomarin, Jun 24, 2020.
Page 1 of 3
Page 1 of 3

