

-
Welcome to Tacoma World!
You are currently viewing as a guest! To get full-access, you need to register for a FREE account.
As a registered member, you’ll be able to:- Participate in all Tacoma discussion topics
- Communicate privately with other Tacoma owners from around the world
- Post your own photos in our Members Gallery
- Access all special features of the site
 Clicking/Knocking on front drivers side
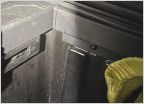 Water sealing the third gen bed
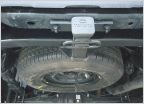 2016 Tacoma Curt Tow hitch 13264 Class 3
 Rear Diff oil change and Tranny fluid change
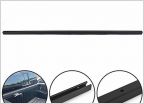 Looking for Toyota Tacoma bed side rail precut
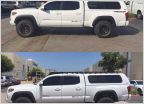 2016 tacoma aftermarket suspension: remove leafspring or crank up the front?
Overland Drawer Build- DIY Camping Drawers- Pic Heavy Thread
Discussion in '3rd Gen. Tacomas (2016-2023)' started by Papadave418, Jun 16, 2018.
Page 1 of 12
Page 1 of 12

