

-
Welcome to Tacoma World!
You are currently viewing as a guest! To get full-access, you need to register for a FREE account.
As a registered member, you’ll be able to:- Participate in all Tacoma discussion topics
- Communicate privately with other Tacoma owners from around the world
- Post your own photos in our Members Gallery
- Access all special features of the site
Quick Links: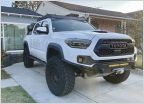 MMoreno16's 2018 Tree Hugging Hipster Cupcake Build, Adventures and BS
 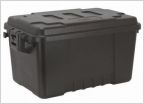 Bed drawer (organizer) build for 2016 tacoma (goal: under $200)
 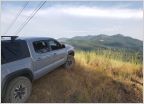 Gandalf Da Grey - Slow build
  Wombat and The Wanderer builds/BS/my insane ramblings.
  2018 Cement Taco RRTX TRD OR 4x4
 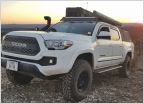 Blanche & Her Augmentations - a SLOW build thread
PC3coyote's 2017 Tacoma Build
Discussion in '3rd Gen. Builds (2016-2023)' started by pc3coyote, Feb 7, 2017.
Page 27 of 28
Page 27 of 28
Products Discussed in


