

-
Welcome to Tacoma World!
You are currently viewing as a guest! To get full-access, you need to register for a FREE account.
As a registered member, you’ll be able to:- Participate in all Tacoma discussion topics
- Communicate privately with other Tacoma owners from around the world
- Post your own photos in our Members Gallery
- Access all special features of the site
 Headunit won't power on, help!
 Which amp wiring kit to buy
 Using factory "sharkfin" antenna with new headunit and Sirius xm?? 2015 Tacoma
 2020 Entune - Factory Integration
 2012-15 Tacoma Radio Upgrade; Camera Tips
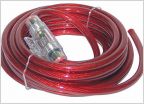 What kind of wiring
removing your interior for sound deadening or other needs.
Discussion in 'Audio & Video' started by 3378jakesr5, Jan 4, 2016.


