

-
Welcome to Tacoma World!
You are currently viewing as a guest! To get full-access, you need to register for a FREE account.
As a registered member, you’ll be able to:- Participate in all Tacoma discussion topics
- Communicate privately with other Tacoma owners from around the world
- Post your own photos in our Members Gallery
- Access all special features of the site
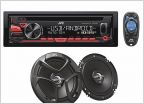 DVD/CD/Bluetooth for 97 tacoma
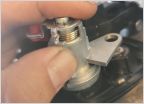 Door Lock Cylinder
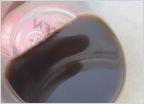 Replacing the fuel filter
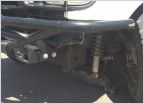 LBJ Failure
 Door Stop replacement?
 Bushing kit for upper mount 5100 first gen? Why does it still unclear after 25 years?
SATOSHI MOD --- 1st gen. write-up (lots of pics)
Discussion in '1st Gen. Tacomas (1995-2004)' started by tacomarotto, May 31, 2012.
Page 8 of 14
Page 8 of 14


