1. Welcome to Tacoma World!

    You are currently viewing as a guest! To get full-access, you need to register for a FREE account.

    As a registered member, you’ll be able to:
    • Participate in all Tacoma discussion topics
    • Communicate privately with other Tacoma owners from around the world
    • Post your own photos in our Members Gallery
    • Access all special features of the site

Someone mentioned to make a build thread.... is this the new age CIA tracking method?

Discussion in '3rd Gen. Builds (2016-2023)' started by BSK, Apr 7, 2020.

  1. Apr 7, 2020 at 8:00 AM
    #1
    BSK

    BSK [OP] Keyboard not responding. Press any key to continue

    Joined:
    Apr 3, 2018
    Member:
    #249320
    Messages:
    778
    Vehicle:
    Trabant 501 Kombi
    Cigarette Lighter Delete
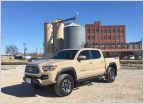
    Saw this little blue puppy at the adoption center:


    Decided that taking it home and parking it would have to come before the first mod:


    Big plans for it once the alignment gets fixed :crapstorm:

    Had pulled during the test drive but I associated that with the crown of the road. Once we get the alignment done (dealerships John Bean alignment machine is broken) Wonder; if they even did an alignment to begin with. The windshield washer fluid bottle wasn't filled either.
    Gotta search the boards for the PDI procedure sheet and see what was supposed to get done and what else was missed.

    Hood Swap thread comes to mind if anyone wants to swap out their hood scoop one for sure!
     
  2. Apr 7, 2020 at 8:01 AM
    #2
    BSK

    BSK [OP] Keyboard not responding. Press any key to continue

    Joined:
    Apr 3, 2018
    Member:
    #249320
    Messages:
    778
    Vehicle:
    Trabant 501 Kombi
    Cigarette Lighter Delete
    Truck pulled to the right badly and the dealers alignment rack was broken. Ended up taking it across the state to another dealer only to be questioned why a truck with 204 miles would need an alignment...


    After that was fixed it was time to get some of these in:


    Hopefully to get installed this weekend.
     
  3. Apr 7, 2020 at 8:02 AM
    #3
    BSK

    BSK [OP] Keyboard not responding. Press any key to continue

    Joined:
    Apr 3, 2018
    Member:
    #249320
    Messages:
    778
    Vehicle:
    Trabant 501 Kombi
    Cigarette Lighter Delete
    After getting all the boxes unpacked

    It was time to unpack and get going with a sticker:


    some key covers:

    Don't hate on the yellow. It will make sense soon.

    a functional addition to the armrest:


    a hitch step:


    mudflaps:


    Tonneau Cover that sadly has some "love stains" on it:


    Gotta see if that comes out with a wash..

    A front bumper guard:


    Some side steps:


    New blurred out tags:


    And the Inaugural hauling trip getting some mulch:


    And there will be more to follow once time allows......
     
  4. Apr 7, 2020 at 8:03 AM
    #4
    BSK

    BSK [OP] Keyboard not responding. Press any key to continue

    Joined:
    Apr 3, 2018
    Member:
    #249320
    Messages:
    778
    Vehicle:
    Trabant 501 Kombi
    Cigarette Lighter Delete
    It was time for some more late night ops:


    wrenching in the dark sucks when you cannot see anything; even worst when your garage is the size of a dog cage:


    And then we have this *hole device:

    Looks like a little snug fit for the cap but it works. Was debating on 3d scanning it into AutoCad and then publishing the files so people can print it at their local 3d shop. Price is little stiff for 22$ but the inventor needs to get paid as well. However its a 1,30$ piece of 3d printed material.

    oh well.. to keep going some LED low beams got added:


    then some high beams:

    looks good in the daytime:


    a sneak peak of the next thing to come:


    as always: once time allows!
     
  5. Apr 7, 2020 at 8:03 AM
    #5
    BSK

    BSK [OP] Keyboard not responding. Press any key to continue

    Joined:
    Apr 3, 2018
    Member:
    #249320
    Messages:
    778
    Vehicle:
    Trabant 501 Kombi
    Cigarette Lighter Delete
    So some major issues started since the last post.

    So the interior dome lights remote key lock stopped working. Apparently the cluster stopped lighting up either when the door was opened etc. Took it back to the dealer and had their MDT work on it. While working on and checking the wiring diagrams that were provided by Toyota he noticed that the BCM was not dumping 12v into the cluster and other control boxes. My wiring diagram from a 2017 model from AllData showed different circuits as well.


    He poked around some more and found other open circuits that didn't make sense. After talking to TACS (or whatever Toyota's shop support line is) they told him that the BCM is most likely bad and needed to get replaced. After replacing the BCM the problem didn't go away so they pulled in a showroom floor unit and did the same checks and the truck exhibited the same issue. Taking more pictures and videos they called TACS again and mentioned their finding and how the wiring diagram doesn't show the other circuit that would power other circuits. TACS pulled one of the same models into their shop and did the same diagnostics and came up with the same results. Long story short there will be a TSB coming out that is related to the wiring diagram being wrong and other diagnostic procedures need to be implemented if someone runs into the same issues.

    However the most revealing part about this whole ordeal is that the roofrack that I had installed caused a leak as well and was dripping onto the roofliner.
    Toyota shop had 20+ hours into etc but I got away very lucky.


    So I am back at my neighbors garage now pulling the old rack and sealing the nut holes....


    Left the truck overnight to sit to inspect the RTV for shrinkage first before moving on with weatherseal tape and the reinstallation of the weatherstripping.
     
  6. Apr 7, 2020 at 8:04 AM
    #6
    BSK

    BSK [OP] Keyboard not responding. Press any key to continue

    Joined:
    Apr 3, 2018
    Member:
    #249320
    Messages:
    778
    Vehicle:
    Trabant 501 Kombi
    Cigarette Lighter Delete
    So my reattached roof drip moldings decided to lift off at interstate speeds; I caught one and rescued it while the other one went AWOL and is MIA.


    So if someone has some takeoffs from their truck that they would like to sell: Let me know please.

    Otherwise it was some cosmetic work for now:


    I am very hesitant to do anything electrical now on this truck due to the issue that it had in my previous post. Not being a daily or even weekly driver makes it worst when it comes to issues since they do not become apparent.
     
  7. Apr 7, 2020 at 8:04 AM
    #7
    BSK

    BSK [OP] Keyboard not responding. Press any key to continue

    Joined:
    Apr 3, 2018
    Member:
    #249320
    Messages:
    778
    Vehicle:
    Trabant 501 Kombi
    Cigarette Lighter Delete
    @Canyonero was paying it forward and send me his two roof weather strip moulding strips free of charge from the Islands of Hawaii to VA. Finally found the time to reinstall them today:


    HUGE THANKS AGAIN TO CANYONERO FOR HELPING A BROTHER OUT!

    Also decided to go ahead and install a homelink interior mirror sourced on ebay with the 10pin connector. Truck came stock with autodimming and 12 pin.


    Installation is fairly straight forward and took some patients and a little bit of tinkering. Do yourself a favor and get the release tools:


    The mirror ordered was 60$ on ebay:


    Stock 12pin auto dimming pin out is shown here:


    Homelink 10pin is here:


    For people searching the interior rearview mirror wire colors below is a chart which I was never able to find on the boards here:

    Original 12pin | Homelink 10pin | Wire color
    3 Ground | 3 or 8 | Black/White
    6 12v ignition | 6 | Pink/Red
    10 12v constant | 10 | Blue

    You will need to slide down the white color square retention block on the connector after releasing it from the mirror to pull the connector cables out. Use the pin release tools in the smallest connector holes to release the pin. Then pull HARD to release; pulling out one pin and reinserting it into the other connector so you only have one cable exposed. You can do this with the battery connected or disconnect the battery and do all three at the same time.


    Existing auto dimming 12 pin connector


    12pin and 10pin side by side


    The "block" shown in both connectors that hold the cable connectors inside the housing. Left white rectangular will need to pushed down by like 2mm and both sides to release the connector once the pin release tool is inserted.


    Release tool pushed all the way in

    Swap your wires with the above chart plug in your replacement mirror and enjoy the savings knowing that you didn't have to spend 140$ on a plug and play mirror. Remember that the smooth side of the cable connector always goes with it facing up.


    Next project will be to install the stock Tacoma Sport front diffuser
     
    This site contains affiliate links for which the site may be compensated.
    #7
  8. Apr 7, 2020 at 8:05 AM
    #8
    BSK

    BSK [OP] Keyboard not responding. Press any key to continue

    Joined:
    Apr 3, 2018
    Member:
    #249320
    Messages:
    778
    Vehicle:
    Trabant 501 Kombi
    Cigarette Lighter Delete
    Had grabbed the front spoiler from a non-offroad truck last year at some point but never got around installing it. Ordered the clips from the dealer and they told me that it wouldn't fit but were still happy to make the sale with their 300% markup on parts.
    My front bull bar developed a rust spot and got replaced for free by the vendor; friend of mine who is in the banking industry needed some mentoring so we ended up up removing the old bull bar, test fitting, cutting the front spoiler and putting everything back together.


  9. Apr 7, 2020 at 8:05 AM
    #9
    BSK

    BSK [OP] Keyboard not responding. Press any key to continue

    Joined:
    Apr 3, 2018
    Member:
    #249320
    Messages:
    778
    Vehicle:
    Trabant 501 Kombi
    Cigarette Lighter Delete
    Sadly the MBPR exhaust that was grabbed had been cut for a short bed truck so I decided to just order a new one from MBPR and it arrived yesterday. Swapped that sucker on in 20mins and kept on going with other stuff like replacing the broken mudflap thanks to @steiner9er . Met up with @Vietguy today and grabbed his Rav4 Blind spot mirror and switched out the drivers side glass. Going to be nice once @Tigers22 makes his way with some TacomaWorld Express delivery which will start the next projects.


  10. Apr 7, 2020 at 8:06 AM
    #10
    BSK

    BSK [OP] Keyboard not responding. Press any key to continue

    Joined:
    Apr 3, 2018
    Member:
    #249320
    Messages:
    778
    Vehicle:
    Trabant 501 Kombi
    Cigarette Lighter Delete
    finally got around all the parts that @Tigers22 and @18quicksand supplied me: LED taillights, Window Rain guards and LED foglights.

    the goodies:


    Pretty nice difference for the tails. Foglights were a breeze to install and took like 5 mins per side going in from the top. Not sure why these took the longest to get on:


    Rain guards are nice to keep the truck cooler in this summer weather:


    Also got talked into getting the minimalist remotes and was impressed by their quality and package design which was over done. =)

     
  11. Apr 7, 2020 at 8:14 AM
    #11
    BSK

    BSK [OP] Keyboard not responding. Press any key to continue

    Joined:
    Apr 3, 2018
    Member:
    #249320
    Messages:
    778
    Vehicle:
    Trabant 501 Kombi
    Cigarette Lighter Delete
    Decided to pull the trigger on DV8 FBTT1-05 bumper last Sunday on Columbus Day Weekend and it was shipped to the east coast and arrived here on Friday.

    • Weight 103 lbs / 46.72 kgs
    • Dimensions 49x17x16 in.


    Packed extremely well from its Mexican factory with expanding foam:

    And even a piece of wood to make it really sturdy!


    The bumper itself came in at roughly 55lbs on garage scale


    The winch mount at around 27lbs


    Thickness of the winch mount is 6.5mm and a lot more thicker than the what is holding the 6 bolts.


    Someone had asked about the mounting pattern:


    Not sure why this is upside down; keeps flipping upon uploading


    Super easy installation for sure


    So which frame reinforcement brackets would fit this setup:


    My power steering relocation brackets were missing at first but we actually taped to the fold on the bumper protection stuff. Don't just rip everything off and trash; make sure the brackets are not in there somewhere.

    Ended up using a spacer as well on the drivers side bolt to get the bracket to clear the cooler lines. Its not mentioned in their instructions but looking closely it can be seen that they elevated the drivers side also to clear lines.


    The bumper has three holes up top to drill a screw through to tighten the bumper snuggly to the bumper. I recommend you tape up the plastic top part of the bumper so it doesn't get scratched up like mine did. Fitment is a little off; I am also slightly lopsided like the ebay pictures if you look super close from the front angle.


    Had measured before and after installing the bumper and the height had not changed for me.


    The wheel liner will be loose so ziptie both sides into the holes shown


    To line up bumper perfectly, I , threw a 2x6 here with a floor jack in the middle of it with everything a smidge tighter than finger tight. This gets you dead nuts level with the truck, and then you can change height with the jack, and get fore aft/ side to side/ and overall angle adjustment. Looks like you may need to remove the factory skid so you’ll have a flat surface there. I have an aftermarket skid plate so it’s easier. Don’t tighten bolts until you’re dialed in.


    Had a second hand to install the bumper but a motorcycle/atv jack will work as well for doing the installation.

    As far as strength, I don’t see how this bracket is any more/ less likely to tweak frame than any others that are commercially available. If concerned, it would be easy to tack it after it’s all lined up perfectly, then weld the mounts to bumper/ winch carrier and possibly throw in some gusseting?[/QUOTE]

    Most other bumpers had some sort of frame tie in that would allow the "load" to be transferred to the frame with some sort of gusseting. The current design of the 90 degree angle bracket wouldn't allow any gussets to be installed since it protrudes past the 3 bolts on each side.

    Like:
    https://www.tacomaworld.com/threads...rmarket-bumper-reinforcement-brackets.612276/
    or
    https://www.tacomaworld.com/threads...t-frame-support-bracket-install-guide.467667/

    The C4 might be modifiable by cutting down the lower lip and welding it onto this bumper but my welding skills aint that professional.

    Had ordered this dual light bar from the jungle shop:
    https://www.amazon.com/gp/product/B07GTL2CTD


    While installing I dropped the bolts and washers in the crevice for the bar mount so make sure to stuff some rags in there so you don't need to borrow someone elses hands and fingers that are small.

    This also brought up another flaw of this bumper which is that the crevice is not painted at all and collects water. When using the air gun trying to get the bolts out I had rusty water spray everywhere.


    So far its been buyers remorse for this bumper as far as design/engineering goes to make it actually function as a winch bumper. Will try to take some daytime pictures of everything. Plate is also just ziptied since the bumper didn't have pre drilled plate holes.

    Needed to treat thebumper around the light bar extension so the rust doesn't bleed out like on mine:


    This is the rust after 6 weeks of weather in Virginia without any snow exposure.
     
    This site contains affiliate links for which the site may be compensated.
    #11
  12. Apr 7, 2020 at 8:32 AM
    #12
    BSK

    BSK [OP] Keyboard not responding. Press any key to continue

    Joined:
    Apr 3, 2018
    Member:
    #249320
    Messages:
    778
    Vehicle:
    Trabant 501 Kombi
    Cigarette Lighter Delete
    Some deer decided to jump into front of the truck as I was going to the firehouse for Thanksgiving resulting in a 5700$ damage bill sadly.

    IMG_20191124_175005846.jpg IMG_20191124_195001124.jpg IMG_20191124_175728946.jpg IMG_20191125_080721423_HDR.jpg IMG_20191125_080544252_HDR.jpg IMG_20191125_080746669_HDR.jpg IMG_20191125_080632550_HDR.jpg IMG_20191125_080551033.jpg IMG-20191220-WA0021.jpg IMG_20200103_151633166.jpg

    Bodyshop rebuilt it back to a Sport model front instead of a TRD
    IMG_20200102_170949937.jpg

    Needless to say the deer didn't make it either.

    FB_IMG_1575829002842.jpg
     
    Last edited: Apr 7, 2020
  13. Apr 7, 2020 at 8:38 AM
    #13
    BSK

    BSK [OP] Keyboard not responding. Press any key to continue

    Joined:
    Apr 3, 2018
    Member:
    #249320
    Messages:
    778
    Vehicle:
    Trabant 501 Kombi
    Cigarette Lighter Delete
    Added a tent and some rifle sticker for good measures:

    IMG_20200216_163539583_HDR.jpg IMG_20200216_163600561_HDR.jpg IMG_20200329_141031.jpg
     
  14. Apr 7, 2020 at 8:49 AM
    #14
    Clearwater Bill

    Clearwater Bill Never answer an anonymous letter

    Joined:
    Oct 11, 2014
    Member:
    #140097
    Messages:
    22,620
    Gender:
    Male
    First Name:
    Billy
    Largo Florida
    Vehicle:
    '13 5 lug AC w/convenience package
    A few OE parts from fancy trucks
    Bumper 2 certainly looked better than that other thing!:thumbsup:
     
  15. Apr 7, 2020 at 9:12 AM
    #15
    BSK

    BSK [OP] Keyboard not responding. Press any key to continue

    Joined:
    Apr 3, 2018
    Member:
    #249320
    Messages:
    778
    Vehicle:
    Trabant 501 Kombi
    Cigarette Lighter Delete
    duh.. yeah the tyger wasn't bad but kept getting caught on my favorite obstacle on the trail.
     
  16. Apr 7, 2020 at 1:49 PM
    #16
    Clearwater Bill

    Clearwater Bill Never answer an anonymous letter

    Joined:
    Oct 11, 2014
    Member:
    #140097
    Messages:
    22,620
    Gender:
    Male
    First Name:
    Billy
    Largo Florida
    Vehicle:
    '13 5 lug AC w/convenience package
    A few OE parts from fancy trucks
    A little to bulky for my taste. Sorta Mad Max in a way.

    The replacement was much cleaner.

    Glad you are enjoying your truck. Well, other than big game hunting that is......
     
    BSK[QUOTED][OP] likes this.
  17. Apr 17, 2020 at 3:38 AM
    #17
    BSK

    BSK [OP] Keyboard not responding. Press any key to continue

    Joined:
    Apr 3, 2018
    Member:
    #249320
    Messages:
    778
    Vehicle:
    Trabant 501 Kombi
    Cigarette Lighter Delete
    Negative did not, deer jumped down from the side of an incline and the radar wouldn't have seen it.
     
  18. May 18, 2020 at 6:11 AM
    #18
    BSK

    BSK [OP] Keyboard not responding. Press any key to continue

    Joined:
    Apr 3, 2018
    Member:
    #249320
    Messages:
    778
    Vehicle:
    Trabant 501 Kombi
    Cigarette Lighter Delete
    Last edited: Jun 5, 2020
  19. Jun 5, 2020 at 6:32 PM
    #19
    BSK

    BSK [OP] Keyboard not responding. Press any key to continue

    Joined:
    Apr 3, 2018
    Member:
    #249320
    Messages:
    778
    Vehicle:
    Trabant 501 Kombi
    Cigarette Lighter Delete
    Thanks to @18quicksand for some Marathon Cordura seat covers, AJT trim rings, Meso interior lights and fuse cover and some other goodies:
    IMG_20200606_124429.jpg IMG_20200606_102233.jpg IMG_20200606_102230.jpg IMG_20200605_152835.jpg IMG-20200605-WA0031.jpg IMG-20200605-WA0030.jpg
     
    Last edited: Jun 6, 2020
  20. Nov 5, 2020 at 4:37 AM
    #20
    BSK

    BSK [OP] Keyboard not responding. Press any key to continue

    Joined:
    Apr 3, 2018
    Member:
    #249320
    Messages:
    778
    Vehicle:
    Trabant 501 Kombi
    Cigarette Lighter Delete
    Had gotten a nasty impact on the front subframe dimple while wheeling which is an exposed body point that is not covered by the stock TRD OR "skid plates".


    The plates arent honestly true skid anything and feel like a thick metal can flattened out:

    PXL_20201105_122214947.jpg PXL_20201105_122237227.jpg

    Decided to go with the MobTown Skidplates when they had a sale for the 4th of July. Ended up driving to Delaware to grab it from their shop on a Friday and was surprised how it came unpainted. All the website pictures showed it painted black and neither did it say anywhere that they were bare. Little disappointed about that but the quality so far appears to be excellent nonetheless.
    PXL_20200925_124410635.jpg PXL_20200925_175608569.jpg PXL_20200925_175622647.jpg

    Decided to give it 3 coats of rattle can paint: Brown Primer, Black rubberized sub coating, blue enamel final coat on the "impact" side.

    PXL_20201003_122752456.jpg PXL_20201003_122758090.jpg PXL_20201003_130034304.jpg PXL_20201003_130114832.jpg PXL_20201003_130118534.jpg PXL_20201003_162951122.jpg PXL_20201003_205403779.jpg

    Third Gen needs some subframe brackets removed that are holding the tin pans in place so that threw me off at first. The instructions on MobTowns website cover the full skidplate setup and were a bit confusing.

    Installation was easier with the ATV lift when doing it without someone elses assistance, packed garages do not help.

    PXL_20201104_203207861.jpg PXL_20201104_204604611.jpg PXL_20201104_205033237.jpg PXL_20201104_212922192.jpg PXL_20201104_214350941.jpg

    In the end this is the hardware and parts left over in addition to the pans:
    PXL_20201104_215749892.jpg
     
    Dbarffish likes this.

Products Discussed in

To Top