1. Welcome to Tacoma World!

    You are currently viewing as a guest! To get full-access, you need to register for a FREE account.

    As a registered member, you’ll be able to:
    • Participate in all Tacoma discussion topics
    • Communicate privately with other Tacoma owners from around the world
    • Post your own photos in our Members Gallery
    • Access all special features of the site

stronghammer's driveway king, now on 35s and 4.88s now sold..

Discussion in '2nd Gen. Builds (2005-2015)' started by stronghammer, Jan 15, 2016.

  1. Jan 15, 2016 at 4:35 PM
    #1
    stronghammer

    stronghammer [OP] STTDB

    Joined:
    Jan 8, 2016
    Member:
    #174366
    Messages:
    35,137
    Gender:
    Male
    First Name:
    Scotty
    Huntsville, Alabama
    Vehicle:
    2011 MGM DCSB TRD Sport 4WD
    Listed for sale on facebook. 20.5k STRONGHAMMER
    Name Origin: Inheritance Book Series, Character: Roran Garrowson, nickname: stronghammer

    Welcome, this is my build thread for my 2011 MGM DCSB Tacoma Sport 4WD.

    Thankful for Tacoma World and all the people in it for motivation, inspiration, assistance, and just like-minded friends.

    Pictures are organized by modification type (interior/exterior/suspension/armor/miscellaneous) below. Any and all criticisms and compliments welcome, enjoy!

    Current mods:
    Interior:
    • Interior LED Lights - Thanks to @MedlinAround Kit Here
    • Gauge Bezels, Tweeter Bezels, Vent Trim, and Bottom of Shift Knob Painted Blue
    • Door Panel Pieces for Window Controls Painted Black
    • Center Console Organizer Bin from Target
    • Wet Okole Full Piping Seat Covers, Black with Cobalt Blue Piping
    • Treat-A-Dog Pup Protector for the backseat to carry my dog
    • Weather Tech Floor Liners in Black
    Communications:
    • Cobra 19 DX IV Compact 40 Channel 4 Watt CB Radio with RF Gain
    • FireStik II FS4-BB 4' CB Antenna Easy Tune Blue
    • 18' RG-58A/U Coaxial Cable With Pl-259 Connectors
    • Firestik SS-3H Heavy Duty Stainless Steel Antenna Spring
    • Rectangular External Communications Speaker for Ham Radio, CB & Scanners
    • Firestik K-4A Stud with Screw-On Coaxial Termination for Antenna Mirror Mounts
    • FireStik K-1A Push-n-Twist quick disconnect
    • @Shmellmopwho's Driver Side CB Antenna Mount
    Exterior:
    • Black Badges and Black Grill Emblem
    • Removed Fender Flares
    • Removed Mud Flaps
    • Diff Breather Relocate
    • Redline Tuning Hood Struts
    • Cali Raised Side Projecting Ditch Lights and Brackets
    • SOS Concepts Bed Rack
    • Tacoma Bed Mat
    • Black CVT Trasharoo
    • Stock Exhaust Cut Above Axle and Rerouted
    • @Bentrodder Bed Supports
    • Fenders trimmed 1.5" all around
    • Extreme CMC
    Suspension:
    • Front:
      • Total Chaos Uniball UCAs
      • Sway Bar Removed
      • King 2.5" RR Extended Travel Coil-over Shocks w/ 700# Springs from DSM 25001-119-E (removed)

        • Extended Length: 21.687 Inch
        • Collapsed Length: 16.750 Inch
        • (installed at approximately 115k)
      • Dobinsons MRR front with 730# springs
      • 4" SS Extended Brake Lines
    • Rear:
      • OME 2.75" Lift Dakar Leaf Pack w/ AAL
      • U-Bolt Flip (Modified Low-Range Flip Kit)
      • Wheeler's Super Bumps Bumpstops
      • King 2.5" RR Extended Travel Rear Shocks from DSM 25001-121-Dakar (removed)
        • Extended Length: 25.54 Inch
        • Collapsed Length: 17.08 Inch
        • (installed at approximately 115k)
      • BAMF Shock Relocation and Bilstein 5125 14" Shocks
      • 4" SS Extended Brake Lines
    • Performance:
      • ARB RD129 Air Locker in rear
      • ECGS 4.88 Gears installed at 153,910 miles.
    • Wheels & Tires:
      • SCS Ray10 17x8.5 Matte Black Wheels
      • 35/12.5/17 Treadwright Guard Dogs (Installed 153,430)
    Armor:
    • Custom Rock Sliders by Taylor Welding, LLC (Instagram: taylor_weldingllc)
    • Custom Hybrid Front and Rear High Clearance Bumpers by Hammock Welding and Fabrication
      • (4) Blue 3/4" Reteck D Ring Shackle, 9,500 Lb Capacity w/ Daystar Isolators
    • SOS Concepts Skid Plates
    Maintenance:
    • Oil Change, Tire Rotation/Balance, and Alignment ~every 5k miles
    • ECGS Bearing Replacement
    • BFGs put on at 108k miles
    • Front Diff Fluid Replaced 116k miles
    • Replaced Alternator October 2017 after Black Mountain
    • At ~150k miles:
      • Replaced Driver Side CV Axle
      • Replaced Passenger Side CV Axle
      • Replaced Inner and Outer Tie Rods (Pass and Driver)
      • Front Diff Fluid Replaced
      • Spark Plugs Replaced
    • Replaced Driver and Passenger Wheel Bearings/Hub Assemblies at about 151k miles. Thanks @BamaToy1997!!
    • Guard Dogs put on at 153,430 miles
    • Diff Fluids changed 153,910, and again 500 miles later with gear break in.
    • Drum brake shoes changed at 153,910
    • Energy Suspension Radiator Bushings
    Other:
    • Hi-Lift Jack w/ Base Plate, Handle Keeper, and Slider Adapter
    • Tow Strap
    • Ratchet Straps
    • SuperWinch Tiger Shark 9500 SR
    • ARB CKMP12 Portable Air Compressor
    • EZ Tire Deflator (gift from TWSS)

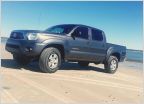
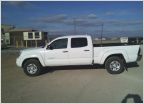
    1. How it looked when I got it. June, 2015.
    IMG_0814.jpg

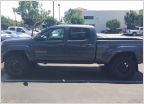
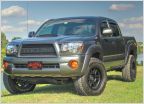
    2. How the truck currently sits:
    93CAE617-434B-43F2-826B-CD41DCBC1C1D.jpg
    8FA44C08-D342-4F9B-A8D0-FBDC536504DF.jpg

    3. Some photos:
    AA9B42EF-4B61-4524-B8D1-BE025AEEE1F4.jpg
    GOPR0199.jpg
    IMG_8037.jpg
    IMG_8315.jpg
    20181104_124915.jpg
    DSC_0110.jpg
    DSC_0073.jpg
    20180630_184314.jpg
    20180630_183550.jpg
    20170925_141107.jpg
    20170917_113135.jpg
    20170917_111815.jpg
    20170603_132618.jpg
    20170603_124937.jpg
    20170603_124945.jpg

    IMG_1586.jpg
    20229215_10155566517764108_4005083708240786067_n.jpg
    20161210_114801.jpg
    IMG_4394.jpg
    DSC_1125.jpg
    DSC_1049.jpg
    Attach0 (5).jpg

    My Toyota History:

    When I was 16 years old my dad bought me a 1989 Toyota Pickup with 189k on it. It was already lifted 3" and I quickly put 35" Hankook Dynapro MTs on it and removed the fender flares. Here is the earliest photo I could find of it:
    27821_415657724107_6369359_n.jpg

    I then decided it was time to cut it. We cut 4" out of the fenders and 16.5" out of the bed. I also painted the wheels, side bars, and bumpers black.
    27821_415657654107_7551181_n.jpg
    156077_10150096214149108_4089122_n.jpg
    safari-app-wallpaper-2.jpg

    I used to wheel the heck out of that thing and actually almost lost it once when the ground gave way beneath me:
    28644_419091964107_6576580_n.jpg
    74690376.jpg

    I longed for a solid axle Toyota since I was 16 and I ended up finding a guy who had a 1985 4Runner for sale, and we ended up straight trading my truck for his 4Runner.
    269370_10151437287759108_144755361_n.jpg

    This thing was a ton of fun, but I never had the funds to do anything with it. It came with the tube doors and front and rear bumpers and sliders on it so I just left it alone and played with it as it was.
    536848_10151606046204108_1459305705_n.jpg
    10003581_10152351114754108_520532724_o.jpg

    I drove this around for a couple of years before I ended up buying my current 2011 Tacoma. So I know it's a short history (3 vehicles by 25 years old), but it's always been a 4WD and it's always been a Toyota for me.
     
    Last edited: Jul 17, 2020
  2. Feb 26, 2016 at 3:29 PM
    #2
    stronghammer

    stronghammer [OP] STTDB

    Joined:
    Jan 8, 2016
    Member:
    #174366
    Messages:
    35,137
    Gender:
    Male
    First Name:
    Scotty
    Huntsville, Alabama
    Vehicle:
    2011 MGM DCSB TRD Sport 4WD
    INTERIOR

    LED interior and tag lights installed thanks to @MedlinAround go buy the super easy to use kit from here!
    IMG_1325.jpg

    Painted my gauge bezels blue
    IMG_0294.jpg

    Painted vent trim, door speaker bezels, and the chrome piece on the bottom of the shift knob blue. Also, removed the chrome piece that surrounded the shift knob because it sucked to paint! Window control panel pieces on the doors painted black.
    IMG_0361.jpg

    My Patch Collection on my Headliner
    20170308_062306.jpg
    20170308_062313.jpg


    Wet Okole Seat Covers, Full Piping Black with Cobalt Blue. These take about 1.5-2 hours to install by yourself, but they are so nice.
    20161026_165655.jpg
    20161026_173227.jpg
    20161026_173232.jpg
    20161026_182405.jpg
    20161026_182416.jpg

    Treat-A-Dog Pup Protector:
    20161028_165757.jpg

    Weather Tech floor mats installed. I love these things.


    Reserved for future interior updates.
     
    Last edited: Mar 8, 2017
  3. Mar 5, 2016 at 9:05 AM
    #3
    stronghammer

    stronghammer [OP] STTDB

    Joined:
    Jan 8, 2016
    Member:
    #174366
    Messages:
    35,137
    Gender:
    Male
    First Name:
    Scotty
    Huntsville, Alabama
    Vehicle:
    2011 MGM DCSB TRD Sport 4WD
    EXTERIOR

    Removed Fender Flares:
    image2 (2).jpg

    Redline Hood Struts:
    IMG_0280.jpg

    Got me an ARE camper shell! Awesome Craigslist find!
    20160624_102617.jpg
    And I got it colormatched:
    13932246_10154409574409108_598902824_o.jpg

    Mounted my Hi-Lift Jack with @Shmellmopwho's mounts and slider adapter. Great products.
    20160624_151851.jpg

    Snorkel
    20160905_183438.jpg

    This is the install thread that I followed, but I did not cut the bracket, I simply "bent" it back to allow for enough room by being STRONGHAMMER (I used a flat piece of metal and a hammer to beat the hell out of it):
    https://www.tacomaworld.com/threads/how-to-airflow-snorkel-install.443155/

    and snorkel install process pics:
    Cali Raised Ditch Lights and Brackets:
    Attach0 (1).jpg
    Attach0.jpg

    Ditch Lights + Headlights:
    [​IMG]

    Ditch Lights Only:
    [​IMG]

    My new Leer XL100 Camper Shell with sliding front window I got to replace the ARE I had.
    [​IMG]
    [​IMG]
    [​IMG]
    [​IMG]

    20$ Tacoma Bed Mat
    20161229_161713.jpg

    Prinsu Cabrac and Toprac
    20170115_161334.jpg
    20170115_161403.jpg
    20170115_161311.jpg


    Reserved for future exterior updates.
     
    Last edited: Jun 1, 2017
    Mike likes Tacos and ChadsPride like this.
  4. Mar 5, 2016 at 9:13 AM
    #4
    stronghammer

    stronghammer [OP] STTDB

    Joined:
    Jan 8, 2016
    Member:
    #174366
    Messages:
    35,137
    Gender:
    Male
    First Name:
    Scotty
    Huntsville, Alabama
    Vehicle:
    2011 MGM DCSB TRD Sport 4WD
    SUSPENSION & WHEELS/TIRES

    Installed 285/70/17 BFGoodrich KO2's, 3" Rough Country Lift, and 1.25" Spydertraxx wheel spacers, and painted wheels.
    Tacoma2.jpg image1(2).jpg

    Total Chaos UCAs Installed!
    Total Chaos UCAs.jpgIMG_1396.jpg

    OME Dakar Leaf Springs:
    IMG_0378.jpg
    IMG_0380.jpg

    Installed SCS Ray10 17x8.5 Matte Black Wheels and removed spacers:
    IMG_0411.jpg

    Low Range U-Bolt Flip Kit Installed:
    Attach0.jpg

    King's 2.5" RR Rear Shocks Installed, Low Range U-Bolt Flip Kit did not work with the shock on the passenger side so had to modify the plate so that it would work. Here are the modified plates:
    13918900_10154409573579108_1154081882_o.jpg
    13950673_10154409573574108_1987737541_o.jpg
    13951034_10154409573964108_1632733886_o.jpg

    Here is the wonderful King's that I put on!
    Before (Rough Country Shock):
    Attach0 (5).jpg
    After:
    Attach0 (10).jpgAttach0 (12).jpg
    Attach0 (6).jpg
    Attach0 (7).jpg

    King 2.5" OEM Replacement Coilover Shocks with RR Installed
    Attach0 (14).jpg
    Attach0 (16).jpgAttach0 (9).jpgAttach0 (17).jpg

    4" SS Extended Brake Lines Installed
    Attach0 (5).jpgAttach0 (6).jpgAttach0 (7).jpg

    Upgraded to 35/12.5/17 Treadwright Guard Dogs and trimmed fenders
    20180630_184314.jpg

    Reserved for future suspension updates.
     
    Last edited: Jul 2, 2018
  5. Mar 5, 2016 at 2:11 PM
    #5
    stronghammer

    stronghammer [OP] STTDB

    Joined:
    Jan 8, 2016
    Member:
    #174366
    Messages:
    35,137
    Gender:
    Male
    First Name:
    Scotty
    Huntsville, Alabama
    Vehicle:
    2011 MGM DCSB TRD Sport 4WD
    ARMOR

    Sliders by Taylor Welding (256-738-7886). Local Alabama guy.
    IMG_1384.jpg12821422_1717155345186801_1073945639190129389_n.jpg 12803174_1717155355186800_809464338285241707_n.jpg

    Custom Front Hybrid Bumper by Hammock Welding & Fabrication
    20170528_143141.jpg
    IMG_20170528_153825_156.jpg

    Custom High Clearance Rear Bumper by Hammock Welding & Fabrication
    IMG_20170528_153825_159.jpg
    20170528_143039.jpg


    Reserved for bumpers/armor updates.
     
    Last edited: May 30, 2017
    gilligoon, bohpoli and ChadsPride like this.
  6. Mar 5, 2016 at 4:23 PM
    #6
    stronghammer

    stronghammer [OP] STTDB

    Joined:
    Jan 8, 2016
    Member:
    #174366
    Messages:
    35,137
    Gender:
    Male
    First Name:
    Scotty
    Huntsville, Alabama
    Vehicle:
    2011 MGM DCSB TRD Sport 4WD
    MISCELLANEOUS

    Did a flex test just to see what I was capable of at this point. (Rough Country lift is all that's installed at this point)
    IMG_0205.jpg
    IMG_0201.jpg

    Flex test at same spot with current suspension setup:
    20160831_172429.jpg
    20160831_172442.jpg

    Artsy Fartsy photo
    IMG_0235.jpg

    Riding in Birmingham:
    Riding at Lakeshore in Birmingham:

    Riding at County Line in Arab:

    Riding at The Slab in Montevallo:
    Riding at Choccolocco in Jacksonville AL:
    Alabama Tacoma World at Top of the World:
    https://www.youtube.com/watch?v=oZlFMr8cwL8&t=9401s

    At Stoney Lonesome in Alabama:
    Wheeling at AOP in South Pittsburg, Tennessee:


    Reserved for who knows what.
     
    Last edited: Jul 24, 2017
    AbePDX, markelhof, Dawson08 and 2 others like this.
  7. Mar 5, 2016 at 10:51 PM
    #7
    justinalldredge19

    justinalldredge19 Well-Known Member

    Joined:
    Jul 5, 2013
    Member:
    #107672
    Messages:
    2,331
    Gender:
    Male
    First Name:
    Justin
    Arab, Alabama
    bhlm, fog light mod too!
     
    ChadsPride likes this.
  8. Mar 6, 2016 at 6:34 AM
    #8
    stronghammer

    stronghammer [OP] STTDB

    Joined:
    Jan 8, 2016
    Member:
    #174366
    Messages:
    35,137
    Gender:
    Male
    First Name:
    Scotty
    Huntsville, Alabama
    Vehicle:
    2011 MGM DCSB TRD Sport 4WD
    I don't feel comfortable doing the BHLM by myself, I just know I'm going to screw something up, and you mean the fog light anytime mod?
     
    ChadsPride likes this.
  9. Mar 6, 2016 at 6:39 AM
    #9
    justinalldredge19

    justinalldredge19 Well-Known Member

    Joined:
    Jul 5, 2013
    Member:
    #107672
    Messages:
    2,331
    Gender:
    Male
    First Name:
    Justin
    Arab, Alabama
    It's WAY easier than you think, just follow a How-too thread on here and take your time. And yes fog light anytime.
     
    ChadsPride likes this.
  10. Mar 6, 2016 at 6:51 AM
    #10
    stronghammer

    stronghammer [OP] STTDB

    Joined:
    Jan 8, 2016
    Member:
    #174366
    Messages:
    35,137
    Gender:
    Male
    First Name:
    Scotty
    Huntsville, Alabama
    Vehicle:
    2011 MGM DCSB TRD Sport 4WD
    I just don't trust myself putting a headlight in the oven! haha!
     
    ChadsPride, 4x4Banger and PvilleJohn like this.
  11. Mar 19, 2016 at 3:05 AM
    #11
    Demeat50

    Demeat50 Well-Known Member

    Joined:
    Dec 23, 2014
    Member:
    #144817
    Messages:
    128
    Gender:
    Male
    Washington, DC
    Vehicle:
    15 Double Cab, Full Bed, TRD Pro
    Looks nice. What r your plans for the fender flares? If u put bushwhackers in do you have to cut the fender?
     
    ChadsPride likes this.
  12. Mar 19, 2016 at 7:34 AM
    #12
    stronghammer

    stronghammer [OP] STTDB

    Joined:
    Jan 8, 2016
    Member:
    #174366
    Messages:
    35,137
    Gender:
    Male
    First Name:
    Scotty
    Huntsville, Alabama
    Vehicle:
    2011 MGM DCSB TRD Sport 4WD
    I don't plan to do fender flares at all. I personally really dislike bushwackers. One day when it becomes a full time toy I will probably cut the fenders out and use the holes as a template.
     
    ChadsPride likes this.
  13. Mar 19, 2016 at 5:46 PM
    #13
    Demeat50

    Demeat50 Well-Known Member

    Joined:
    Dec 23, 2014
    Member:
    #144817
    Messages:
    128
    Gender:
    Male
    Washington, DC
    Vehicle:
    15 Double Cab, Full Bed, TRD Pro
    I hear you. Wish there was something between the two. The stock plastic fender flares just don't do it for me. Should just take mine off too. Did you have to do anything to the screw holes to keep them from rusting?
     
    ChadsPride likes this.
  14. Mar 29, 2016 at 11:29 AM
    #14
    stronghammer

    stronghammer [OP] STTDB

    Joined:
    Jan 8, 2016
    Member:
    #174366
    Messages:
    35,137
    Gender:
    Male
    First Name:
    Scotty
    Huntsville, Alabama
    Vehicle:
    2011 MGM DCSB TRD Sport 4WD
    I'm sorry I completely forgot to ever reply to this. No I didn't do anything. No paint was missing or anything from the holes, they were factory painted and still in great shape so shouldn't see any rust issue. Dirt/mud/water do come through them and leave stupid looking streaks down the side of the truck, but all can be washed off.
     
    ChadsPride likes this.
  15. Apr 12, 2016 at 4:53 PM
    #15
    stronghammer

    stronghammer [OP] STTDB

    Joined:
    Jan 8, 2016
    Member:
    #174366
    Messages:
    35,137
    Gender:
    Male
    First Name:
    Scotty
    Huntsville, Alabama
    Vehicle:
    2011 MGM DCSB TRD Sport 4WD
    Decided my accent color will be blue on this truck, so painted the gauge bezels blue. Speaker and vent bezels to come in the future.
    Before:
    IMG_0285.jpg
    After:
    IMG_0294.jpg
     
    Last edited: Apr 14, 2016
    ChadsPride likes this.
  16. Apr 15, 2016 at 5:48 PM
    #16
    stronghammer

    stronghammer [OP] STTDB

    Joined:
    Jan 8, 2016
    Member:
    #174366
    Messages:
    35,137
    Gender:
    Male
    First Name:
    Scotty
    Huntsville, Alabama
    Vehicle:
    2011 MGM DCSB TRD Sport 4WD
    Painting Door Speaker Bezels

    To remove your door panel remove the two screws in the door handles as shown:
    IMG_0301.jpg
    IMG_0300.jpg

    then simply pop this piece off:
    IMG_0302.jpg
    IMG_0303.jpg

    push the center of this pin to pop it out:
    IMG_0305.jpg

    then use a small flat head screw driver to remove the window controls and disconnect the connector on the back like so:
    IMG_0307.jpg
    IMG_0308.jpg

    simply pull the door panel off by starting at the front seam where you popped the little black pin out and go around the bottom of the door and back up. The door panel will just pop out and then you can lift it off of the window seal. You will then reveal the backside of your speaker cover and mine looked like this:
    IMG_0309.jpg

    You can pop out the "screen" by just pushing on it, but removing the bezel is a bit more difficult. If yours is like mine the green stuff is some kind of glue or epoxy holding it on, and you also have the two clips holding it on. GENTLY squeeze the two clips together and then you basically have to "break" the bezel away from the green stuff to remove it. Yay now you can paint it!

    For reinstall just follow the steps backwards! I used a small amount of super glue to reattach the speaker bezel where the "green glue" was holding it. THE PASSENGER SIDE IS EXACTLY THE SAME PROCESS.

    Here is the finished product of mine:
    IMG_0316.jpg
     
    ChadsPride, Pirhett and TheTacoma like this.
  17. Apr 15, 2016 at 6:02 PM
    #17
    stronghammer

    stronghammer [OP] STTDB

    Joined:
    Jan 8, 2016
    Member:
    #174366
    Messages:
    35,137
    Gender:
    Male
    First Name:
    Scotty
    Huntsville, Alabama
    Vehicle:
    2011 MGM DCSB TRD Sport 4WD
    Painting the gauge bezels:

    I recommend removing the bezels from the backside so that requires taking apart your dash. Some people use a flat head screw driver and pry the bezels out (I did it my first time) but that's the easy way to risk breaking them because they are cheap plastic. I broke mine my first time and had to order new ones from Toyota. I guess the good news is you CAN get new bezels from Toyota for like 45$ if you majorly screw yours up or break them, but I'm going to show you how to do it without breaking them.

    First pull up the trim along your door seam (it just pulls up) and the piece by your e-brake, it has two metal clips right beside the door seam that hold it in and you can pop it out of those and just pull it out of your way. There is then a 10mm bolt behind it in the lower corner of your dash you need to remove:
    IMG_0324.jpg

    then remove the 10mm bolt over to the right above your gas pedal behind the fold down flap:
    IMG_0323.jpg

    that is the only 2 bolts holding the lower dash part on. You then need to simply pull out the "tray" that is above the second bolt you pulled, it should just pop out. It is held in by yellow clips like this one on it's backside:
    IMG_0319.jpg

    then that lower dash piece should just pull out, you don't need to unplug any of the wires. For the upper dash piece it is only held in by two black push pins above the gauges that are similar to the one in the door panels, simply push the small piece in the middle and they will pop out.
    IMG_0325.jpg

    the gauge portion of the dash will now pull out. The backside looks like this:
    IMG_0311.jpg

    You then just need to remove the bezels my releasing the clips on the backside, mine are shown in blue:
    IMG_0310.jpg

    IMPORTANT: The two side bezels are not interchangeable!!! Keep up with which one goes on which side just to avoid confusing yourself and causing a headache later.
     
    ChadsPride, Pirhett and TheTacoma like this.
  18. Apr 16, 2016 at 10:05 AM
    #18
    TacoMan33

    TacoMan33 The little idiot that could

    Joined:
    Oct 6, 2015
    Member:
    #166006
    Messages:
    195
    Gender:
    Male
    First Name:
    David
    Texas
    Vehicle:
    2006 PreRunner 4.0 V6 SR5 ACLB
    JBA C/B | Apline door speakers | Kenwood radio
    Thanks man. Thill keep me from breaking stuff
     
    ChadsPride and stronghammer[OP] like this.
  19. Apr 16, 2016 at 10:15 AM
    #19
    ODNAREM

    ODNAREM MEMBER Of The Church Of @ODNAREM

    Joined:
    Feb 28, 2015
    Member:
    #149762
    Messages:
    41,292
    Gender:
    Male
    First Name:
    Ron
    Huntington Beach,CA.
    Vehicle:
    2012 TRD Sport Prerunner
    TRD catback exhaust,FJ Cruiser trail team wheels,BFG All Terrain K02 tires,Grillcraft front grill,Pelfreybilt IFS/Mid skids,sliders,standard rear bumper,Total Chaos bed stiffeners.TRD Pro Bilstein front/rear suspension.
  20. Apr 16, 2016 at 12:12 PM
    #20
    TacoMan33

    TacoMan33 The little idiot that could

    Joined:
    Oct 6, 2015
    Member:
    #166006
    Messages:
    195
    Gender:
    Male
    First Name:
    David
    Texas
    Vehicle:
    2006 PreRunner 4.0 V6 SR5 ACLB
    JBA C/B | Apline door speakers | Kenwood radio

Products Discussed in

To Top