1. Welcome to Tacoma World!

    You are currently viewing as a guest! To get full-access, you need to register for a FREE account.

    As a registered member, you’ll be able to:
    • Participate in all Tacoma discussion topics
    • Communicate privately with other Tacoma owners from around the world
    • Post your own photos in our Members Gallery
    • Access all special features of the site

The Island of Misfit Toys: Randomness/Build Thread

Discussion in '3rd Gen. Builds (2016-2023)' started by TuRDLYFE, Nov 30, 2019.

  1. Nov 30, 2019 at 12:46 PM
    #1
    TuRDLYFE

    TuRDLYFE [OP] Well-Known Member

    Joined:
    Nov 9, 2019
    Member:
    #310230
    Messages:
    1,480
    An over-taxed town, county, and state
    Vehicle:
    2020 AG TRD Pro 6MT
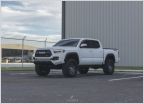
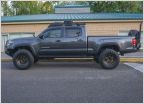
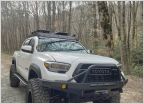
    Hey TW. I haven't been here long, but buying this truck so far has been an awesome experience. I thought my GTi was a money pit, then my Ranger, then my Gen Coupe... I had no idea. So far, I have found that this truck stares at me in a way that is constantly yearning to consume my hard earned cash. With not a dime in my pocket, but my savings and plastic-based promises to creditors footing the bill, this truck is getting all that she deserves.

    So far, my list is growing at an alarming rate. Here is where I am so far. Things really got out of control fast and I'm totally pleased about that fact :burnrubber:

    Graphics Package // BF Goodrich K02 (285/75R16) // UpTop Overland Bravo with Grab Handles and 40" BD S8 // Genuine Toyota Tailgate Remote Lock // SP-9100 on Power Tray w/Remote Clutch Reservoir and Expedition Essentials Sunglasses Holder Mount // Redline Hood Struts // Genuine Toyota Console Safe // Custom Clutch Accumulator Delete // Tailgate Seal // Pace Edwards UltraGroove Metal Tonneau // SSO Slimline Hybrid with Stage II Kit and Rigid SR-20 // WARN 10-S Platinum Synthetic with Remote Mounting Kit // Genuine Toyota Bed Lighting Kit // Tailgate Inserts // Door Edge Guards // WARN Epic Shackles with Infinite Rule Locking Pins // BAMF Bumper Reinforcement Brackets

    I will be posting here periodically to show the progress of my build (and impending financial doom). Penny for your thoughts?

    Switch Pros 9100 install and BS thread

    Switch Pros 9100 install and BS thread (finished product)

    MT Accumulator Delete Mod (ADM) and BS Thread

    New tires for my TRDPro 6 speed manual stock


    UpTop Overland Bravo Rack Installed

    Redline Tuning Hood Struts Installed

    OEM Remote Tailgate Lock Actuator Installed

    OEM Console Safe Installed

    Pace Edwards UltraGroove Metal bed cover Installed

    ARB CKMTA12 Installed in Driver's Bedside (Part I - Cutting/Mounting)

    ARB CKMTA12 Installed in Driver's Bedside (Part II - Wiring/Cable Routing)

    OEM LED Bed Lighting Kit, Door Edge Guards, OEM Tailgate Inserts

    SSO Slimline, Stage II, and WARN Winch
     
    Last edited: Mar 10, 2020
    AKGSD and DerekV87 like this.
  2. Nov 30, 2019 at 12:50 PM
    #2
    Steves104x4

    Steves104x4 Well-Known Member

    Joined:
    Apr 17, 2010
    Member:
    #35468
    Messages:
    16,248
    Gender:
    Male
    First Name:
    Steve
    Buffalo NY
    Vehicle:
    2010 RC 2.7 4x4
    BUCKLE UP! It makes it harder for Aliens to pull you out of your Truck.
    Yeah, Boi!
     
    HONY BADGER likes this.
  3. Nov 30, 2019 at 12:51 PM
    #3
    TuRDLYFE

    TuRDLYFE [OP] Well-Known Member

    Joined:
    Nov 9, 2019
    Member:
    #310230
    Messages:
    1,480
    An over-taxed town, county, and state
    Vehicle:
    2020 AG TRD Pro 6MT
    Too bad the truck is all covered in bird shit right now... If I had that kind of cleaning service available, she'd never be dirty!
     
  4. Nov 30, 2019 at 12:58 PM
    #4
    TuRDLYFE

    TuRDLYFE [OP] Well-Known Member

    Joined:
    Nov 9, 2019
    Member:
    #310230
    Messages:
    1,480
    An over-taxed town, county, and state
    Vehicle:
    2020 AG TRD Pro 6MT
    Don't know what to think about that ha! It could be good or soooo bad in soooo many different ways.
     
  5. Dec 2, 2019 at 6:31 PM
    #5
    TuRDLYFE

    TuRDLYFE [OP] Well-Known Member

    Joined:
    Nov 9, 2019
    Member:
    #310230
    Messages:
    1,480
    An over-taxed town, county, and state
    Vehicle:
    2020 AG TRD Pro 6MT
    New roof rack installed. Thanks to @upTOPOverland_Drew for the STELLAR customer service. My only complaint is on the powder coating: it doesn't look like all the crossbars got a good coat. All of the extrusions had naked aluminum spots in the channels. I didn't take a great pic, but you can see below on the far right one of the spots that I'm talking about. I also added washers on a lot of the hardware so the lock washers wouldn't mar up the finish.

    20191202_163601.jpg

    Looking shmexy. BD S8 backordered and should be here in the next month or so. Can't wait to wire it up!

    20191202_204734.jpg
     
  6. Dec 2, 2019 at 6:39 PM
    #6
    Hobbs

    Hobbs Anti-Lander from way back…

    Joined:
    Mar 20, 2016
    Member:
    #181838
    Messages:
    22,348
    Yep…
    Vehicle:
    Rock Bangen', Desert Tamin', Gold Findin' Machine!
    I LIKE that color! Very sexy!
     
  7. Dec 2, 2019 at 7:13 PM
    #7
    TuRDLYFE

    TuRDLYFE [OP] Well-Known Member

    Joined:
    Nov 9, 2019
    Member:
    #310230
    Messages:
    1,480
    An over-taxed town, county, and state
    Vehicle:
    2020 AG TRD Pro 6MT
    Thanks, man! I had thought about getting the Alpha and color matching, but it would be too much. That and they don't have the Army Green powder coat yet, so it'd have to be painted by a local shop and that runs way more. I'm satisfied with this!
     
    Hobbs[QUOTED] likes this.
  8. Dec 2, 2019 at 8:25 PM
    #8
    upTOPOverland_Drew

    upTOPOverland_Drew upTOP Overland Technical Design and Application

    Joined:
    May 22, 2016
    Member:
    #187612
    Messages:
    2,709
    Gender:
    Male
    First Name:
    Drew
    Littleton, CO
    Vehicle:
    2017 TRD OR DCSB SUPER WHITE
    All the things...click the link in sig
    LOOKS GREAT!

    I hear your complaint on the powder coat in the bars. We try our very best to get even, full coverage but don't always get it 100% We are working with a new powder coater so that is set to improve. Please let me know if you need anything :)
     
  9. Dec 3, 2019 at 12:12 PM
    #9
    TuRDLYFE

    TuRDLYFE [OP] Well-Known Member

    Joined:
    Nov 9, 2019
    Member:
    #310230
    Messages:
    1,480
    An over-taxed town, county, and state
    Vehicle:
    2020 AG TRD Pro 6MT
    I'll take comps or a partial refund in the form of test gear or *ahem* special favors.
     
  10. Dec 3, 2019 at 12:21 PM
    #10
    upTOPOverland_Drew

    upTOPOverland_Drew upTOP Overland Technical Design and Application

    Joined:
    May 22, 2016
    Member:
    #187612
    Messages:
    2,709
    Gender:
    Male
    First Name:
    Drew
    Littleton, CO
    Vehicle:
    2017 TRD OR DCSB SUPER WHITE
    All the things...click the link in sig
    It wasn't test gear. My bars look like that too. get em scratched up and they'll match :) plus if anyone is on your roof you may have bigger issues, i recommend a large bat in that instance LOL
     
  11. Dec 3, 2019 at 12:26 PM
    #11
    TuRDLYFE

    TuRDLYFE [OP] Well-Known Member

    Joined:
    Nov 9, 2019
    Member:
    #310230
    Messages:
    1,480
    An over-taxed town, county, and state
    Vehicle:
    2020 AG TRD Pro 6MT
    No, no, no...I didn't say it was test gear. Hahaha I was pimping myself to beta test any products you may have coming down the pike. Obviously, living in the NE, my chief concern is corrosion.
     
  12. Dec 4, 2019 at 2:37 PM
    #12
    TuRDLYFE

    TuRDLYFE [OP] Well-Known Member

    Joined:
    Nov 9, 2019
    Member:
    #310230
    Messages:
    1,480
    An over-taxed town, county, and state
    Vehicle:
    2020 AG TRD Pro 6MT
    Had my Redline Tuning gas struts on the porch waiting for me when I got home. These mark the first official cuts into the truck outside of the holes in the rain gutter weather stripping for the roof rack earlier this week. Give me time... I have to start slowly. I followed the directions almost to a tee, but deviated a bit by pre-drilling the holes in the fender for the ball mounts. I also gave a few small sprays of touch-up paint into all of the holes and hit them with a heat gun prior to riveting the mounts onto the hood and fenders. Looking great!

    20191204_172324.jpg
     
    AKGSD likes this.
  13. Dec 5, 2019 at 2:44 PM
    #13
    TuRDLYFE

    TuRDLYFE [OP] Well-Known Member

    Joined:
    Nov 9, 2019
    Member:
    #310230
    Messages:
    1,480
    An over-taxed town, county, and state
    Vehicle:
    2020 AG TRD Pro 6MT
    Time to get this installed!

    20191205_173506.jpg
     
  14. Dec 6, 2019 at 9:28 PM
    #14
    TuRDLYFE

    TuRDLYFE [OP] Well-Known Member

    Joined:
    Nov 9, 2019
    Member:
    #310230
    Messages:
    1,480
    An over-taxed town, county, and state
    Vehicle:
    2020 AG TRD Pro 6MT
    Got my tailgate remote lock kit installed tonight (P/N PK3B6-35JS0 for MY '19 and up). No instructions included, so I have attached the PDF in case anyone is interested. This has been covered fairly well in this thread, but there wasn't a consolidated walkthrough. It only took about an hour and fifteen to do it perfectly. I needed dykes, a 10mm socket, trim tool, tin snips, some RTV (Toyota recommended 3M body sealer, but didn't have any), and a Torx T-30. I followed to the tee the (not included) install instructions and had very minor issues resloving some of the images. My lessons learned are discussed below. Feel free to use this consolidated writeup or the Toyota directions attached to the bottom of this post.

    Disconnected the battery then pulled the 16x T-30 screws holding down the access panel:

    20191206_194645.jpg

    Marked the camera harness on either end before going into the retaining clip and bed retaining clip using a silver sharpie. After that, pulled out the retaining clips for the camera harness on the tailgate and truck side using a trim tool:
    20191206_195440.jpg

    20191206_195447.jpg

    Threaded the actuator harness (the short one in the kit) through the bed and into the tailgate with the female side going into the tailgate:

    20191206_195606.jpg

    Careful you aren't like me when installing the new retaining clips as the tabs on them are fragile. The directions were not super clear here. However, make sure that the clip entering the bed opes downward with the latch on the bottom and the one entering the tailgate opens upward with the latch on top. This way, looking forward at the clip that goes into the bed, the tab is on the left; and for the clip that goes into the tailgate, the clip is on the right. After you get them clipped onto the harnesses, insert the sides opposite double plastic clips into the slots and rock them into place, locking them in flush afterwards. I beat mine up pretty good here trying to get them into this tight space.

    Looking forward at the retaining clip that inserts into the bed (sorry for how badly marred up it is. Learn from my lesson. These are P/N PK3B6-34JP0 if you jack them both up like I did:

    20191206_204102.jpg

    Top down (the front of the truck is to the right) looking at the harnesses entering the retaining clip and tailgate. It is spread open a tiny bit because the latch that clamps the clip down onto the harnesses broke off with very little force. The actuator harness is on top and the camera harness on bottom. Careful here:

    20191206_204046.jpg

    Next up, the actuator was installed. There is one 10mm nut on tailgate handle you have to remove (right below the actuator here and just to the left rod with the orange clasp) and reinstall through the bracket. Ensure that the harness is mounted into the actuator bracket first (see below). Torque spec on this bolt is 49 in-lb. Once the actuator is installed the retaining ring is pressed down onto the retaining ring, coat the small metal clip on the harness in RTV and attach it to the metal post in the middle of the tailgate, then zip-tie it into place:

    20191206_200523.jpg

    20191206_201254.jpg

    Next, over to the passenger side to pull up the trim. a little bit of upward force here goes a long way. Careful pulling too hard as you can damage the white harness clips that are attached to the body:

    20191206_204643.jpg

    Next, remove the nut that holds the kick panel to the floor (near where the passenger's right foot would sit) and pull it back and out simultaneously. The plastic clips here have a tendency to stay attached to the body, so be sure to pull them out and reattach to the panel before reinstallation. Once removed, you'll be pulling the slightly grey 10-pin electrical connector here (slightly hidden behind the harness in the middle of the picture):

    20191206_204847.jpg

    Plug the grey clip into the long harness and the harness into the same location you just pulled the grey connector out of and zip-tie as shown:

    20191206_211106.jpg

    Open the white clips by pulling the tabs towards the passenger's side door opening and slightly upward. Route the new harness and zip tie as such. There is a rubber plug under the seat about 10 inches back from the door sill that you'll have to remove in order to thread the new harness through. Make wire the new plug is properly seated in the body! :

    20191206_211320.jpg

    Next, intercept the harness just on top of the frame (router on the top inner portion about 4 inches further towards the center of the truck from the boot) and start zip-tieing all the way back! You'll follow this wiring all the way back to the right tail light recess within the rear fender well. When you get to the section of the run that lies above the muffler, use the steel zip ties and clip with tin snips:

    20191206_220604.jpg

    When I got all the way to the back to plug into the pigtail that was wired into the tailgate, this is how I routed the harnesses one ziptie gets threaded through the long harness' connector to affix it to the white plastic tab holding the body harness in place. thread it through the connector, zip-tie to that tab, and ziptie the actuator harness as such:

    20191206_220554.jpg

    Reconnect the battery, ops check it, and reinstall the kick panel, door sill trim as well as tailgate access panel and voila!

    20191206_220604.jpg
     

    Attached Files:

    Last edited: Dec 7, 2019
    eclane, Vttroy, ChouDawg and 3 others like this.
  15. Dec 8, 2019 at 1:04 PM
    #15
    TuRDLYFE

    TuRDLYFE [OP] Well-Known Member

    Joined:
    Nov 9, 2019
    Member:
    #310230
    Messages:
    1,480
    An over-taxed town, county, and state
    Vehicle:
    2020 AG TRD Pro 6MT
    I did a bad thing. The wife wasn't impressed, but I'm pleased. Just need the SSO bumper to show up and I'll get this puppy installed! Got a good deal on this on Black Friday with a price match and discount to boot.

    20191208_131724.jpg

    That's some tidy packaging for a 70# box!

    20191208_132215.jpg
     
    montijo505 and AKGSD like this.
  16. Dec 9, 2019 at 4:02 PM
    #16
    TuRDLYFE

    TuRDLYFE [OP] Well-Known Member

    Joined:
    Nov 9, 2019
    Member:
    #310230
    Messages:
    1,480
    An over-taxed town, county, and state
    Vehicle:
    2020 AG TRD Pro 6MT
    I went ahead and installed the Baja Designs 40" S8 on my roof rack today. If anyone needs help on orientation of the UpTop mounting brackets that come included, let me know. There were no instructions and by the time I received a call back from Micah @upTOPoverland, I had figured out the measurements (thank you for returning my call so promptly, bro!).

    20191209_155933.jpg

    I installed the lightbar with the pigtail on the passenger's side. The weatherpack connector is somewhat cumbersome and I wanted someplace to hide the connector. I tucked the wire into the fairing and used the metal uprights at the bend in the fairing to attach zip-ties. It isn't the most elegant, but it works. I will likely cut these and flip the locking mechanism to the inside of the fairing for a cleaner look.

    20191209_183616.jpg

    In any case, I ran two lines and a ground up the side of the windshield moulding. I couldn't get it all the way tucked, so along the top 6" of the moulding, the wire isn't tucked. I'll figure something out eventually. The green tape is because I didn't have the three wires all side-by-side and I had to cut the braided loom, peel it back, stack the wires, and tape it back up. It is a tight fit to tuck into the side of the windshield!

    20191209_183628.jpg

    All lit up prior to cutting the wire ties.

    20191209_183731.jpg

    The separate line was attached to a 20A circuit on the Switch Pro for the backlighting:


    20191209_183748.jpg

    20191209_183623.jpg
     
  17. Dec 11, 2019 at 12:16 PM
    #17
    upTOPoverland

    upTOPoverland Well-Known Member

    Joined:
    Feb 1, 2019
    Member:
    #281432
    Messages:
    1,052
    Gender:
    Male
    First Name:
    Drew
    Vehicle:
    2019 Tacoma TRD OR
    upTOP All the Things!
    Epic thread. Great write up.
     
  18. Dec 11, 2019 at 1:19 PM
    #18
    TuRDLYFE

    TuRDLYFE [OP] Well-Known Member

    Joined:
    Nov 9, 2019
    Member:
    #310230
    Messages:
    1,480
    An over-taxed town, county, and state
    Vehicle:
    2020 AG TRD Pro 6MT
    Thanks, guys!
     
  19. Dec 22, 2019 at 3:55 PM
    #19
    TuRDLYFE

    TuRDLYFE [OP] Well-Known Member

    Joined:
    Nov 9, 2019
    Member:
    #310230
    Messages:
    1,480
    An over-taxed town, county, and state
    Vehicle:
    2020 AG TRD Pro 6MT
    Anybody else waiting on an SSO slimline? I have this winch taking up tons of room in my garage, and I'd rather it be in my truck. What is the average order to delivery time?
     
  20. Dec 27, 2019 at 7:11 AM
    #20
    TuRDLYFE

    TuRDLYFE [OP] Well-Known Member

    Joined:
    Nov 9, 2019
    Member:
    #310230
    Messages:
    1,480
    An over-taxed town, county, and state
    Vehicle:
    2020 AG TRD Pro 6MT
    So today I went to install the OEM console safe (Part Number 00016-35874) and when I opened up the box, I was confronted with this:

    20191226_104752.jpg
    20191226_103537.jpg

    And people wonder why I hate FedEx. I never seem to have issues with item damage from any of the other carriers, but FedEx abuses boxes. Sparks Toyota should be sending me another one here shortly, but the frustration is real. I also got myself a retractible tonneau for the holiday (a big thank you to Leonard Accessories for hooking it up). More to follow on that!
     

Products Discussed in

To Top