1. Welcome to Tacoma World!

    You are currently viewing as a guest! To get full-access, you need to register for a FREE account.

    As a registered member, you’ll be able to:
    • Participate in all Tacoma discussion topics
    • Communicate privately with other Tacoma owners from around the world
    • Post your own photos in our Members Gallery
    • Access all special features of the site

Smuook's Taco Mojo

Discussion in '1st Gen. Builds (1995-2004)' started by smuook, Apr 23, 2013.

  1. Apr 23, 2013 at 6:40 PM
    #1
    smuook

    smuook [OP] Daily Driver "Plus"

    Joined:
    Nov 23, 2009
    Member:
    #26418
    Messages:
    439
    Gender:
    Male
    First Name:
    Smuook
    Loganville, GA
    Vehicle:
    2004 DC V6 PreRunner
    Billy 5100, Satoshi, MBW Wheels, All Pro Front Bumper with 3x PIAA 530, LED dash lighting, other stuff too much to list
    Welcome to my PreRunner Daily Driver Build. Say What? Yeah that’s right… you heard me correct. This thread is about how I like to travel to in from work, buzz around town, and the occasional weekend excursion. I know that this forum is heavily biased towards 4WD, but I live in Florida, the flattest state in the US with the least snowfall (zero inches per year)... I don’t even think we have any rocks to speak of. At least not like the ones I grew up with in New Hampshire. I do enjoy camping and light trail riding, but I’ve never even come close to getting stuck in my PreRunner with rear locker. So if you looking off-roading prowess, you won’t find it here. I think the PreRunner is a good general-use truck as is, so for me it’s about making my Taco more to my liking. I learn more about my truck and get ideas here at TW than I could ever learn on my own. So thank you TW and I continue to read and enjoy the forums. This thread is to maybe give some ideas back to others.
     
  2. Apr 23, 2013 at 6:42 PM
    #2
    smuook

    smuook [OP] Daily Driver "Plus"

    Joined:
    Nov 23, 2009
    Member:
    #26418
    Messages:
    439
    Gender:
    Male
    First Name:
    Smuook
    Loganville, GA
    Vehicle:
    2004 DC V6 PreRunner
    Billy 5100, Satoshi, MBW Wheels, All Pro Front Bumper with 3x PIAA 530, LED dash lighting, other stuff too much to list
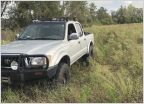
    You still here? OK, let’s get started then. I bought a used 2004 3.4L PreRunner TRD Package back in 2008 with about 60K miles on it. Below is about the closest to stock picture I have. But at this point, I already started to add stuff. The cap came with it, but you can see the Randy Ellis Design light bar up front and fog lights. It’s actually a pretty stout piece of metal, as my son decided to test out on a parked car (the light bar won). Bug deflector is there to try to flow them nasty Florida bugs over my windshield. If you saw the bugs down here, you would consider a bug deflector as well, trust me. This picture has my install of Bilstein 5100s all around set at 2.5” up front and a 1” rear shackle. I really just needed a shock upgrade while trying to level out the front rake, but I did decide to go up a little bit without have to worry about not aligning or new control arms. I’m glad I went with the Billys and I highly recommend these shocks over the stock Tokicos. They improved the ride quality immensely. Many would recommend AAL or leaf pack to rear, especially for those wheelers, but this starts to run into more cash, so I just did a shackle for now. May do Wheeler’s HD leaf pack at some point, but this are not cheap. That’s about all I had at this point.


    [​IMG]

    Bilstein 5100s front and rear ($290)
    Top Gun Customz rear shackle ($75)
    3.5 hours of my time ($0)
    This is what I used to install shocks:
    http://www.customtacos.com/forum/showthread.php?t=138312
     
  3. Apr 23, 2013 at 6:45 PM
    #3
    smuook

    smuook [OP] Daily Driver "Plus"

    Joined:
    Nov 23, 2009
    Member:
    #26418
    Messages:
    439
    Gender:
    Male
    First Name:
    Smuook
    Loganville, GA
    Vehicle:
    2004 DC V6 PreRunner
    Billy 5100, Satoshi, MBW Wheels, All Pro Front Bumper with 3x PIAA 530, LED dash lighting, other stuff too much to list
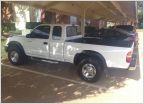
    Next major mod is the Rolla roof rack. I have a reinforced cap and decided to add some storage space. It actually has come in handy quite a few times. Take note, the Rolla rack rusts quickly. I have to sand it and repaint it already, but it’s been holding up ok after that. Takes some nerve to drill them holes… remember… measure twice, cut once. I also went with Line-X bedliner at about the same time. This stuff is ultra-durable and after years of moderate abuse, still looks great.

    [​IMG]

    [​IMG]

    Also added some additional backup lighting to the rear of rack wired in parallel to reverse lights.

    More about it here:
    http://www.tacomaworld.com/forum/1st-gen-tacomas/64597-roof-basket-security.html
     
  4. Apr 23, 2013 at 6:45 PM
    #4
    smuook

    smuook [OP] Daily Driver "Plus"

    Joined:
    Nov 23, 2009
    Member:
    #26418
    Messages:
    439
    Gender:
    Male
    First Name:
    Smuook
    Loganville, GA
    Vehicle:
    2004 DC V6 PreRunner
    Billy 5100, Satoshi, MBW Wheels, All Pro Front Bumper with 3x PIAA 530, LED dash lighting, other stuff too much to list
    Alarm mod, pretty much a no-brainer if you own a 2003/4 and don’t have an alarm system. You can see the glass breakage sensor and alarm LED to the right. I also mounted my contura switch for my foglights to the left of it and my courtesy lighting on the shift console that turns on when the door is open.


    [​IMG]

    You can read how to do the alarm mod here:
    http://www.customtacos.com/tech/index.php?article=12
     
  5. Apr 23, 2013 at 6:46 PM
    #5
    smuook

    smuook [OP] Daily Driver "Plus"

    Joined:
    Nov 23, 2009
    Member:
    #26418
    Messages:
    439
    Gender:
    Male
    First Name:
    Smuook
    Loganville, GA
    Vehicle:
    2004 DC V6 PreRunner
    Billy 5100, Satoshi, MBW Wheels, All Pro Front Bumper with 3x PIAA 530, LED dash lighting, other stuff too much to list
  6. Apr 23, 2013 at 6:47 PM
    #6
    smuook

    smuook [OP] Daily Driver "Plus"

    Joined:
    Nov 23, 2009
    Member:
    #26418
    Messages:
    439
    Gender:
    Male
    First Name:
    Smuook
    Loganville, GA
    Vehicle:
    2004 DC V6 PreRunner
    Billy 5100, Satoshi, MBW Wheels, All Pro Front Bumper with 3x PIAA 530, LED dash lighting, other stuff too much to list
  7. Apr 23, 2013 at 6:49 PM
    #7
    smuook

    smuook [OP] Daily Driver "Plus"

    Joined:
    Nov 23, 2009
    Member:
    #26418
    Messages:
    439
    Gender:
    Male
    First Name:
    Smuook
    Loganville, GA
    Vehicle:
    2004 DC V6 PreRunner
    Billy 5100, Satoshi, MBW Wheels, All Pro Front Bumper with 3x PIAA 530, LED dash lighting, other stuff too much to list
    Sock Monkey Graphics:

    [​IMG]

    [​IMG]
     
  8. Apr 23, 2013 at 6:49 PM
    #8
    smuook

    smuook [OP] Daily Driver "Plus"

    Joined:
    Nov 23, 2009
    Member:
    #26418
    Messages:
    439
    Gender:
    Male
    First Name:
    Smuook
    Loganville, GA
    Vehicle:
    2004 DC V6 PreRunner
    Billy 5100, Satoshi, MBW Wheels, All Pro Front Bumper with 3x PIAA 530, LED dash lighting, other stuff too much to list
    Painted stock wheels black. Tons of threads on how to do this… I used the playing card method to mask the tires. You can see my running boards here. I really don’t like these and want to get rid of them eventually, but this is how my 4 year old daughter gets in and out of my truck, so this is probably my most important mod.

    [​IMG]
     
  9. Apr 23, 2013 at 6:50 PM
    #9
    smuook

    smuook [OP] Daily Driver "Plus"

    Joined:
    Nov 23, 2009
    Member:
    #26418
    Messages:
    439
    Gender:
    Male
    First Name:
    Smuook
    Loganville, GA
    Vehicle:
    2004 DC V6 PreRunner
    Billy 5100, Satoshi, MBW Wheels, All Pro Front Bumper with 3x PIAA 530, LED dash lighting, other stuff too much to list
  10. Apr 23, 2013 at 6:50 PM
    #10
    smuook

    smuook [OP] Daily Driver "Plus"

    Joined:
    Nov 23, 2009
    Member:
    #26418
    Messages:
    439
    Gender:
    Male
    First Name:
    Smuook
    Loganville, GA
    Vehicle:
    2004 DC V6 PreRunner
    Billy 5100, Satoshi, MBW Wheels, All Pro Front Bumper with 3x PIAA 530, LED dash lighting, other stuff too much to list
    Cipher Auto seats. $615 total for seats and brackets after discounts and rebates. By far the biggest comfort upgrade. If you think the stock seats are good, you are only lying to yourself. Sit in a real seat and then talk to me.


    [​IMG]
     
  11. Apr 23, 2013 at 6:52 PM
    #11
    smuook

    smuook [OP] Daily Driver "Plus"

    Joined:
    Nov 23, 2009
    Member:
    #26418
    Messages:
    439
    Gender:
    Male
    First Name:
    Smuook
    Loganville, GA
    Vehicle:
    2004 DC V6 PreRunner
    Billy 5100, Satoshi, MBW Wheels, All Pro Front Bumper with 3x PIAA 530, LED dash lighting, other stuff too much to list
    Red LED lighting throughout. Really easy on the eyes at night. The pics looks a lot more intense than it is in person… but you get the idea.


    [​IMG]
    Also installed autometer analog clock. Can read the time even with car not running.


    [​IMG]
     
  12. Apr 23, 2013 at 6:53 PM
    #12
    smuook

    smuook [OP] Daily Driver "Plus"

    Joined:
    Nov 23, 2009
    Member:
    #26418
    Messages:
    439
    Gender:
    Male
    First Name:
    Smuook
    Loganville, GA
    Vehicle:
    2004 DC V6 PreRunner
    Billy 5100, Satoshi, MBW Wheels, All Pro Front Bumper with 3x PIAA 530, LED dash lighting, other stuff too much to list
    Stereo system is JVC KW-HDR81BT with HD radio, BT hands free/audio, and nice display. Multiple color options for day and night. Amp is Alpine KTP-445… big distortion-free power in a small package. I actually have it tucked below center console vents and above the climate controls. Fits nice and snug. Finally, I have four Polk Audio DB651s in the doors. They are 6.5 round speakers and fit with a little trimming. Had to cut some plastic inside the front door panels. The rears doors needed some custom mounting holes drilled. All I can say is that this sound setup rocks… literally. Nice, clean, crisp, hard hitting when needed sound. I have a Kicker 10 sub and amp that I’m gonna put behind back seat soon as well.


    [​IMG]
     
  13. Apr 23, 2013 at 7:04 PM
    #13
    smuook

    smuook [OP] Daily Driver "Plus"

    Joined:
    Nov 23, 2009
    Member:
    #26418
    Messages:
    439
    Gender:
    Male
    First Name:
    Smuook
    Loganville, GA
    Vehicle:
    2004 DC V6 PreRunner
    Billy 5100, Satoshi, MBW Wheels, All Pro Front Bumper with 3x PIAA 530, LED dash lighting, other stuff too much to list
  14. Apr 23, 2013 at 7:10 PM
    #14
    smuook

    smuook [OP] Daily Driver "Plus"

    Joined:
    Nov 23, 2009
    Member:
    #26418
    Messages:
    439
    Gender:
    Male
    First Name:
    Smuook
    Loganville, GA
    Vehicle:
    2004 DC V6 PreRunner
    Billy 5100, Satoshi, MBW Wheels, All Pro Front Bumper with 3x PIAA 530, LED dash lighting, other stuff too much to list
    Satoshi Mod... lots of work but glad I did it. Added "TOYOTA" logo, Hella Supertone horns, PIAA 530 LED fogs, with Laminix amber film over top.

    [​IMG]
     
  15. Apr 23, 2013 at 7:20 PM
    #15
    smuook

    smuook [OP] Daily Driver "Plus"

    Joined:
    Nov 23, 2009
    Member:
    #26418
    Messages:
    439
    Gender:
    Male
    First Name:
    Smuook
    Loganville, GA
    Vehicle:
    2004 DC V6 PreRunner
    Billy 5100, Satoshi, MBW Wheels, All Pro Front Bumper with 3x PIAA 530, LED dash lighting, other stuff too much to list
    Other mechanical things:

    Deckplate mod
    Power stop brakes with slotted rotors
    New O2 sensors x2
    New valve cover gaskets and PCV
    Stant 170F thermostat
    Denso spark plugs and NGK wires
     
  16. May 3, 2013 at 7:57 AM
    #16
    BigOly

    BigOly Well-Known Member

    Joined:
    May 3, 2012
    Member:
    #78148
    Messages:
    431
    Gender:
    Male
    Bay Area, NorCal
    Vehicle:
    14 MGM DCSB TRD/OR 4x4
    Enjoying your build! I just did the alarm mod (disconnecting one cable), and looking to get a glass break sensor/LED module. I noticed you already have one of the vertical ones in front of your gear shift area. Did yours already come with a wire harness in the back of that area? If not could you share how you wire it all up? What I do know is the GB/LED module takes 4 wires total, 2 for the LED and 2 for the glass sensor.

    Btw, I love the look of that Rola rack, nice job!!
     
  17. May 4, 2013 at 10:22 AM
    #17
    smuook

    smuook [OP] Daily Driver "Plus"

    Joined:
    Nov 23, 2009
    Member:
    #26418
    Messages:
    439
    Gender:
    Male
    First Name:
    Smuook
    Loganville, GA
    Vehicle:
    2004 DC V6 PreRunner
    Billy 5100, Satoshi, MBW Wheels, All Pro Front Bumper with 3x PIAA 530, LED dash lighting, other stuff too much to list
    Thanks for the compliment on the rack. It's very solid and functional. It may cost me an MPG or 2, but I like it.

    Also, I've been keeping an eye on your build... lots of awesome info in there... your LED ignition key ring mod is on my short list :D

    I had to open it up and take a look to remember how I did this. This was actually one of my first mods a few years ago. I remember buying the LED GB module from the part number on the customtacos thread, but don't remember where from. It came with 4 wires and no harness, so I had to splice it myself. The wiring for the module is as follows:

    LED GB Module:
    - Glass Breakage sensor
    -- Thick grey wire with 2 inner wires
    --- White wire
    --- Bare metal wire
    - LED
    -- Red wire
    -- White w/ black

    These are the wires coming from the left in the pic. I actually didn't use the LED wires from the module, but used a separate LED that was in a more obvious location (more on that later).

    [​IMG]

    Then you have to locate the factory unused wire from the customtaco thread and route it down where you want the module.

    3_7f79ac41149ad79bd9efaf0a537d0d78291aecb9.jpg

    Onelowrx7 from that thread relocated his hazard switch and put the LED GB module where that was. I didn't do that. Can't remember why exactly, maybe cuz I was too lazy or didn't like the light location or something. It does require splicing and lengthening the 8 wires on the hazard switch to relocate it. In retrospect, I may have done it like Onelowrx7 to make it cleaner if I was to do it today, but this was one of my first mods... plus it works fine. So anyway, the factory wiring is like this:

    Factory wiring harness:
    - Glass Breakage sensor
    -- Thick grey wire with 2 inner wires
    --- White wire (connects to white of module)
    --- black wire (connects to bare metal of module)
    - LED
    -- Brownish (connects to Red wire I think)
    -- White w/ black (connects to White w/ black I think)
    If the LED doesn't work, just swap wires. When you lock the doors it turns on solid, then starts blinking after a minute or so.

    I ended up routing the LED wires to a flush mount LED on the center console near the cup holders to make it more obvious. The LED works great and I think the glass breakage works, but I'm not gonna test that :p


    [​IMG]
     
  18. May 4, 2013 at 5:02 PM
    #18
    BigOly

    BigOly Well-Known Member

    Joined:
    May 3, 2012
    Member:
    #78148
    Messages:
    431
    Gender:
    Male
    Bay Area, NorCal
    Vehicle:
    14 MGM DCSB TRD/OR 4x4
    Thank you for your reply. I really appreciate you taking the time to crack open your work and document these little things in detail. I feel I owe you a beer or something :proposetoast::cheers:

    I actually spent a good amount of time last week rewiring the hazard button to the lower panel exactly like what Onelowrx7 on CT did, so it's funny you mentioned his work. It did take a lot of time, half way I was thinking if it was really worth relocating lol. Well a few butt conntectors and spare wires later I have an empty hole in my dash where the hazard used to be and ready for a used GB sensor/LED module to fill it up. I was able to find a used vertical module off eBay now kind of hoping it's similar to the one you have.

    Nice touch on the aftermarket LED! I read that on CT that it's possible, and nice to see that you were able to get this done. I live in a townhouse and in front of my kitchen window I have a nice view of our carport where my truck sits pretty for me to enjoy :) I plan to purchase a bright red aftermarket LED light and mount it right below the rear view mirror or on middle top portion of the dash so I can easily peak thru the window to double check every now and then that I armed/locked my truck.

    If you have a chance, I have a couple of questions:
    1) Is the aftermarket LED light you purchased a 3Volt or 12Volt?

    2) Did you think about or try wiring to the LED module and your aftermarket LED?

    Thanks again for the help and looking to see what you do next to your truck. Oh, and I'm a bit jealous of your aftermarket seats... they look great! :woot:
     
    This site contains affiliate links for which the site may be compensated.
    #18
  19. May 5, 2013 at 2:19 PM
    #19
    smuook

    smuook [OP] Daily Driver "Plus"

    Joined:
    Nov 23, 2009
    Member:
    #26418
    Messages:
    439
    Gender:
    Male
    First Name:
    Smuook
    Loganville, GA
    Vehicle:
    2004 DC V6 PreRunner
    Billy 5100, Satoshi, MBW Wheels, All Pro Front Bumper with 3x PIAA 530, LED dash lighting, other stuff too much to list
    If you are ever in Jacksonville, FL... I'll take you up on that beer. ;) It is a 12v led I bought from Radio Shack. I did think about having both LEDs and they should work fine if you wire them in parallel, not in series.

    My only thinking about it was that it might look gimmicky and not real if I had multiple LEDs blinking (just based on factory ones I've seen in different cars). I don't think any alarm will stop a career thief, but maybe an authentic looking alarm might make a juvenile delinquent think twice. ???

    The seats are great. I probably would have sold truck without doing this. But I really love my Taco so decided to invest in comfort. No regrets.
     
    Last edited: May 5, 2013
  20. May 7, 2013 at 5:19 PM
    #20
    smuook

    smuook [OP] Daily Driver "Plus"

    Joined:
    Nov 23, 2009
    Member:
    #26418
    Messages:
    439
    Gender:
    Male
    First Name:
    Smuook
    Loganville, GA
    Vehicle:
    2004 DC V6 PreRunner
    Billy 5100, Satoshi, MBW Wheels, All Pro Front Bumper with 3x PIAA 530, LED dash lighting, other stuff too much to list
    2 days ago, I was cruising down the road with the fam. Just got back from my son's graduation and decided to GO BIG and eat at Red Lobster :rolleyes::p. While I was driving the radio started to cut out and kept resetting. :confused:. After messing with it for a minute or so, I decided to scroll through my scangauge meters (I knew I bought that thing for a reason). Looked at battery voltage and it was down around 10V. Buy the time I got my truck stopped, the lowest I saw was 7.6V! :eek: I happened to be near a Wally World and picked up a new battery. It was over 2 years old so just decided to get a new one. On the ride home, it was pretty evident that my alternator was dead. Voltage started at 12.5V new and slowly crept down to 11ish by the time I got home.

    I ended up buying a new alternator. I could have put new brushes in myself, but decided to upgrade to an 80amp version. I've always thought the Tacoma stock alternator to be a bit underpowered. Plus with only 120K miles a professionally rebuilt one should last many more years, possibly the life of the vehicle. Here it is in all it's glory...

    [​IMG]

    For those of you who haven't done this before, I can tell you it is very simple and should take less than an hour. Here is the FSM drawing:

    [​IMG]

    I used 14mm, 12mm, 10mm sockets, screw drivers.

    I disconnected positive terminal of battery
    Popped cap off generator wire with screw driver and removed nut
    Removed generator connector
    Loosened pivot bolt
    Removed adjusting bolt lock nut and loosened adjusting bolt to remove tension off belt
    Removed adjusting bolt
    Removed pivot bolt
    Pried out alternator

    Here is a pic of the bottom of the alternator where you can see the adjusting bolt lock nut facing you and the adjusting bolt to the right.
    [​IMG]

    Easy day. After second day, tension seems to be holding on the belt good. I'll keep checking it over the next few weeks just to make sure.

    Here are some specs for ya:

    Drive belt Tension

    New belt 116 – 169 lbf
    Used belt 66 – 88 lbf

    I don't know how to check this... so I just went slightly more taught than my used belt prior to removing it.

    Torque
    Pivot Bolt: 38 ft·lbf
    Adjusting bolt lock nut: 25 ft·lbf
     

Products Discussed in

To Top