1. Welcome to Tacoma World!

    You are currently viewing as a guest! To get full-access, you need to register for a FREE account.

    As a registered member, you’ll be able to:
    • Participate in all Tacoma discussion topics
    • Communicate privately with other Tacoma owners from around the world
    • Post your own photos in our Members Gallery
    • Access all special features of the site

motionridr8's build

Discussion in '2nd Gen. Builds (2005-2015)' started by motionridr8, Jul 8, 2013.

  1. Jul 8, 2013 at 1:10 PM
    #1
    motionridr8

    motionridr8 [OP] Well-Known Member

    Joined:
    Dec 21, 2011
    Member:
    #69183
    Messages:
    503
    Gender:
    Male
    First Name:
    Drew
    Merrimack, NH
    Vehicle:
    2012 Tacoma 4x4 DCSB
    5100's/886's/JBA UCAs, ICON RXT Rears, US Offroad Bumper
    Most Current Photo
    Finally updated! 7/18/2016

    [​IMG]

    Please ask if you have any questions!
    Be sure to keep an eye out for my FS threads and my product reviews!

    History

    Alright, well I've been browsing here long enough and have been a Tacoma owner even longer, so I thought it was time to share my truck with everyone and try to pass down whatever experiences, ideas, tip, tricks, knowledge, etc. I can.

    So here we go...

    Basics
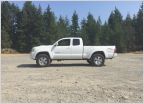
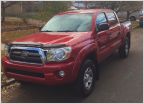
    2012 Tacoma 4x4 DCSB TRD Sport, Automatic, Pyrite Mica, V6

    [​IMG]

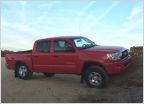
    And this is where I am today after all the TacomaWorld influence and ideas:

    [​IMG]
    [​IMG]

    Modification List
    Performance
    - TRD Catback Exhaust LINK
    - aFe Dry Filter LINK

    Suspension
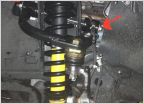
    - Bilstein 5100's set at 0 LINK
    - OME 886's LINK
    - OME 885's (painted red) - REMOVED
    - Light Racing (SPC) UCA's (set neutral, +2deg caster) LINK - REMOVED
    - JBA STD High Caster Upper A-arms LINK
    - Icon Progressive AAL w/ OEM overload installed LINK
    - Toytec 1/4" Driver's Side Lean Spacer LINK

    Wheels/Tires
    - (5) TRD Sport 17" Alloys, painted graphite Duplicolor HWP102 LINK
    - (5) 265/70/R17 General Grabber AT2's LINK
    - Full Sized Spare, mounted under bed
    - TRD FJ Center Caps Part #PTR20-35081 painted graphite Duplicolor HWP102 LINK-Center Caps TUTORIAL
    - BORA 3/4" Wheel Spacers LINK

    Recovery
    - Badland 9000lb Winch - 3/8" Amsteel Blue Synthetic Winch Line with Viking Offroad abrasion guard, 75', 17.6k lbs rated from DDD LINK
    - Factor 55 ProLink Safety Thimble LINK
    - Viking 245 "Trail Series" Hawse Fairlead LINK
    - Warn 29519 Clevis Hook (CM Rebranded) LINK
    - Rugged Ridge 11235.11 Snatch Block Pulley, 30,000 Lbs LINK
    - (2) Wheeler's Offroad 3"X20' Snatch/Recovery Strap, 13.5k lbs. rated - (3) CM Super Strong Anchor Shackles 6 1/2 Ton M65P LINK
    - CURT Manufacturing 2" Receiver Hitch LINK
    - Thule 16mm XB16 Snow Chains LINK
    - Reese Towpower Hi-Lift Jack 48" LINK

    Armor
    - USOffroad Winch Mount in OEM Bumper LINK
    - Relentless Fabrication IFS/mid/Tcase skids, 3/16" steel LINK
    - Relentless Fabrication Rock Sliders, 2" hybrids, no kick-outs, bolt on LINK

    Electronics
    - Blue Sea Aux Fuse Block LINK
    - Otrattw Switches - LINK
    - PAC 500-Amp Battery Isolator Relay LINK
    - Blue Sea Circuit Breakers - for aux fuse block/winch overload protection 60A/200A LINK
    - Cobra LX29 CB Radio w/ 4' FireStik Antenna
    - Passport 8500 X50 Radar Detector LINK
    - Fotga MINI VCI Cable for TOYOTA TIS Techstream V8.00.034 - Disable Seat Belt Chime LINK
    - AMI Big Stick Automotive Antenna 21" Black LINK

    Hauling/Towing
    - TruXedo Lo Profile QT Soft Roll-Up Tonneau Cover LINK
    - Bed D-Ring Upgrade LINK-D Rings TUTORIAL
    - (4) Delta Bike Hitch Pro 2 Fork Mounts, Bed Rail Mounted LINK

    Lighting
    - 30W Reverse Light Mod LINK-Bulbs TUTORIAL TUTORIAL
    - Foglight Anytime Mod TUTORIAL
    - Putco White LED Interior Lights LINK
    - White LED footwell lighting on/off with door switch
    - (2) 4' Rigid Industries D2 LED Light Bars - White, Driving Pattern
    - (2) Rigid Industries Dually LEDs - White, Diffuse Pattern, Rear Bumper Mounted
    - (2) Rigid Industries A-Series High Power LED pods - white - Rock Lights, on/off with door switch
    Misc.
    -Westin Oval Step Bars LINK *REMOVED*

    More Photos
    [​IMG]
    [​IMG]
    [​IMG]
    [​IMG]
    [​IMG]
    [​IMG]
    [​IMG]
    [​IMG]
    [​IMG]
    [​IMG]
    [​IMG]
    [​IMG]
    [​IMG]
    [​IMG]
    [​IMG]
    [​IMG]
    [​IMG]
    [​IMG]
    [​IMG]
    [​IMG]
    [​IMG]
    [​IMG]
    [​IMG]
    [​IMG]
    [​IMG]

    Thanks for looking!
     
    Last edited: Aug 20, 2016
    Kolter45 likes this.
  2. Jul 10, 2013 at 7:25 AM
    #2
    motionridr8

    motionridr8 [OP] Well-Known Member

    Joined:
    Dec 21, 2011
    Member:
    #69183
    Messages:
    503
    Gender:
    Male
    First Name:
    Drew
    Merrimack, NH
    Vehicle:
    2012 Tacoma 4x4 DCSB
    5100's/886's/JBA UCAs, ICON RXT Rears, US Offroad Bumper
    REVIEWS
    - ICON Progressive 3 Leaf AAL Kit - LINK

    FOR SALE
     
    Last edited: Dec 1, 2013
  3. Jul 11, 2013 at 8:49 AM
    #3
    toyohtadude

    toyohtadude Well-Known Member

    Joined:
    Jul 8, 2008
    Member:
    #7814
    Messages:
    558
    Gender:
    Male
    First Name:
    Eric
    Austin, TX
    Vehicle:
    2017 4x4 Tundra SR5 CrewMax
    Bone stock
    This is quite a list! Great start and it will be cool to watch the progress. Where in NH? I'm in Dover.

    What did you use for a spring compressor? You own one, rent one or have a shop do this?
     
  4. Jul 11, 2013 at 8:53 AM
    #4
    Toy Yoda

    Toy Yoda gotta make sure Youtube comes down to tape this

    Joined:
    Apr 12, 2011
    Member:
    #54800
    Messages:
    1,862
    Gender:
    Male
    First Name:
    Garrett
    Vehicle:
    06 DCLB
    OME, ARB, Warn, Snugtop XV
    good job with the build, links will be very helpful for people who want your set up, armor is gonna be sweet! +1
     
  5. Jul 11, 2013 at 9:03 AM
    #5
    motionridr8

    motionridr8 [OP] Well-Known Member

    Joined:
    Dec 21, 2011
    Member:
    #69183
    Messages:
    503
    Gender:
    Male
    First Name:
    Drew
    Merrimack, NH
    Vehicle:
    2012 Tacoma 4x4 DCSB
    5100's/886's/JBA UCAs, ICON RXT Rears, US Offroad Bumper
    Thanks! As I was writing it up I kept getting flashbacks of my back statements and my accounts getting lower and lower! Have to pay to play I guess. :D

    My parents live in and I grew up in Amherst. I currently live in Boston, but all the work gets done in NH where I have a garage and all my tools.

    I used this method LINK. The rental spring compressors are dangerous, and this method works and is safe and easy. Don't think it would work with 886's though... :eek:

    Disclaimer, I'm an engineer so if you're not 100% comfortable, take the springs to a shop! This can be very dangerous if done incorrectly!
     
  6. Jul 11, 2013 at 9:09 AM
    #6
    motionridr8

    motionridr8 [OP] Well-Known Member

    Joined:
    Dec 21, 2011
    Member:
    #69183
    Messages:
    503
    Gender:
    Male
    First Name:
    Drew
    Merrimack, NH
    Vehicle:
    2012 Tacoma 4x4 DCSB
    5100's/886's/JBA UCAs, ICON RXT Rears, US Offroad Bumper
    Thanks! I'll try to keep it updated with everything I do! Once I get caught up on work, etc. I'll try to write some reviews/tips for the parts that I think people should know or were hard for me to find information on!
    I can't wait to get the armor. Skids should be here in the next few weeks and sliders in 2 months. So by the fall, I'll be ready for front and rear bumpers! :cool::D Thinking they'll either be BAMF or RelentlessFab or Pelfreybilt??? Then a winch and some extra lights??

    Then I'll be done!!:p:D lol, jk
     
  7. Jul 11, 2013 at 9:44 AM
    #7
    toyohtadude

    toyohtadude Well-Known Member

    Joined:
    Jul 8, 2008
    Member:
    #7814
    Messages:
    558
    Gender:
    Male
    First Name:
    Eric
    Austin, TX
    Vehicle:
    2017 4x4 Tundra SR5 CrewMax
    Bone stock
    Done, eh? Ha! As long as you have bank, you're not done! :D

    I said the same about my bike.... now I'm over $6k in just mods.... Still have to convert the front to the R1 setup....

    I'm just starting on the truck now that I own it outright and intend to keep it till it cannot run. Thus far, 2.5" lift (TSB leaf packs and Hell Bent front levelers), Satoshi grill done by me with HomerTaco's mesh, Andres Devil Horns, N-Fab nerf steps, and soon to have the 1.25" BORA spacers. I don't know what is next... I am putting all my money into one last debt right now so mods are on hold. After that debt, I only have a mortgage left!!! w00t!

    I'll be watching this thread to see your progress... the upcoming stuff looks awesome! Nice work!
     
  8. Jul 15, 2013 at 6:55 PM
    #8
    UrPebkac

    UrPebkac Well-Known Member

    Joined:
    Jan 20, 2013
    Member:
    #95649
    Messages:
    820
    Gender:
    Male
    First Name:
    David
    RI
    Vehicle:
    2016 GMC SIERRA
    Looks great Drew! Did you find the stiffness of the 885s match the rear AAL? Or does your new packs seem to "float" over the bumps and the front is a little stiffer? What did you get for hub to fender measurements? Did you add a degree shim? Did you find you have a takeoff shutter with the AAL? And your right the rear end is easy to tweak. I find I keep tweaking mine.
     
  9. Jul 16, 2013 at 6:26 AM
    #9
    motionridr8

    motionridr8 [OP] Well-Known Member

    Joined:
    Dec 21, 2011
    Member:
    #69183
    Messages:
    503
    Gender:
    Male
    First Name:
    Drew
    Merrimack, NH
    Vehicle:
    2012 Tacoma 4x4 DCSB
    5100's/886's/JBA UCAs, ICON RXT Rears, US Offroad Bumper
    Thanks! So far I think the stiffness of the 885's goes well with the OEM leaf pack with the ICON progressive 3 leaf AAL kit. The 885 front coils are obviously stiffer that the OEM coils, but I'd say the ICON leaf pack is relatively much stiffer than the OEM leafs; certainly not 'floating', might even say 'hopping'. I'll be curious to see how the ride changes when I install my full set of skids and sliders.

    I didn't take any hub to fender measurements, but I will this weekend when I paint my wheels. :D

    I did not add a 'degree shim'. Not totally sure what you're referring to. I did add the 1/4" spacer to the drivers side though. When I measured both sides after driving it around for a few days, the lift was just a hair under 3" on both sides, with the driver and passenger sides being within 1/8" of each other, probably due to measurement error.

    No shutter take off. Accelerating quickly does feel different that stock, but overall it just doesn't feel like I tip backwards when accelerating or nose-dive when braking.

    Yeah once you've taken the suspension off once, doing it again seems really easy. Took me probably 12 hours to do the whole thing and now I bet I could do it in 6, just from knowing how things all fit together, what tools to have out, torque settings, etc.

    Your setup looks really similar. I'm guessing you have 'float', takeoff shutter, and are considering a degree shim?
     
  10. Jul 16, 2013 at 6:48 PM
    #10
    UrPebkac

    UrPebkac Well-Known Member

    Joined:
    Jan 20, 2013
    Member:
    #95649
    Messages:
    820
    Gender:
    Male
    First Name:
    David
    RI
    Vehicle:
    2016 GMC SIERRA
    I did have the takeoff shutter. It was solved with a combination of the 3 degree shims http://toyteclifts.3dcartstores.com/Solid-Steel-Axle-Degree-Shims_p_358.html And a few washers under the center support bearing (carrier bearing) I had to replace it too. My geometry was off because of the lift in the rear.

    The floating feeling was because I have so much travel in the rear end with the b110 5100's. I literally can't feel the rear end go over a speed bump at slow speeds. It just soaks them up. Problem being, on the highways if I hit a decent bump it throws the rear end up in the air and it takes a cycle or two of the shock to bring it back under control.

    I ended up having to clamp the six leafs together to the overload about 2" in front and back of the axel on both sides. This gave me the same "hopping" feeling. I found it is stiffer around town but it is more under control on the highway. It feels more stable. Just getting things tweaked the way I like it. I have a feeling those AAL leafs of yours will settle and the rear end will soften up just a little. But maybe not....
     
  11. Jul 17, 2013 at 10:15 AM
    #11
    motionridr8

    motionridr8 [OP] Well-Known Member

    Joined:
    Dec 21, 2011
    Member:
    #69183
    Messages:
    503
    Gender:
    Male
    First Name:
    Drew
    Merrimack, NH
    Vehicle:
    2012 Tacoma 4x4 DCSB
    5100's/886's/JBA UCAs, ICON RXT Rears, US Offroad Bumper
    Measurements (Center of Hub to Fender, +/- 1/8 in):
    Driver Front: 23 3/4 in
    Passenger Front: 23 3/4 in
    Passenger Rear: 24 1/4 in
    Driver Rear: 24 in

    I'm guessing the Driver Rear is sitting lower because I just filled up with gas! I'm curious to see how much it comes down with full under armor and sliders. The goal was always to end up nearly level, hopefully the front comes down because of the skids and the rear settles in a bit and at the end of it all, I'll be level.
     
    Last edited: Jul 17, 2013
  12. Jul 22, 2013 at 5:33 AM
    #12
    motionridr8

    motionridr8 [OP] Well-Known Member

    Joined:
    Dec 21, 2011
    Member:
    #69183
    Messages:
    503
    Gender:
    Male
    First Name:
    Drew
    Merrimack, NH
    Vehicle:
    2012 Tacoma 4x4 DCSB
    5100's/886's/JBA UCAs, ICON RXT Rears, US Offroad Bumper
    so i painted my wheels graphite this weekend. they came out great in my opinion and i'm really happy with how they look. hopefully they hold up to a New England winter!

    question: chrome lug nuts or black? I have a set of eBay black nuts that will be arriving tomorrow and wanted to know if you guys think I should switch the chrome ones for black when I install the wheel spacers this next weekend?
     
    This site contains affiliate links for which the site may be compensated.
    #12
  13. Jul 22, 2013 at 5:53 PM
    #13
    motionridr8

    motionridr8 [OP] Well-Known Member

    Joined:
    Dec 21, 2011
    Member:
    #69183
    Messages:
    503
    Gender:
    Male
    First Name:
    Drew
    Merrimack, NH
    Vehicle:
    2012 Tacoma 4x4 DCSB
    5100's/886's/JBA UCAs, ICON RXT Rears, US Offroad Bumper
    black lug nuts came it and are definitely going on when the wheel spacers come in. now just anxiously waiting for my Relentless armor!! :D
     
  14. Jul 22, 2013 at 6:08 PM
    #14
    toyohtadude

    toyohtadude Well-Known Member

    Joined:
    Jul 8, 2008
    Member:
    #7814
    Messages:
    558
    Gender:
    Male
    First Name:
    Eric
    Austin, TX
    Vehicle:
    2017 4x4 Tundra SR5 CrewMax
    Bone stock
    I guess some pics would help us compare... ;) Make sure you get before and after shots to show off.
     
  15. Jul 22, 2013 at 6:34 PM
    #15
    motionridr8

    motionridr8 [OP] Well-Known Member

    Joined:
    Dec 21, 2011
    Member:
    #69183
    Messages:
    503
    Gender:
    Male
    First Name:
    Drew
    Merrimack, NH
    Vehicle:
    2012 Tacoma 4x4 DCSB
    5100's/886's/JBA UCAs, ICON RXT Rears, US Offroad Bumper
    absolutely will. the photos up now show the stock chrome lug nuts. I'll take a close up with some better lighting with them and with the black ones when I install them. my thought is the darker ones will tend to 'disappear' more as opposed to the chrome 'catching your eye'. we'll see though.
     
  16. Jul 31, 2013 at 6:08 AM
    #16
    motionridr8

    motionridr8 [OP] Well-Known Member

    Joined:
    Dec 21, 2011
    Member:
    #69183
    Messages:
    503
    Gender:
    Male
    First Name:
    Drew
    Merrimack, NH
    Vehicle:
    2012 Tacoma 4x4 DCSB
    5100's/886's/JBA UCAs, ICON RXT Rears, US Offroad Bumper
    got a PM about painting the wheels so I figured I'd share with everyone

    As far as painting the wheels, this is what I did:
    Plan to be without the truck for 2 1/2 days (I did it in a Friday/Saturday/Sunday). Had the new tires already mounted on the wheels.

    Friday afternoon:
    -Put the truck up on jack stands in the driveway and took the wheels off.
    - Remove the wheel weights. I used a metallic Sharpie and marked the weights and the locations on the tire before removing them with a screwdriver/pliers. Be sure to group them/keep them organized so when you re-install them the wheels will be balanced!
    -Clean and scrub the wheels with Simple Green and grease remover etc. I used a pressure washer and all kinds of cleaning chemicals to get off all of the road grime and brake dust. The better you do this, the better they will come out.

    Saturday:
    -Went over each wheel, front, back, inside and out with 180 grit sandpaper, roughing up the existing finish and removing any blemishes, wheel cancer, corrosion, etc.
    -Kept sanding, rinsing, and sanding until I finished with 400 grit sandpaper. This could be quick if your wheels are in good shape or take a long time if they need a lot of refinishing.
    -Wash and scrub with Simple Green to remove and dust or residue. Let dry.
    -Masking the tires. I used blue 1" painters tape to tape off the wheel lip from the tire. This process takes a long time and is super tedious, but is critical. I then used some loose leaf notebook paper to tape off the sidewall of the tire, using painters tape to secure it. Do both sides of the wheel/tire.
    -Wheels should be dry and masked by the end of Saturday.

    Sunday:
    -Mask off your painting area, preferably in a garage etc. away from your truck or anything else you don't want to get over sprayed.
    -I used the Duplicolor Self Etching Primer first, then the Duplicolor Wheel Paint, and no clear coat. For the primer and paint, I would spray the inside of the wheel first, all of the coats, then flip the wheel and spray the front. I needed 4 cans of the primer and 5 cans of wheel paint for 5 wheels.
    -Primer was a 2 thin coats, waiting 5 min in between coats, and a wetter coat applied 5 min after the 2nd thin coat. I basically went in a line and did the 1st wheel, 2nd wheel, etc., and by the time I got done with the 5th it was time to do the next coat on the 1st wheel. After all 3 coats were done to the back, I flipped the wheels and repeated for the front. I waited 2 hours after applying the primer before painting.
    -Wheel paint was similar to the primer, but 4 coats (2 thin and 2 wetter but not so heavy that you get runs!). Waited 15 min between all coats.
    -I finished painting all of the wheels by 2pm on Sunday. At 8pm I removed the masking tape and paper.
    -Wheels mounted by 9pm and sat in the driveway overnight.
    -Center caps installed the next morning before work.
    -Paint takes a full 7 days to completely harden up, so try and avoid washing them/mud/etc. after.

    The wheels came out well and I'm happy with them. Now I'll have to see how they hold up to some weather, washes, and the woods. Center caps were FJ TRD centercaps that a painted with regular primer and the same color wheel paint. I then used some Testors Red enamel paint from a hobby shop to repaint the TRD letters in red. The wheel painting process is a pain in the butt, but if you do it right, they will come out great. If you don't, they'll look like crap and you will have to either sand them again down to the metal or have them media blasted.

    Let me know if you have any other questions!
     
  17. Jul 31, 2013 at 9:15 AM
    #17
    JMFM0911

    JMFM0911 Member

    Joined:
    Jul 31, 2013
    Member:
    #109459
    Messages:
    8
    Gender:
    Male
    First Name:
    Josh
    Low Country
    Vehicle:
    2011 TRD Sport 4x4
    When does your armor get in?
     
  18. Jul 31, 2013 at 10:10 AM
    #18
    motionridr8

    motionridr8 [OP] Well-Known Member

    Joined:
    Dec 21, 2011
    Member:
    #69183
    Messages:
    503
    Gender:
    Male
    First Name:
    Drew
    Merrimack, NH
    Vehicle:
    2012 Tacoma 4x4 DCSB
    5100's/886's/JBA UCAs, ICON RXT Rears, US Offroad Bumper
    skids arrive today. sliders in a few weeks. planning on installing both at the same time so probably won't be installed for a few months.
     
  19. Jul 31, 2013 at 10:16 AM
    #19
    toyohtadude

    toyohtadude Well-Known Member

    Joined:
    Jul 8, 2008
    Member:
    #7814
    Messages:
    558
    Gender:
    Male
    First Name:
    Eric
    Austin, TX
    Vehicle:
    2017 4x4 Tundra SR5 CrewMax
    Bone stock
    Months? You've got some patience.... Throw 'em in the back, drive up to Dover and we'll put them on in one Saturday while throwing back some Sam's and grilling some animal flesh!
     
  20. Jul 31, 2013 at 10:24 AM
    #20
    saundern

    saundern Swerve for nothing

    Joined:
    Dec 10, 2009
    Member:
    #27342
    Messages:
    6,861
    Gender:
    Male
    First Name:
    Nick
    Simpsonville, SC
    Vehicle:
    2005 TRD Sport
    so sexy :drool:
    love the color and wheels
     
To Top