

-
Welcome to Tacoma World!
You are currently viewing as a guest! To get full-access, you need to register for a FREE account.
As a registered member, you’ll be able to:- Participate in all Tacoma discussion topics
- Communicate privately with other Tacoma owners from around the world
- Post your own photos in our Members Gallery
- Access all special features of the site
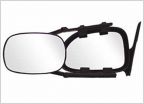 What are the tow mirrors everyone is running
 Installing a Hooke Road roof rack, what did you do with your weatherstripping?
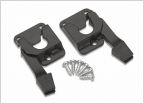 Bed extender hardware
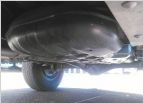 OEM Gas Tank Skid from TRD OR on SR5 Prerunner
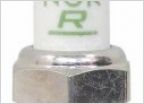 Spark Plugs
 OEM, or aftermarket Front wheel Liners?
Leer 100XQ Keyless Entry Wiring
Discussion in '2nd Gen. Tacomas (2005-2015)' started by mich3210, May 21, 2014.


